Try the best heavy whipping cream ice cream recipe at home. It’s easy and delicious. You only need heavy whipping cream and sweetened condensed milk. This recipe makes a creamy treat without an ice cream maker.
Heavy whipping cream comes from full-fat cow’s milk. It has about 35% to 40% fat. This makes it great for whipping and adding flavor to your ice cream. Sweetened condensed milk adds just the right amount of sugar. It dissolves in the cream’s water, making the ice cream sweet and creamy.
This recipe lets you try different flavors and mix-ins. You can make classic vanilla, chocolate, or even fruit flavors. It’s a great base for all your homemade ice cream creations.
Key Takeaways
- Heavy Whipping Cream Ice Cream with 35% to 40% fat content is ideal for making rich ice cream recipes at home.
- Sweetened condensed milk provides the perfect balance of sweetness and creaminess without the need for additional sugar or eggs.
- This recipe requires no ice cream maker, making it accessible for everyone to enjoy homemade whipped cream desserts.
- Experiment with various flavors and mix-ins to create your own unique and delicious creamy frozen treats.
- Homemade ice cream typically requires 10 to 12 hours of freezing time for the best texture and consistency.
Homemade Heavy Whipping Cream Ice Cream
4
servings30
minutes4
hours350
kcalA simple yet creamy ice cream recipe using everyday ingredients.
Keep the screen of your device on
Ingredients
2 cups 2 heavy whipping cream
1 cup 1 whole milk
0.75 cup 0.75 granulated sugar
1 tablespoon 1 pure vanilla extract
1 pinch 1 salt
Directions
- In a large mixing bowl, combine the heavy whipping cream, whole milk, granulated sugar, vanilla extract, and a pinch of salt. Mix well until sugar is completely dissolved.
- Cover the mixture with plastic wrap and refrigerate for at least 2 hours or until well chilled. This step ensures the mixture churns properly.
- Pour the chilled mixture into your ice cream maker, and churn according to the manufacturer's instructions, usually about 20 to 25 minutes.
- Once the ice cream reaches a soft-serve consistency, transfer it to a freezer-safe container. Cover with a lid or plastic wrap.
- Freeze for at least 2 hours or until the ice cream is firm. For best results, let sit on the counter for a few minutes before serving.
Recipe Video
Nutrition Facts
- Total number of serves: 4
- Calories: 350kcal
- Cholesterol: 82mg
- Sodium: 30mg
- Potassium: 118mg
- Sugar: 27g
- Protein: 3g
- Calcium: 108mg
- Iron: 0mg
- Thiamin: 0mg
- Riboflavin: 0mg
- Niacin: 0mg
- Folate: 0mg
- Biotin: 0mg
- Phosphorus: 91mg
- Iodine: 0mg
- Magnesium: 0mg
- Zinc: 0mg
- Selenium: 0mg
- Copper: 0mg
- Manganese: 0mg
- Chromium: 0mg
- Molybdenum: 0mg
- Chloride: 0mg
Did you make this recipe?
Tag @https://www.instagram.com/ice_cream_haven/ on Instagram and hashtag it with #IceCreamIceCreamHavens
Like this recipe?
Follow @https://www.pinterest.com/Ice_Cream_Haven/ on Pinterest
Join our Facebook Group!
Follow https://www.facebook.com/icecreamhavens/ on Facebook
Understanding Heavy Whipping Cream
Heavy whipping cream is a key ingredient in making creamy ice cream. It has a lot of fat, which makes the ice cream smooth and tasty. Let’s explore what heavy whipping cream is and its health benefits.
What is Heavy Whipping Cream?
Heavy whipping cream, also known as heavy cream or double cream, is rich in milk fat. In the U.S., it has at least 36 percent milk fat. This makes it perfect for whipping into stiff peaks, ideal for ice cream.
There are creams with different fat levels. Light whipping cream has 30 percent to 36 percent milk fat. Half-and-half has even less, between 10.5 percent and 18 percent.
Nutritional Benefits of Heavy Whipping Cream
Heavy whipping cream is high in fat but also has nutritional value. Here are some benefits:
- It’s a good source of vitamin A, which is good for your eyes and immune system.
- It has essential fatty acids for brain health and cell membranes.
- The fat in heavy cream helps your body absorb vitamins A, D, E, and K.
But, heavy cream is also high in calories and saturated fat. One tablespoon has about 50 calories, 5 grams of fat, and 3.5 grams of saturated fat. Enjoy it in moderation, if you have health concerns or dietary limits.
“Heavy cream is a delightful ingredient that adds richness and depth to ice cream, but it’s important to enjoy it in balance with an overall healthy lifestyle.” – Chef Emily, Ice Cream Enthuasiast
Ingredient Essentials Heavy Whipping Cream Ice Cream

Making the perfect homemade ice cream begins with the right ingredients. Choose heavy whipping cream with 36% fat for a rich, creamy texture. Regular whipping cream, with less fat and stabilizers, won’t give you the same creamy treat.
You’ll need 2 cups of heavy cream or regular cream, and 1 cup of whole milk. Mix 1 ½ cups of heavy cream with ½ cup of whole milk for the best texture. Sugar is key, with 1/2 to 3/4 cups needed, depending on your taste and any extra flavors.
Choosing the Right Heavy Whipping Cream
When picking heavy whipping cream, both regular and ultra-pasteurized work well. The cream should have at least 36% fat for a smooth texture. This ensures your ice cream is creamy and delicious.
Common Add-Ins for Flavor Variety
While base ingredients are important, add-ins make your ice cream special. Vanilla extract adds a delightful aroma and taste, with 1 tablespoon needed. Other favorites include:
- Chocolate chips
- Caramel sauce
- Vanilla beans
- Crushed cookies
- Sprinkles
- Nuts
- Cheesecake crumbles
- Fresh fruits or jam
By combining these toppings, you can make many unique ice cream flavors. Just fold in your chosen add-ins before freezing for the final step.
Heavy Whipping Cream Ice Cream The Ice Cream Making Process

Making homemade ice cream is fun and rewarding. With the right ingredients and a simple recipe, you can make smooth frozen treats quickly. Let’s explore how to make ice cream at home.
Step-by-Step Guide to Making Ice Cream
Start by getting your ingredients: heavy whipping cream, condensed milk, and vanilla extract. Chill the bowl and whisk to keep things cool. Whip the cream until it’s soft, then mix in the condensed milk slowly until it’s stiff. Avoid over-whipping to prevent curdling.
Then, add vanilla extract to make the ice cream softer and easier to scoop. Put the mix in an ice cream maker and follow the maker’s instructions, usually 20-30 minutes. The quicker you freeze it, the creamier it will be.
Tips for the Best Texture and Consistency
To get a smooth and creamy texture, remember these tips:
- Use high-quality, full-fat ingredients for the best results
- Chill all ingredients and equipment before starting
- Whip the heavy cream to soft peaks before adding condensed milk
- Gradually incorporate the condensed milk to avoid over-whipping
- Add vanilla extract at the end to help prevent ice crystals
The key to smooth, creamy ice cream is to churn it quickly and freeze it promptly.
After churning, your ice cream will be soft-serve. Move it to a sealed container and freeze for 2-4 hours for a firmer texture. With these easy steps and tips, you’ll make delicious homemade ice cream that’s as good as store-bought.
Equipment Needed for Ice Cream
Making homemade ice cream is easy and doesn’t need fancy tools. You can make creamy ice cream in your kitchen with just a few basic items. Let’s look at what you need for your ice cream adventures.
Essential Tools for Homemade Ice Cream
You’ll need measuring cups, spoons, a stand mixer or hand mixer, and a spatula to start. These tools are all you need to make delicious ice cream. The recipe author made many batches without an ice cream maker, showing it’s not necessary.
For storing your ice cream, get good freezer containers. Tovolo 1.5 quart containers are great for keeping ice cream fresh and preventing freezer burn.
Optional Equipment for Advanced Techniques
An ice cream maker can make your ice cream better. Make sure your churning container fits the batch size. A 2-quart batch needs a 2-quart or bigger freezer bowl. Before churning, freeze the bowl and chill the base well for the best results.
“I’ve had my ice cream maker for 25 years, and it’s perfect. It’s a great buy for ice cream lovers.”
For trying new flavors and mix-ins, use a Vitamix blender. Tools like a balloon whisk, sieve, heat-proof silicone spoons, and a blowtorch are useful for advanced techniques and gourmet ice cream.
Flavoring Your Heavy Whipping Cream Ice Cream

Flavoring your homemade ice cream is a world of endless possibilities. You can stick to classics like vanilla, chocolate, and strawberry. Or, you can try unique mixes. This base recipe lets you make over fifty tasty flavors.
Classic Flavors vs. Unique Combinations
Timeless favorites like vanilla, chocolate, and strawberry ice cream are always a hit. But, don’t shy away from trying new flavors. Think about making pistachio kulfi, a creamy Indian treat, or tiramisu ice cream, a taste of Italy.
Other great mixes include:
- Strawberry cheesecake
- Cookies & cream
- Green tea
- Mint chocolate chip
- Raspberry white chocolate
How to Infuse Natural Flavors
To add natural flavors, just mix them into the base before churning. For vanilla ice cream, use vanilla bean paste or scrape a vanilla bean. For chocolate ice cream, add cocoa powder or melted chocolate.
“The beauty of this ice cream base recipe is that it serves as a blank canvas for your creativity. From fruity and refreshing to rich and indulgent, the flavor combinations are limited only by your imagination.”
For a fruity twist, puree strawberries and mix them in. For a light touch, steep tea or herbs in the cream and then strain it out.
Storing Your Heavy Whipping Cream Ice Cream

After making your homemade ice cream, it’s important to store it right. This keeps it fresh and creamy. Use the right container and follow best practices for freezer storage.
Best Practices for Freezing Ice Cream
Store your ice cream in an airtight container or a covered loaf pan. This stops freezer burn and keeps it fresh for up to six weeks. For different flavors, use frozen dessert containers to keep them separate.
Heavy whipping cream can be frozen for about four months. It stays fresh longer. Freeze it in ice cube trays for easy portions.
How to Keep Ice Cream Fresh and Creamy
Adding vanilla extract to your ice cream keeps it creamy. It stops the ice cream from freezing too hard. If you skip the vanilla, let it sit at room temperature for 15 minutes before scooping.
“The key to smooth, creamy ice cream is all in the storage. An airtight container and proper freezing techniques can make all the difference in preserving that perfect texture and flavor.”
To enjoy your ice cream, thaw it in the fridge. It takes one to two days, depending on the amount and container size. Follow these tips to enjoy your homemade ice cream whenever you want.
Troubleshooting Common Issues
Making homemade ice cream is fun and rewarding, but you might face some problems. Two common issues are ice cream that’s too soft and ice crystals in the mix. Let’s look at these problems and find solutions to get the perfect ice cream texture.
What to Do if Ice Cream is Too Soft
If your ice cream is too soft, there are a few things to check. One mistake is unplugging the ice cream maker too soon. It usually takes 40-50 minutes to churn the ice cream fully. Also, make sure the freezer bowl has been in the freezer for at least 24 hours before use.
Another important thing is the temperature of the ice cream mixture when you pour it into the machine. It should be fridge temperature (4º C/39º F) for proper churning. Lastly, don’t pour too much mixture into the machine. It should be above the optimal level but not more than 4/5 of the bowl capacity to avoid overflowing.
How to Fix Ice Crystals in Ice Cream
Ice crystals in ice cream can be a big problem, making it icy. To avoid this, start with a well-balanced recipe and measure ingredients accurately. Changing recipe ingredients can affect the texture and consistency, so be careful.
The most common problem with homemade ice cream is the issue of ice crystals forming in the mixture, leading to icy texture.
Using stabilizers correctly and heating mixtures with eggs properly are key to avoiding ice crystals. Make sure the mixture and equipment are cooled down well before churning. This can greatly affect the freezing process and ice crystal size.
When troubleshooting ice cream problems, remember that making ice cream in a heatwave can be a challenge. By following these tips and being careful throughout the process, you’ll make smooth, creamy, and crystal-free homemade ice cream.
Serving Suggestions and Pairings
Now that you’ve learned to make homemade heavy whipping cream ice cream, it’s time to explore serving and pairing options. You can enjoy classic sundaes or impress guests with unique flavors. With creativity and the right toppings, your ice cream can become a gourmet treat.
Best Toppings for Heavy Whipping Cream Ice Cream
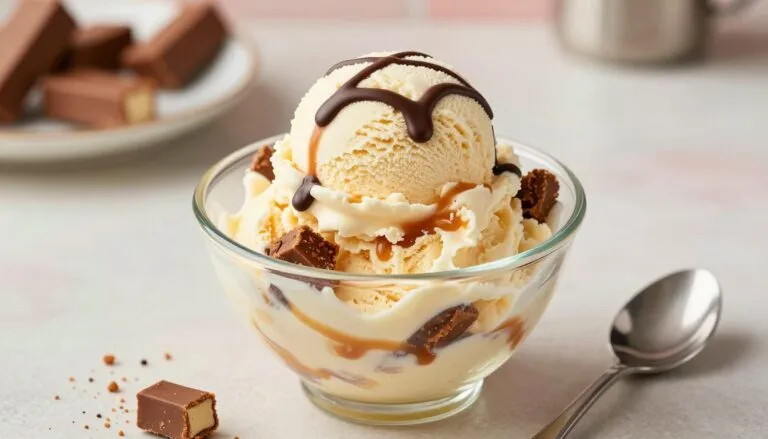
Classic toppings like hot fudge, caramel, and whipped cream are always a hit. Sprinkles and maraschino cherries also pair well with the creamy texture. For something different, try fresh fruit, toasted nuts, or flavored syrups. You can also use dairy-free and sugar-free chocolate or fresh berries for a healthier option.
Creative Ways to Serve Homemade Ice Cream
There are many ways to serve homemade ice cream. Try making ice cream sandwiches with cookies or wafers. Or, layer it with cake or brownie crumbs for a fancy ice cream cake. Pairing it with warm desserts like brownies or pies adds a nice contrast.
Enjoying your homemade ice cream is the most important thing. Whether it’s for yourself or to share with others, it’s sure to be a hit. Experiment with toppings and serving styles to find your favorite pairings. With practice and creativity, you’ll become an ice cream expert!


