


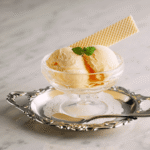
Homemade Butterscotch Ice Cream
4
servings30
minutes40
minutes300
kcal1
hour10
minutesCreamy butterscotch ice cream made with simple ingredients.
Keep the screen of your device on
Ingredients
3/4 cup 3/4 brown sugar
2 tablespoons 2 water
4 tablespoons 4 unsalted butter
1 cup 1 heavy cream
1 teaspoon 1 vanilla extract
2 cups 2 whole milk
1/2 cup 1/2 granulated sugar
1/4 teaspoon 1/4 salt
Directions
- In a small saucepan, combine brown sugar and water over medium heat until sugar dissolves, about two minutes, then reduce heat to low.
- Add butter to the saucepan and stir continuously until mixture is smooth and fully combined, forming a butterscotch sauce.
- Remove the saucepan from heat and mix in the heavy cream and vanilla, stirring until fully incorporated, then allow mixture to cool.
- In a separate bowl, whisk together whole milk, granulated sugar, and salt until sugar is fully dissolved.
- Combine the cooled butterscotch mixture with the milk mixture and stir until well mixed.
- Chill the entire mixture in the refrigerator for at least two hours to ensure it is completely cold.
- Pour the chilled butterscotch mixture into an ice cream maker and freeze according to the manufacturer's instructions, usually about 20-25 minutes.
- Once churned, transfer the ice cream to an airtight container and freeze for at least four hours or until firm.
- Before serving, let the ice cream sit at room temperature for five minutes to soften slightly for easier scooping.
Nutrition Facts
- Total number of serves: 8
- Calories: 250kcal
- Cholesterol: 50mg
- Sodium: 90mg
- Potassium: 120mg
- Sugar: 25g
- Protein: 3g
- Calcium: 100mg
- Iron: 0mg
- Thiamin: 0mg
- Riboflavin: 0mg
- Niacin: 0mg
- Folate: 0mg
- Biotin: 0mg
- Phosphorus: 0mg
- Iodine: 0mg
- Magnesium: 0mg
- Zinc: 0mg
- Selenium: 0mg
- Copper: 0mg
- Manganese: 0mg
- Chromium: 0mg
- Molybdenum: 0mg
- Chloride: 0mg
Did you make this recipe?
Tag @https://www.instagram.com/ice_cream_haven/ on Instagram and hashtag it with #IceCreamIceCreamHavens
Like this recipe?
Follow @https://www.pinterest.com/Ice_Cream_Haven/ on Pinterest
Join our Facebook Group!
Follow https://www.facebook.com/icecreamhavens/ on Facebook
Why this butterscotch ice cream is your next summer obsession
Summer needs a frozen staple that tastes like browned butter and caramelized sugar—this recipe delivers that, with clean flavor and a silky finish.
The allure starts with browned butter, dark brown sugar, a whisper of salt, and real vanilla. Add a hint of bourbon if you like warm, boozy notes.
Choose your path: a starch-stabilized Sicilian gelato base keeps fat lower and lets the sauce sing, while a yolk-rich custard gives luxurious body. Both routes yield tiny ice crystals and lasting smoothness.
- Homemade means control over sugar, salt, and fat for balanced flavor.
- Starch plus cream cheese or classic custard stabilization prevents graininess.
- Quick cook times and short chill windows make this a summer-friendly treat.
For a full recipe and step-by-step guide, try this take on classic butterscotch ice cream and start planning your next scoop.
Ingredients, substitutions, and the gear that makes life easier

A few thoughtful ingredient choices and the right equipment make the difference between a grainy batch and a glassy, smooth finish. Stock your pantry with dark brown sugar, unsalted butter, real vanilla, and kosher salt to build the base flavor. Whole milk and heavy cream balance fat and body depending on which route you pick.
Core flavors
Dark brown sugar brings deep molasses notes while unsalted butter lets you control seasoning. Add a pinch of salt to lift sweetness, and vanilla for warmth. These simple items form the flavor backbone before you even pick a base.
Pick your base
For a Sicilian gelato-style base, dissolve cornstarch in dairy and blend in a touch of cream cheese to stabilize the mixture and reduce ice crystals. This gives a silky texture without adding eggs.
Prefer a custard? Temper egg yolks into the hot caramel mixture and cook until the mixture coats the back of a spoon. Yolks add richness and emulsify the fats for a plush mouthfeel.
Helpful equipment
An ice cream maker speeds and standardizes churning, but a whisk or immersion blender can mimic the process for no-churn batches. Use a heavy-bottomed saucepan for even heating and keep a heatproof bowl for transfers.
- Loaf pan or freezer-safe container with tight seal
- Plastic wrap (press to surface to limit ice formation)
- Immersion blender or medium bowl and a reliable digital scale
Build the base: make butterscotch and the ice cream mixture
Start by building a glossy base: brown the butter, melt in dark brown sugar, and watch the mixture turn deep and fragrant.
Cook perfect butterscotch: brown the butter, dissolve and caramelize the brown sugar
Brown butter in a heavy pan until nuts and aroma emerge. Add brown sugar and a splash of water to help dissolve the sugar smoothly.
Cook through the “break and come-together” stages until the mix darkens. Keep the heat moderate to avoid scorching; this preserves complex caramel notes.
Whisk in dairy the smart way: gradual additions prevent clumping and graininess
Remove from heat and add half the milk while whisking to dissolve any clump. If it seizes, lower the heat and stir gently until glossy again.
Next, stream in the remaining milk and cream slowly. Whisking in stages prevents lumps and keeps the final mixture smooth for faster churn times.
Pick your thickener: cornstarch + cream cheese or yolk-custard technique
Starch route: Whisk cornstarch into cold milk with a pinch of salt, then bring the blend to a short boil to activate thickening. Fold in softened cream cheese off heat to reduce iciness.
Custard route: Temper yolks with hot butterscotch-dairy, return to the pot, and cook until the mixture coats a spoon. Finish with vanilla and the final cream for richness.
- Begin with browned butter for depth.
- Work in dairy slowly to avoid grainy texture.
- Cool in a bowl before chilling to cut ice crystal size.
Churn with an ice cream maker for premium scoopability

Before you turn on the motor, make sure the base is thoroughly chilled.
Cold starts matter: chill the base at least 3–6 hours or overnight so the maker reaches soft-serve texture faster and forms smaller ice crystals.
Chill, churn, and target soft-serve texture
Follow your machine’s guidance and aim to churn to soft-serve in roughly 20–25 minutes. Stop when the dasher leaves distinct swirls and the mixture holds light peaks.
Work quickly from maker to container to keep aeration. Transfer the soft mixture right away to avoid melt-refreeze damage.
Packing tips: minimize ice crystals and lock in that creamy finish
Use a cold container and spread the batch in layers to avoid warm pockets. If the lid isn’t snug, press plastic wrap to the surface before sealing.
- Pack while still soft for best texture and to ease filling into the ice cream freezer.
- Fold ripples or mix-ins at the soft-serve stage so they distribute evenly.
- Label the container with churn date and flavor, then freeze 4 hours or overnight to firm up.
Make butterscotch ice cream without an ice cream maker

You can turn a chilled base into a silky frozen treat using just a bowl, a whisk, and an hourly routine. These instructions work without ice and without a maker, so anyone can get professional texture at home.
Whisk-and-freeze method: hourly agitation for 3–4 rounds
Pour the fully chilled base into a wide bowl and freeze for 1 hour. Remove and whisk vigorously, scraping frozen edges back into the middle. Repeat this freeze-and-whisk cycle 3–4 times.
Immersion blender option: break crystals and aerate between freezes
Prefer gadgets? Freeze 1 hour, then blast the mix with an immersion blender or hand mixer to shatter crystals and fold in air. Repeat at hour two and three to mimic a churn ice cream action.
When it’s ready: the soft-serve visual cue before the overnight set
Watch for soft peaks and a velvety, scoopable texture. Once you see the soft-serve cue, transfer to a cold container and freeze 4+ hours in the freezer for the final set.
- Keep the container cold between rounds.
- If the base over-hardens, cut into chunks and blend to rescue it.
- Stick to hourly cycles for the first few hours to lock in smoothness.
Texture, timing, and troubleshooting like a pro

Texture and timing are the quiet skills that turn a good batch into a legendary pint. With clear steps you can avoid common faults and keep the final scoop silky and stable.
Avoid crystallization
When cooking sugar into the sauce, stop aggressive stirring once it dissolves. Swirl the pan gently and keep a steady, moderate heat to prevent recrystallization.
Fix a grainy base fast
If the custard or base goes grainy, pulse with an immersion blender for 20–30 seconds. A gentle reheat on low heat, then quick cooling, often restores a smooth mixture.
Rescue an over-frozen batch
Has the batch frozen solid before you could aerate it? Cut into chunks, blend to reintroduce air and break crystals, then pack into a cold container and refreeze.
Plan your timeline
Budget a few active minutes for cooking, several hours for chill time, and extra hours for the final set in the freezer. Keep tools cold and the bowl ready during no-churn rounds to trim total time and protect texture.
- Tip: Move quickly between churn and container to lock in smoothness.
- Tip: If heat is uneven, flavors flatten—aim for steady medium heat when cooking.
- Tip: Scrape bowl edges during hourly freezes to keep a fine, velvety crumb.
Flavor upgrades, mix-ins, and serving ideas

Boost texture and taste by adding a glossy ripple and smart mix-ins at the right time. Small steps make your homemade pint look and taste professional.
Make a ripple that holds its shape
Cook brown sugar with butter, a pinch of salt, and cream until it reaches a moderate bubble. Finish with vanilla, a squeeze of lemon, and bourbon for a spirited swirl.
For a family-friendly option, omit the alcohol or use an alcohol-style flavoring. Cool the sauce until pourable but not set before layering into the soft-serve stage.
Mix-ins: timing and technique
Fold additions after churn so chips, cookie bits, or candy distribute evenly. Work quickly while the base is still soft to avoid overworking texture.
Press larger pieces gently into the surface so they stay suspended during the final freeze.
Serve, store, and keep scoopable
- Layer alternate ribbons of sauce and soft base for dramatic swirls.
- Pack into a cold container, press plastic wrap to the surface, then seal the lid.
- Freeze several hours before serving; peak quality is best within two weeks.
- Before scooping, rest the pint a few minutes at room temp for easy, generous servings.
Garnish ideas: drizzle leftover ripple, add a pinch of flaky salt, or top with softly whipped cream for contrast.
Conclusion
Finish smart, gather your chilled base, set a timer, and use a cold container to lock in texture.
This recipe gives a flexible roadmap: choose a starch-stabilized base or a yolk-rich custard, lean on dark brown sugar for depth, and control heat to protect flavor.
Churn or follow the no-churn hourly whisk routine for 3–4 rounds to reach soft-serve, then ripple in a sauce and pack tightly. If it over-hardens, chunk and blend to rescue the batch.
Save or print the recipe notes, mark your cup measures, and set a timer. With a few careful minutes and hours, you’ll serve scoopable, flavorful results from your freezer.
FAQ
What makes this homemade butterscotch ice cream different from store-bought versions?
Can I use a custard base with egg yolks or should I choose the gelato-style base?
What equipment do I need to get professional results at home?
How do I prevent grainy texture or crystallization in my finished batch?
Is there a reliable method to make this recipe without an ice cream maker?
How long should I chill the mixture before churning, and why does timing matter?
What are the best mix-ins and when should I add them?
How do I fix a batch that turned out icy or over-frozen?
Can I reduce sugar or use alternative sweeteners without losing texture?
What’s the best way to pack and store my homemade frozen dessert for long-term freshness?


