


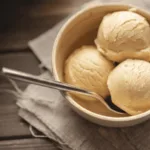
Cookies and Cream Ice Cream
4
servings30
minutes40
minutes300
kcal1
hour10
minutesA creamy blend of smooth vanilla ice cream and crunchy cookie pieces.
Keep the screen of your device on
Ingredients
2 cups 2 heavy cream
1 cup 1 whole milk
3/4 cup 3/4 granulated sugar
1 tablespoon 1 vanilla extract
10 pieces 10 chocolate sandwich cookies
Directions
- In a mixing bowl, combine heavy cream, whole milk, granulated sugar, and vanilla extract, whisking until the sugar dissolves completely.
- Cover the bowl and refrigerate the mixture for at least 2 hours or until thoroughly chilled, to ensure better churning results.
- Crumble the chocolate sandwich cookies into small pieces, making sure they are evenly sized for a consistent mixture.
- Set up your ice cream maker according to the manufacturer's instructions, making sure it is clean and ready to use.
- Pour the chilled base into the ice cream maker and churn for about 15-20 minutes, or until it resembles soft-serve ice cream.
- Add the crumbled cookies during the last 5 minutes of churning to mix them evenly throughout the ice cream.
- Transfer the ice cream to an airtight container, smoothing the top and sealing it properly to avoid freezer burn.
- Freeze the ice cream for at least 2 hours to allow it to fully harden before serving to achieve the best texture.
Nutrition Facts
- Serving Size: 1g
- Total number of serves: 6
- Calories: 250kcal
- Fat: 16g
- Saturated Fat: 10g
- Trans Fat: 0g
- Polyunsaturated Fat: 0g
- Monounsaturated Fat: 4g
- Cholesterol: 60mg
- Sodium: 80mg
- Potassium: 120mg
- Carbohydrates: 28g
- Fiber: 1g
- Sugar: 22g
- Protein: 4g
- Vitamin A: 550IU
- Vitamin C: 0mg
- Calcium: 80mg
- Iron: 0.8mg
- Vitamin D: 1mg
- Vitamin E: 0.5mg
- Vitamin K: 1mg
- Thiamin: 0.1mg
- Riboflavin: 0.2mg
- Niacin: 0.3mg
- Vitamin B6: 0.04mg
- Vitamin B12: 0.5mg
- Folate: 10mg
- Biotin: 0mg
- Pantothenic Acid: 0.3mg
- Phosphorus: 90mg
- Iodine: 15mg
- Magnesium: 10mg
- Zinc: 0.4mg
- Selenium: 3mg
- Copper: 0.06mg
- Manganese: 0.1mg
- Chromium: 0mg
- Molybdenum: 5mg
- Chloride: 75mg
Did you make this recipe?
Tag @https://www.instagram.com/ice_cream_haven/ on Instagram and hashtag it with #IceCreamIceCreamHavens
Like this recipe?
Follow @https://www.pinterest.com/Ice_Cream_Haven/ on Pinterest
Join our Facebook Group!
Follow https://www.facebook.com/icecreamhavens/ on Facebook
Why This Cookies and Cream Ice Cream Belongs in Your Freezer
This no-cook recipe delivers a richer scoop than most store options while keeping prep quick. The base skips eggs and heat, so you mix, chill, and churn without fuss.
Chill time matters: refrigerate the mixture for one hour or overnight to deepen flavor and improve body. When the churn reaches soft-serve—about 15–20 minutes—fold in broken sandwich cookies so each bite keeps a satisfying crunch.
Stirring in 3 tablespoons of vodka, rum, or liqueur before the final freeze helps the batch stay scoopable straight from the freezer. Yield is roughly one quart; plan on a 2–4 hour set time for firm, ready-to-serve results.
“Real vanilla and crisp chocolate bits turn this simple method into a freezer staple you’ll reach for again and again.”
- Superior texture: creamy mouthfeel with bright vanilla notes.
- Speed: no-cook prep saves time without skimping on richness.
- Control: add more cookie pieces for bolder contrast or keep it classic.
Ingredients, Equipment, and Yield at a Glance

Start by lining up cold dairy, sugar, vanilla, and a reliable maker for best results. This section lists what you need and how long it will take, so prep goes smoothly.
Core ingredients: 1 cup whole milk, 2 cups heavy cream, 2/3–3/4 cup granulated sugar, 1–2 tsp vanilla extract, and 1 1/4 cups crushed chocolate sandwich cookies (about 15–20 pieces).
Essential gear: a freezer-bowl or compressor ice cream maker, a large bowl, a sturdy whisk, and a freezer-safe container with a tight lid.
“Keep dairy cold and tools chilled so the mixture thickens quickly and the texture stays silky.”
Yield and timing
- Yield: about 1 quart — roughly 6–8 servings (cups measured).
- Plan: whisk in minutes, chill at least 1 hour or overnight, churn ~20 minutes, then freeze 2–4 hours to set.
- Tip: use vanilla bean flecks for visual appeal and richer aroma.
Cookies and Cream Ice Cream: Step-by-Step Instructions

Follow a clear, short process to turn cold dairy into a silky, cookie-studded treat.
Whisk the base: Begin by whisking cold whole milk with granulated sugar until the sugar dissolved fully and the liquid feels smooth. Then stir in cold heavy cream and vanilla to complete the dairy foundation.
Chill the mixture: Cover the bowl and refrigerate for at least 1 hour or overnight for deeper flavor and better body. A longer rest intensifies vanilla notes and helps the churned texture.
Set up your maker: Prepare the ice cream maker per the manufacturer instructions. If you use a freezer-bowl unit, ensure the bowl is fully frozen before you pour in the base.
Churn and add mix-ins: Pour the chilled mixture into the maker and churn. Watch the texture—after about 15-20 minutes when it resembles soft serve, fold in the cookie chunks and churn another 5–10 minutes to distribute them evenly.
Freeze to finish: Transfer the aerated ice cream to a pre-chilled container, smooth the top, and freeze for 2–4 hours until firm. If the batch hardens beyond your liking, let it sit at room temperature for 15–20 minutes before scooping.
“Steady churning and cold ingredients make the difference between a good scoop and a great one.”
Pro Tips, Variations, and Substitutions for the Creamiest Results

Small tweaks make a big difference. Use these practical moves to lift texture, flavor, and convenience when you follow this ice cream recipe.
Keep it scoopable: Adding about three tablespoons of a spirit after churning slows hardening and keeps scoops pliant from the freezer. Vodka stays neutral; rum or a liqueur adds warm notes.
Flavor and mix-in strategy
Use a quality vanilla extract or vanilla bean for bright aroma. A pinch of salt balances sweetness and boosts chocolate sandwich mix-ins.
When to add cookie pieces
Add cookie chunks when the churn reaches soft-serve, about 15–20 minutes of work in the machine. Aim for roughly 1 1/4 cups of crushed bits — it gives great texture without sogginess.
- Scale mix-ins to taste; feel free to use more if you love crunch.
- Reserve a few crumbs to sprinkle on top before the final set for a bakery finish.
Equipment and workflow
Freezer-bowl units need a fully frozen bowl per manufacturer instructions. A compressor cream maker requires no pre-freeze and handles back-to-back batches with ease. Keep your bowl and spatula cold so folding in additions is quick and even.
“Simple adjustments—timing, quality extract, and the right maker—define a perfect scoop.”
Serve, Store, and Savor

Bring the batch to the table with a few quick finishing touches that elevate each scoop. After the final freeze—about 2–3 hours (up to 4)—the batch firms. If it feels too hard, let it rest 15–20 minutes at room temp for easy, clean scoops.
Serving ideas
Top each scoop with extra crushed cookies, a ribbon of chocolate, or place a whole sandwich cookie on the rim for instant dessert theater.
Pro tip: Warm your scoop in hot water and wipe it dry between passes to create smooth, rounded servings worthy of a shop.
Storage and texture
Store leftovers in a lidded, freezer-safe container to limit ice crystals. Press parchment onto the surface before sealing to reduce air exposure and preserve texture.
Aim to enjoy within a couple of weeks for peak flavor. If the mixture hardens over several days, give extra time on the counter before scooping to bring back that creamy bite.
“Return the lid promptly after serving; small steps keep texture lively and flavor bright.”
- Keep the maker’s bowl in the freezer so you can churn a quick second batch when cravings strike.
- Pair scoops with warm brownies or fresh berries to highlight vanilla and cocoa contrasts.
- Portion into smaller tubs when you plan to serve over several days to cut down on air exposure.
Conclusion
This simple blueprint turns pantry staples into a reliably silky batch you’ll make again.
Whisk, chill, churn, and add mix-ins at the soft-serve stage to protect texture. Use whole milk, cups heavy cream, fragrant vanilla extract, and quality ingredients to lift flavor. Trust your ice cream maker or cream maker and follow manufacturer instructions for best results.
Store in a snug bowl with a tight lid, allow 15–20 minutes to soften before scooping, and finish with a ribbon of chocolate or an Oreo cookie for theater. Keep this recipe bookmarked as your go-to method for satisfying, repeatable treats.
FAQ
What ingredients do I need to make this cookies and cream ice cream?
Can I make this recipe without an ice cream maker?
How long should I chill the base before churning?
How long does churning take with an ice cream maker?
When should I add cookie chunks during churning?
How long do I freeze the ice cream to get scoopable firmness?
What yield and serving size can I expect?
Any tips to keep homemade ice cream soft in the freezer?
Can I substitute different cookies or add-ins?
Should I use vanilla extract or vanilla bean for best flavor?
How do I prevent the sugar from feeling grainy in the mixture?
What equipment options are recommended: freezer-bowl makers vs. compressor models?
How should I store leftovers and preserve texture?


