


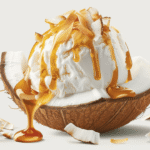
Cuisinart Vanilla Ice Cream Recipe
6
servings10
minutes35
minutes250
kcal45
minutesClassic vanilla ice cream with everyday ingredients.
Keep the screen of your device on
Ingredients
2 cups 2 heavy cream
1 cup 1 whole milk
0.75 cup 0.75 granulated sugar
1 tbsp 1 pure vanilla extract
1 pinch 1 salt
Directions
- In a mixing bowl, combine the heavy cream, whole milk, granulated sugar, vanilla extract, and a pinch of salt. Whisk until the sugar has dissolved.
- Cover the bowl with plastic wrap and refrigerate the mixture for at least two hours until well chilled.
- Once chilled, pour the mixture into the ice cream maker bowl and follow the manufacturer's instructions for churning, usually about 20 to 25 minutes.
- The ice cream will be soft-serve consistency once churned. Transfer to an airtight container and freeze for at least 2 hours for firmer texture.
- Serve the ice cream with your favorite toppings, such as chocolate chips or fresh fruit, for added flavor.
Recipe Video
Nutrition Facts
- Serving Size: 1g
- Total number of serves: 6
- Calories: 250kcal
- Fat: 18g
- Saturated Fat: 11g
- Trans Fat: 0g
- Polyunsaturated Fat: 0.5g
- Monounsaturated Fat: 5g
- Cholesterol: 70mg
- Sodium: 40mg
- Potassium: 110mg
- Carbohydrates: 22g
- Fiber: 0g
- Sugar: 20g
- Protein: 3g
- Vitamin A: 665IU
- Vitamin C: 0mg
- Calcium: 110mg
- Iron: 0mg
- Vitamin D: 0mg
- Vitamin E: 1mg
- Vitamin K: 2mg
- Thiamin: 0mg
- Riboflavin: 0.2mg
- Niacin: 0mg
- Vitamin B6: 0mg
- Vitamin B12: 0.7mg
- Folate: 7mg
- Biotin: 0mg
- Pantothenic Acid: 0.5mg
- Phosphorus: 100mg
- Iodine: 0mg
- Magnesium: 10mg
- Zinc: 0.4mg
- Selenium: 2mg
- Copper: 0mg
- Manganese: 0mg
- Chromium: 0mg
- Molybdenum: 0mg
- Chloride: 0mg
Did you make this recipe?
Tag @https://www.instagram.com/ice_cream_haven/ on Instagram and hashtag it with #IceCreamIceCreamHavens
Like this recipe?
Follow @https://www.pinterest.com/Ice_Cream_Haven/ on Pinterest
Join our Facebook Group!
Follow https://www.facebook.com/icecreamhavens/ on Facebook
Why Homemade Vanilla Ice Cream Shines with a Cuisinart
From a hand-cranked freezer in 1843 to the modern countertop maker, home churning keeps tradition alive.
A home cream maker gives you full control over the base: heavy cream, whole milk, sugar, and pure vanilla. That control keeps the flavor clean and the texture lush without stabilizers or odd additives.
Steady churning folds just enough air into the mixture. The result is smoother ice cream and fewer large ice crystals. A chilled bowl and cold base help the ice set quickly so the scoop holds its shape and mouthfeel stays rich.
“A fresh batch delivers brighter aroma, truer dairy taste, and scoops that last longer on the plate.”
- Homemade uses fewer additives and fresher ingredients.
- Modern machines shorten hands-on time and give repeatable results.
- No-machine freeze-stir cycles mimic churning for great texture.
Bottom line: you get a freezer-to-table way to enjoy custom flavors with balanced sweetness and a dependable texture, whether you fill a small bowl or a larger cup.
Cuisinart Vanilla Ice Cream Recipe

Begin with chilled milk and cream, whisked with sugar and salt until fully dissolved. Taste the mixture and adjust the pure vanilla and pinch of salt so the flavor reads round and balanced before chilling.
Ingredients
- 2 cups heavy cream
- 1 cup whole milk
- 3/4 cup granulated sugar
- 1–2 teaspoons pure vanilla (or seeds from a vanilla bean)
- Pinch of salt
Equipment
- Countertop ice maker with a frozen freezer bowl and paddle
- Medium mixing bowl and whisk
- Measuring cups
- Lidded storage container
Ingredient notes
Base: Whisk until the sugar dissolves and the cream mixture looks uniform. Chill 1–2 hours (or overnight) to improve creamy texture and prevent large ice crystals.
Vanilla options: Extract is convenient; a scraped vanilla bean gives specks and deeper aroma. If using honey in place of sugar, lower the amount slightly and taste—the structure may soften.
“Pre-freeze the bowl per the manual for faster freezing once the base touches the cold surface.”
Scale the batch by keeping ratios the same, and always chill larger batches thoroughly before churning. For further tips and an alternate approach, see this helpful guide on the best machine methods: best machine methods.
Step-by-Step: From Ice Cream Base to Creamy Churn

Start by dissolving sugar into chilled milk so the base mixes smoothly and tastes balanced. Whisk for 1–2 minutes until the sugar is gone. Then stir in cream, a touch of vanilla, and a pinch of salt so the mixture tastes even.
Chill the base for 1–2 hours or overnight. Cold liquid freezes faster and encourages small ice crystals for a smoother, creamier texture.
Churn with your maker
Start the machine first, then pour the chilled base into the frozen bowl. Churn according manufacturer instructions for about 20–30 minutes, watching for a soft‑serve look and gentle mounding that signals the right texture.
No‑machine freeze‑stir
Freeze a shallow metal bowl or pan 45 minutes. Cool the base in an ice bath, pour into the cold pan, then freeze 20 minutes. Stir vigorously, repeat every 30 minutes for 4–5 rounds until the mixture is smooth and fluffy.
- Add chunky mix‑ins in the last minutes of churning so pieces stay distributed.
- Transfer airtight container promptly to avoid melt‑and‑refreeze and place in the freezer 2–3 hours to firm.
- When stirring by hand, work the edges inward to prevent hard icy bands.
“Chill well, churn correctly, and finish in a sealed container for the best scoopable results.”
Cuisinart Vanilla Ice Cream Recipe Pro Tips, Variations, and Flavor Mix‑Ins

A few simple upgrades will lift texture and introduce bright new flavors without extra fuss.
Custard-style option: Temper egg yolks into a warm cream and milk base until the mixture coats the spoon. Cook just until it thickens, then chill fully for a silkier texture and richer flavor.
Smart last-minute add‑ins
Add chips, crushed cookies, or nuts in the final minutes of churning so pieces stay intact and spread evenly. For fresh fruit, macerate sliced fruit with a splash of lemon juice and sugar for about two hours, drain well, then fold in during the last five minutes to avoid extra moisture.
Texture and freezer tips
Chill the base well and churn to a soft‑serve stage before transferring. Move the batch quickly into a pre‑frozen, airtight container to prevent ice crystals and lock in a creamy mouthfeel.
- Vanilla bean: Split and steep seeds in the warm base for visible specks and deeper aroma; strain if you prefer a smoother mixture.
- Swirl ideas: ribbons of caramel, toasted coconut, or a quick berry compote add contrast to the main flavor.
- If the machine struggles in warm kitchens, make shorter batches so the bowl and cup stay cold and the texture stays fine.
“Aim for soft‑serve in the maker, then firm up in a chilled container for the best scoopable finish.”
Cuisinart Vanilla Ice Cream Recipe Serving, Storage, and Simple Nutrition Notes

A well-plated scoop brings contrast — cold, silky, and ready beside a warm dessert. Serve scoops on their own, in cones, or with warm pies for a classic à la mode pairing. Chill serving bowls and the scoop briefly for cleaner rounds that hold shape.
Top it your way: set out hot fudge, caramel, sprinkles, crushed cookies, whipped cream, chopped nuts, and fresh fruit so guests can customize flavors. For neat cones, scoop from the softer edge of the mixture to avoid ragged balls.
Storage and shelf life: transfer to an airtight container and press parchment onto the surface before sealing to cut air contact. Keep the tub in the coldest part of the freezer and avoid repeated thaw‑and‑refreeze cycles.
- Plan ahead: temper the container a few minutes at room time before scooping for softer servings.
- Expect best flavor and texture in the first few weeks; a well-sealed container will stay good 2–4 months.
- For plating speed, pre‑scoop onto a chilled sheet pan and hold briefly in the freezer.
“A chilled bowl and a warmed scoop are small steps that make a big difference.”
A 1/2‑cup portion offers energy plus calcium and vitamin A from the cream and milk, so serve with fresh fruit for balance and color. For extra tips and a full guide, see this full guide.
Conclusion
A short list of pantry staples and a cold bowl are all you need to deliver consistent, creamy results at home.
Start with balanced dairy—two cups heavy and one cup whole—plus 3/4 cup granulated sugar, a pinch of salt, and pure vanilla. Chill the base, churn until softly mounded (about 20–30 minutes), then freeze 2–3 hours for firm scoops.
This simple approach keeps crystals small and highlights true flavor. Use an ice cream maker or the freeze‑stir method to match your kitchen gear. Split the batch to test add‑ins, or try a vanilla bean in winter and fruit swirls in summer.
Store well: press a barrier on the surface, seal tightly, and keep in the coldest spot for best texture. For a step‑by‑step refresher and equipment tips, see this detailed guide.
Keep a couple of cups heavy and a cup whole on hand. With this measured method, weeknight or guest dessert becomes a reliable, delicious ritual.
FAQ
What ingredients do I need for an easy homemade vanilla ice cream using a Cuisinart machine?
Can I use vanilla bean instead of extract, and how does it change flavor?
Do I have to make a custard base with egg yolks?
How long should I chill the ice cream mixture before churning?
What are the basic steps to churn in an ice cream maker according to the manufacturer instructions?
Is there a reliable no-machine method for creamy frozen dessert?
When should I add chocolate chips, cookie crumbs, or fresh fruit?
How can I prevent ice crystals and keep the texture creamy in the freezer?
How long will homemade frozen dessert stay good in the freezer?
Can I reduce sugar or use alternative sweeteners without affecting texture?
What scoop and serving tips help achieve perfect portions and presentation?
Are there simple nutrition notes I should know about this dessert?


