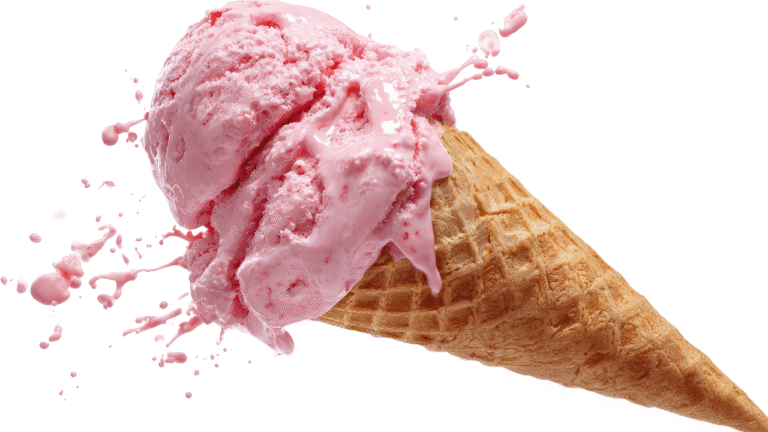
Make a fresh, creamy dessert Ice Cream Ball Recipe anywhere with a hands-on rolling method that swaps electricity for motion. This simple project works at home, in the backyard, or on a trip. Mix a chilled base, pack it into jars or a novelty device, then roll or shake until the mixture thickens into soft-serve.
The process is quick: a classic vanilla base chills fast and most batches finish in about 5–12 minutes, depending on heat and how much ice you use. A commercial SoftShell/Play and Freeze model suggests ten minutes of rolling, then more time after scraping and adding more ice and salt if needed.
This is perfect for family and friends who want a playful, group activity. The design encourages teamwork and keeps everyone involved while the motion churns the mixture. Follow simple safety tips: don’t toss or kick the device, roll on grass, and wipe off condensation before opening.
Key Takeaways
- Make a chilled base at home, then transport in jars for easy churning on the go.
- Most batches reach soft-serve in 5–12 minutes; commercial models often need about 10 minutes of rolling.
- Both a novelty device and a DIY two-container method yield creamy results when kept moving.
- Great group activity for family and friends—safe handling makes it fun for kids and adults.
- Customize with sauces or mix-ins for varied flavors after churning.
Homemade ice Cream Ball Recipe
4
servings15
minutes30
minutes250
kcal45
minutesA simple, creamy vanilla ice cream using everyday ingredients.
Keep the screen of your device on
Ingredients
2 cups 2 heavy cream
1 cup 1 whole milk
3/4 cup 3/4 granulated sugar
1 tablespoon 1 pure vanilla extract
1 pinch 1 rock salt
4 cup 4 cups ice cubes
- Optional Mix-ins:
½ cup ½ Chocolate chips
½ cup ½ Crushed cookies
¾ cup ¾ Chopped fruits
¾ tablespoons ¾ Sprinkles
Directions
- In a medium mixing bowl, whisk together the heavy cream, whole milk, granulated sugar, vanilla extract, and salt until the sugar is completely dissolved.
- Cover the mixture with plastic wrap and refrigerate for at least 2 hours, or until it is thoroughly chilled.
- Fill the outer chamber of the ice cream ball with ice cubes and rock salt, ensuring it is packed well. Pour the chilled mixture into the inner chamber and securely seal the lid.
- Roll, shake, and toss the ice cream ball continuously for 20-30 minutes. Every 10 minutes, open the ball, stir the mixture, and check the ice level—adding more ice and salt if needed.
- Once the ice cream reaches a soft-serve consistency, transfer it to a lidded container and freeze for at least 2 hours to firm up before serving.
- For best results, store the ice cream in the back of the freezer, where the temperature is most consistent.
Recipe Video
Nutrition Facts
- Total number of serves: 4
- Calories: 250kcal
- Cholesterol: 70mg
- Sodium: 60mg
- Potassium: 140mg
- Sugar: 22g
- Protein: 3g
- Calcium: 10mg
- Iron: 2mg
- Thiamin: 0mg
- Riboflavin: 0mg
- Niacin: 0mg
- Folate: 0mg
- Biotin: 0mg
- Phosphorus: 0mg
- Iodine: 0mg
- Magnesium: 0mg
- Zinc: 0mg
- Selenium: 0mg
- Copper: 0mg
- Manganese: 0mg
- Chromium: 0mg
- Molybdenum: 0mg
- Chloride: 0mg
Did you make this recipe?
Tag @https://www.instagram.com/ice_cream_haven/ on Instagram and hashtag it with #IceCreamIceCreamHavens
Like this recipe?
Follow @https://www.pinterest.com/Ice_Cream_Haven/ on Pinterest
Join our Facebook Group!
Follow https://www.facebook.com/icecreamhavens/ on Facebook
Why This DIY Ice Cream Ball Method Is Perfect for Home or the Outdoors
Rolling a sealed chamber filled with a sweet base next to an ice-and-salt side harnesses basic thermodynamics to freeze your mix.
How it works: fill one side of the device with ice and rock salt and the other side with the sweet cream mixture. The salt lowers the freezing point of the ice so the outer shell gets colder than 32°F. That colder surface pulls heat from the inner cylinder and the mixture firms as you roll.
Simple science and practical tips
Motion keeps fresh portions of the mix against the cold metal. Stop after about 10 minutes to scrape the frozen layer so new mixture contacts the surface. Then add more ice and up to 1/4 cup rock salt if needed and roll another stretch of time.
Fat matters: higher-fat bases freeze smoother and may take less active rolling. Lower-fat blends need steadier movement and a bit more time. Pre-chill the base at home to speed things up and improve texture, especially on a warm day or a trip.
“This method turns teamwork into dessert—no power required, just ice, salt, and motion.”
- Keep the unit on grass or pavement and roll, don’t throw or kick the ball; it’s heavy.
- Check ice levels during the session and add more rock salt and ice to maintain the cold bath.
- Great for groups: pass it softly between friends for a playful, hands-on make.
Ice Cream Ball Recipe
Start with a cold mixture and the right gear, then turn simple movement into a creamy finish.
Ingredients for a classic vanilla base (plus a fruity yogurt option)
Classic vanilla: in a bowl whisk 1 cup whole milk with 2/3 cup sugar. Add 2 cups heavy cream, 1 tablespoon vanilla extract, and 1/4 teaspoon salt. Chill the mixture in jars for transport.
Fruity yogurt option: mash 1 cup raspberries with 2 tablespoons honey. Stir into 2 cups low‑fat French vanilla yogurt for a tangy alternative that churns well.
What you need
Use an ice cream ball like YayLabs! or a two‑container method. Pack plenty of ice and coarse rock salt or ice cream salt. Have a tight lid and a spoon to scrape frozen edges.
Step-by-step
- Fill the ice side with ice and about 1 tablespoon salt per 2 cups of ice.
- Pour the base into the inner cylinder, leave ~1 inch headspace, then roll or shake for ~10 minutes.
- Open, scrape frozen edges into the center, top up ice and salt if needed, then continue about 10 more minutes.
Timing & nutrition: Batches often set in 5–12 minutes depending on temperature. The classic cream version is richer (~579 kcal per serving); the yogurt option is lighter (~152 kcal per serving).
“Chill the base and keep rolling—cold starts and steady motion make the best texture.”
Ice Cream Ball Recipe Pro Tips, Flavor Variations, and Troubleshooting for Better Results
Dialing in salt, motion, and timing transforms an ordinary churn into a smoother, more flavorful finish. Start with rock salt for the coldest, most stable bath.
If you swap salts, add more. Kosher or sea salt work, but add about 1/4 cup extra to match the chill from rock salt. Aim for roughly 1 tablespoon of salt per 2 cups of ice in the bath.
Chill the base and keep it moving. Roll or shake for about 10 minutes, open to scrape frozen edges, then continue another 10 minutes. Scraping forces fresh mixture against the cold side and prevents a stubborn frozen layer.
- Adjust for fat and weather: higher fat mixes set smoother; hot days need more salt and vigorous motion.
- Safety first: the ball is heavy—don’t kick or throw it. Roll on grass and wipe condensation before opening to avoid dirt.
- Flavor ideas: swirl chocolate syrup or fold in raspberry-honey yogurt near the end for even distribution.
- Troubleshoot: too soft? Add ice and rock salt and churn longer. Too hard? Let it sit briefly, then stir for scooping.
“Small adjustments to salt and motion shave minutes and lift texture.”
Conclusion
Finish smart: chill your base in a bowl, pack the cold side with the right salt, then roll the unit about 10 minutes. Stop, scrape frozen edges, add more ice and salt if needed, and roll another 10 minutes or until texture is right.
Be safe and clean: pass the device gently—don’t throw or kick it. Wipe the side before opening so no grit lands in your cream. Stir mid-freeze to prevent sticking.
Serve immediately for best texture. Try vanilla ice cream, a swirl of chocolate, or a fruit-forward frozen yogurt. Clean the unit well so your next outdoor dessert is ready to go.


