


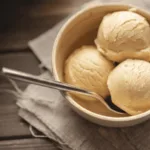
Homemade ice Cream Ball Recipe
4
servings15
minutes30
minutes250
kcal45
minutesA simple, creamy vanilla ice cream using everyday ingredients.
Keep the screen of your device on
Ingredients
2 cups 2 heavy cream
1 cup 1 whole milk
3/4 cup 3/4 granulated sugar
1 tablespoon 1 pure vanilla extract
1 pinch 1 rock salt
4 cup 4 cups ice cubes
- Optional Mix-ins:
½ cup ½ Chocolate chips
½ cup ½ Crushed cookies
¾ cup ¾ Chopped fruits
¾ tablespoons ¾ Sprinkles
Directions
- In a medium mixing bowl, whisk together the heavy cream, whole milk, granulated sugar, vanilla extract, and salt until the sugar is completely dissolved.
- Cover the mixture with plastic wrap and refrigerate for at least 2 hours, or until it is thoroughly chilled.
- Fill the outer chamber of the ice cream ball with ice cubes and rock salt, ensuring it is packed well. Pour the chilled mixture into the inner chamber and securely seal the lid.
- Roll, shake, and toss the ice cream ball continuously for 20-30 minutes. Every 10 minutes, open the ball, stir the mixture, and check the ice level—adding more ice and salt if needed.
- Once the ice cream reaches a soft-serve consistency, transfer it to a lidded container and freeze for at least 2 hours to firm up before serving.
- For best results, store the ice cream in the back of the freezer, where the temperature is most consistent.
Recipe Video
Nutrition Facts
- Total number of serves: 4
- Calories: 250kcal
- Cholesterol: 70mg
- Sodium: 60mg
- Potassium: 140mg
- Sugar: 22g
- Protein: 3g
- Calcium: 10mg
- Iron: 2mg
- Thiamin: 0mg
- Riboflavin: 0mg
- Niacin: 0mg
- Folate: 0mg
- Biotin: 0mg
- Phosphorus: 0mg
- Iodine: 0mg
- Magnesium: 0mg
- Zinc: 0mg
- Selenium: 0mg
- Copper: 0mg
- Manganese: 0mg
- Chromium: 0mg
- Molybdenum: 0mg
- Chloride: 0mg
Did you make this recipe?
Tag @https://www.instagram.com/ice_cream_haven/ on Instagram and hashtag it with #IceCreamIceCreamHavens
Like this recipe?
Follow @https://www.pinterest.com/Ice_Cream_Haven/ on Pinterest
Join our Facebook Group!
Follow https://www.facebook.com/icecreamhavens/ on Facebook
Make Ice Cream Anywhere: A Fun, Hands-On Way to Homemade Ice Cream
A portable dual-chamber maker turns simple ingredients into a smooth frozen treat while you roll or pass it with friends. The softshell design hides a mixing canister on one end and a cold chamber on the other. Pack the cold side with as much ice as possible and about 1/2 cup of rock salt to start.
How the system works: your ingredients sit in the inner canister while the surrounding ice and salt slurry pulls down temperature fast. The cold layer freezes the mix as you keep the unit moving, which helps prevent large ice crystals and keeps texture creamy.
To use, fill the bowl side with cream, sugar, and vanilla, then seal and roll, shake, or gently pass the cream ball for about 10 minutes. Stop, scrape semi-frozen edges with a plastic or wooden spoon, top up ice and add ice or up to 1/4 cup more rock salt if needed, then continue.
Steady motion matters more than force—don’t throw or drop the device. Most batches set in 15–30 minutes depending on how vigorously you roll and outdoor temperature. For a quick how-to guide, see this handy link: portable frozen treat steps.
Yaylabs Ice Cream Ball Recipe

Measure carefully and follow the steps for a quick, consistent batch. Measure and mix the base, then leave about an inch of headspace before sealing the canister. This helps the mix expand as it freezes and improves final consistency.
Ingredients and amounts
- Classic pint: 1 pint half & half or cream, 1 1/2 tsp vanilla, 1/3 cup + 2 tbsp sugar.
- Yogurt option: Mash 1 cup raspberries with 2 tbsp honey, stir into 2 cups French vanilla yogurt.
Equipment checklist
- SoftShell metal canister (portable cream ball device).
- Lots of ice and 1/2 cup rock salt (plus up to 1/4 cup more).
- Sturdy plastic or wooden spoon; no metal tools.
Step-by-step and timing
Pour the mix into the cylinder leaving ~1″ headspace. Seal, pack the opposite end with ice and 1/2 cup rock salt, then roll or pass for 10 minutes.
Open, scrape frozen sides with the spoon, top off ice and add up to 1/4 cup more rock salt, then continue 10–20 more minutes until desired texture. Total time usually runs 15–30 minutes depending on fat and vigor.
Salt notes
Rock salt gives the best chill. If you only have kosher or sea salt, add an extra 1/4 cup to match the cooling power.
Pro Tips, Flavor Ideas, and Outdoor Fun with Your Yaylabs Ice Cream Ball Recipe

Small choices make big differences. Choose heavy cream for the richest texture and a faster set. If you want lighter homemade ice, use yogurt or half & half; expect a few extra minutes and a softer finish.
Match batch size to your model: pint canisters fit quick servings and small groups. Quart models handle parties and their wide, shallow design makes stirring and scooping easier.
Scrape midway at about 10 minutes to pull frozen edges into the center. This prevents icy rims and improves overall consistency.
- Use only plastic or wooden spoons to avoid scratching the canister.
- Try classic vanilla or a raspberry-honey swirl (1 cup raspberries, 2 tbsp honey, 2 cups French vanilla yogurt) for bright flavor.
- Fold in chips or cookies during the slushy stage so add-ins suspend evenly.
Serve immediately as soft-serve or freeze briefly between batches to firm scoops. Bring the maker to camping, picnics, and backyard parties to turn play into dessert while kids and friends take turns rolling.
For full step-by-step guidance and timing tips, see this handy portable frozen treat steps.
Conclusion
Yaylabs Ice Cream Ball Recipe, Seal the base with your measured ice cream ingredients, pack the cold side with plenty of ice and rock salt, then roll steadily for about 15–30 minutes. Scrape once midway for the smoothest texture.
What matters most: steady motion, enough ice and salt, and a quick mid-scrape keep the mix from forming icy pockets. If you lack rock salt, add an extra 1/4 cup of kosher or sea salt. Add mix-ins by the cup during the slushy stage.
Small things help: wipe lids, top off ice, and avoid metal tools. Share the task with kids and friends — the portable ball maker turns any outdoor spot into a mini creamery. Try a first batch this week, then build new flavors from that base.
FAQ
What ingredients do I need to make creamy homemade ice cream with the ball?
How does the portable cream-making ball work?
What kind of salt should I use and can I substitute it?
How long does it take to reach scoopable texture?
How much mixing or rolling is required?
Can I use metal tools to stir or scoop during the process?
How many servings does a pint vs. quart canister make?
Any tips to improve texture and prevent over‑freezing?
What flavor variations work best for this method?
Is this method safe and kid‑friendly for outdoor use?


