


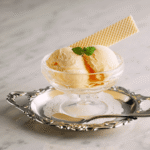
Vanilla Ice Cream without Eggs
4
servings30
minutes40
minutes300
kcal1
hour10
minutesEasy homemade vanilla ice cream recipe using everyday ingredients.
Keep the screen of your device on
Ingredients
2 cups 2 heavy cream
1 cup 1 whole milk
0.75 cup 0.75 sweetened condensed milk
2 teaspoons 2 vanilla extract
1/8 teaspoon 1/8 salt
Directions
- In a large mixing bowl, combine the heavy cream, whole milk, and sweetened condensed milk. Whisk until fully blended.
- Add the vanilla extract and salt. Stir the mixture well to ensure the vanilla and salt are evenly distributed.
- Cover the bowl with plastic wrap and refrigerate for at least 1 hour, or until the mixture is thoroughly chilled.
- Assemble your ice cream maker according to the manufacturer's instructions and ensure the bowl is pre-frozen if necessary.
- Pour the chilled mixture into the ice cream maker and churn for approximately 15-20 minutes, or until it reaches a soft-serve consistency.
- Transfer the churned ice cream into a lidded, airtight container and smooth the top with a spatula for even freezing.
- Place the container in the freezer to harden for at least 2 hours before serving to achieve the best texture.
- To serve, remove the ice cream from the freezer and let it sit at room temperature for a few minutes for easier scooping.
Recipe Video
Nutrition Facts
- Total number of serves: 6
- Calories: 200kcal
- Cholesterol: 50mg
- Sodium: 70mg
- Potassium: 150mg
- Sugar: 12g
- Protein: 3g
- Calcium: 100mg
- Iron: 0mg
- Thiamin: 0mg
- Riboflavin: 0.1mg
- Niacin: 0mg
- Folate: 0mg
- Biotin: 0mg
- Phosphorus: 100mg
- Iodine: 0mg
- Magnesium: 10mg
- Zinc: 0mg
- Selenium: 0mg
- Copper: 0mg
- Manganese: 0mg
- Chromium: 0mg
- Molybdenum: 0mg
- Chloride: 0mg
Did you make this recipe?
Tag @https://www.instagram.com/ice_cream_haven/ on Instagram and hashtag it with #IceCreamIceCreamHavens
Like this recipe?
Follow @https://www.pinterest.com/Ice_Cream_Haven/ on Pinterest
Join our Facebook Group!
Follow https://www.facebook.com/icecreamhavens/ on Facebook
Simple, Creamy, and Egg‑Free: Why You’ll Love This Homemade Ice Cream
Philadelphia‑style makes a quick, silky base that highlights true vanilla without a stovetop custard. The method uses chilled milk and cream so you spend less time over the stove and more time enjoying dessert.
Philadelphia‑style vs. custard: lighter body, pure vanilla flavor
The main difference is texture and speed. Custard relies on yolks for body; the Philadelphia way leans on dairy fat to keep the mix smooth and stable.
“Philadelphia‑style lets pure vanilla stand out while cutting prep and cook time.”
Made for summer, perfect any season
This approach feels bright on hot days and pairs beautifully with warm desserts in cooler months. It’s a flexible foundation for many toppings and swirls.
- Fast assembly: mix, chill briefly, churn, then freeze.
- Family friendly: fewer steps make it ideal for first‑time makers.
- Pairing power: try it over pie, cobbler, or brownies for a classic contrast.
Quick Highlights at a Glance

Knowing the minutes for prep, churn, and freeze turns a weekend treat into an easy weekday victory.
Core ingredients: whole milk, heavy cream, granulated sugar, and vanilla form the simple base that yields about 1.5 quarts of rich, classic ice cream.
Only four core ingredients, five minutes of prep
Hands‑on work takes about five minutes. Whisk sugar into cold milk until dissolved, then stir in cream and vanilla. A brief 15‑minute chill is optional but helps reduce ice crystals before you start the machine.
Churn time and freezer time you can plan around
Most churn cycles run 20–25 minutes to reach soft‑serve. Transfer to a container and freeze at least two hours for scoopable firmness. Total time from start to finish is roughly 2 hours 25 minutes.
- Yield: ~1.5 quarts—great for family servings.
- Equipment: any standard home machine works well.
- Tip: jot your machine’s ideal churn window to refine results.
Ingredients That Deliver Scoopable Texture

A small set of quality ingredients is all you need to build a scoopable, silky base. Focus on balance: milk for body, fat for richness, sugar for softness, and vanilla for flavor clarity.
Whole milk and heavy cream: the fat balance that replaces eggs
Whole milk provides water and dairy solids that give structure, while heavy cream supplies the fat that mimics yolk richness. Using about 1–2 cups of each, depending on batch size, keeps the mix tender and scoopable.
Granulated sugar and a pinch of salt for sweetness and softness
Granulated sugar does more than sweeten: it lowers the freezing point so the final texture stays soft rather than rock hard. A tiny pinch of salt rounds flavors and lifts the vanilla without making the mix taste salty.
Vanilla extract, vanilla bean, or vanilla paste: choosing your flavor driver
Pure vanilla extract is simple and reliable. Vanilla paste adds visible specks and a richer aroma. Split and scrape a vanilla bean for the deepest, most nuanced flavor if your budget allows. High‑quality vanilla truly pays off spoon after spoon.
- Use very cold dairy to shorten churn time and reduce crystals.
- Keep ratios balanced—cups of milk and cream in close measure preserve silkiness.
- Don’t cut sugar too far; it’s structural as well as sweet.
For a simple, tested guide to making this at home, see this short how‑to for a classic base: homemade vanilla without eggs.
Essential Equipment for Homemade Ice Cream

The right hardware can turn a simple base into a silky, scoopable treat every time. Start with gear you’ll actually use: a reliable churn improves texture, while clever storage keeps flavor fresh.
Choosing between a KitchenAid attachment and a Cuisinart machine
If you own a stand mixer, the KitchenAid attachment is a convenient add‑on that saves counter space. It’s ideal for occasional making and fast setup.
A dedicated Cuisinart cream maker delivers consistent results and compact storage. Expect excellent texture; the motor can be a bit louder, but it churns well for steady batches.
Freezer‑safe containers and a frozen bowl strategy
Always freeze the bowl overnight so it’s fully cold before you start churning. Keep a second frozen bowl on rotation for back‑to‑back batches or test flavors quickly.
Use slim, stackable containers like Tovolo Glide‑A‑Scoop or reusable quart tubs with tight lids to limit freezer burn. Pre‑chill storage containers so the freshly churned cream sets faster and stays smoother.
- Tip: a flexible spatula transfers churned mix cleanly and reduces air pockets.
- Label containers with flavor and date to track freshness.
- With the right machine and cold gear ready, your texture will be more consistent and your process faster.
Step‑by‑Step: From Mixing Bowl to Churner

Move confidently from bowl to churner with a few focused steps that lock in smooth texture. This short plan keeps handling cold and timing tight so your homemade ice cream turns out silky every time.
Dissolve sugar fully into cold milk for a silky base
Start cold: in a mixing bowl whisk granulated sugar into very cold milk until crystals disappear and the mix feels smooth. Use measured cups so ratios stay consistent.
Stir in heavy cream, vanilla, and salt; chill briefly
Fold in heavy cream, vanilla, and a tiny pinch of salt. Chill the mixture about fifteen minutes to encourage finer crystals and quicker churn time.
Churn according to your machine’s directions
Turn the machine on before you pour to avoid instant freezing on the sides. Most models reach soft‑serve in roughly 20–25 minutes; watch for volume and defined swirls as cues.
Transfer, cover, and freeze to firm up
Move the churned mix to a chilled, freezer‑safe container immediately. Press parchment or plastic on the surface, seal the lid, and freeze at least two hours for scoopable texture. Overnight gives a firmer, parlor‑style result.
- Short prep: about five active minutes from bowl to chill.
- Churn: ~20–25 minutes to soft‑serve, then freeze 2+ hours.
- Serve: scoop, top, and enjoy—this simple recipe rewards patience.
Pro Tips for Ultra‑Creamy Texture
Cold control is the single best habit to build when you want a velvety final result.
Freeze the machine bowl overnight so the walls are truly arctic before you start. A fully frozen bowl makes tiny crystals and speeds churn, cutting down on coarse texture.
- Favor full‑fat dairy: whole milk and heavy cream supply the fat that replaces yolks and yields rich mouthfeel.
- Chill before and after: cool the base before you churn, then freeze the churned mix—both steps reduce unpleasant ice formation.
- Use quality vanilla: a true vanilla bean or good extract lifts aroma and flavor without extra steps.
- Prep smart: pre‑chill add‑ins and tubs, start the machine before pouring, and leave headspace so the mix can expand while churning.
Track your ideal time window for your setup. Small tweaks to temperature and timing make giant gains in homemade ice cream every batch.
ice cream recipe no eggs: The Core Method and Timing

Timing is the single secret that turns a simple mix into reliably smooth dessert. Follow a short, predictable schedule and your batch will finish with the right balance of softness and structure.
Prep minutes, churn minutes, and total time
Plan your path: about 5 minutes to mix, an optional 15‑minute chill to pre‑cool, 20–25 minutes to churn, and a minimum 2‑hour freezer set to reach tidy scoops.
That adds up to roughly 2 to 2.5 hours from start to scoopable serving and yields about 1.5 quarts—perfect for a family dessert or a small gathering.
Soft‑serve vs. scoopable: knowing when it’s ready
Watch the maker for airy volume and steady swirls. When the mix holds soft peaks and looks like soft‑serve, it’s ready to transfer.
For cones: serve right away for an ultra‑soft treat. For neat, standing scoops, cover and freeze at least two hours so the interior firms.
- Texture tells the truth: airy volume and defined swirls mean it’s time to move the batch.
- Protect structure: press plastic on the surface and seal the lid while freezing.
- Prep while it sets: slice fruit or warm a sauce so everything is ready at serving time.
The method is egg‑free by design—lean on cold dairy and accurate minutes to get a clean vanilla character and smooth final texture.
Variations and Mix‑Ins to Make It Your Own
Bright mix‑ins and swirls turn a simple base into a signature pint everyone will remember. Small touches change texture and flavor while keeping the process quick and fun.
Chunks and ribbons are easiest when you plan their timing. Fold in chocolate chips, cookie pieces, toasted nuts, or chopped candy bars during the last 1–2 minutes of churning so they stay suspended and don’t sink to the bottom.
- Chunk timing: add mix‑ins at soft‑serve stage or in the final minute if your maker runs fast.
- Ribbons: layer hot fudge, caramel, or fruit sauce as you transfer to the container, then gently swirl with a butter knife for clean ribbons.
- Prep tips: pre‑chill add‑ins and pat fruit dry so sauces remain distinct and the base keeps its texture.
- Balance: offset sweetness with a pinch of salt or roasted nuts; aim for about 1 cup of add‑ins per quart to keep churn efficiency.
Create combos like cookies‑and‑cream, peanut butter ripple, or berry‑vanilla to match your favorite toppings. Keep notes on timing and volumes so you can repeat your perfect scoop profile every time.
Serving Ideas: From Classic Sundaes to Ice Cream Sandwiches
Serve your homemade vanilla with simple, show-stopping touches that make each spoonful sing. A few warm sauces and bright fruit turn a plain scoop into a memorable dessert.
Hot fudge, whipped cream, sprinkles, and fresh berries
Build a classic sundae with warm hot fudge sauce, a cloud of whipped cream, colorful sprinkles, and fresh berries for contrast.
Drizzle sauces sparingly so they enhance, not overwhelm, the vanilla profile.
Pair with pie, cobbler, or brownies for temperature contrast
Top warm apple pie, peach cobbler, or fudgy brownies to create a hot‑and‑cold bite that guests love.
For plated desserts, use a warm knife to form clean quenelles or elegant oval scoops.
Root beer floats, affogatos, and party‑friendly sandwiches
Go nostalgic with root beer floats or café‑style affogatos by pouring espresso over a scoop.
For sandwiches, chill cookies first so they don’t crack, then press chilled scoops between them and roll edges in mini chips or nuts.
- Quick party tip: set out a small toppings bar—chopped nuts, crushed cookies, and fruit—so guests can customize.
- Portion into cups for easy serving and keep covered in the freezer until guests arrive.
- Use chilled bowls and spoons when serving large groups to help scoops hold their shape.
“Let the simple, homemade vanilla shine; use accoutrements to add personality rather than mask flavor.”
Storage, Shelf Life, and Make‑Ahead
Storing your batch smartly keeps flavor bright and texture silky long after the churn stops. Follow a few simple habits to prevent large crystals and maintain that spoonable mouthfeel.
How long it keeps and how to prevent crystals
For best results, enjoy your batch within 2–3 weeks. Over longer time, aromas fade and crystals grow.
Press plastic wrap directly on the surface before sealing the lid. That thin barrier stops air and limits ice buildup.
Container tips and batch expectations
Use airtight, freezer‑safe tubs and pre‑chill containers so the churned mix sets faster. Keep tubs toward the back of the freezer where temperature stays steady.
- Portions: this method yields about 1.5 quarts per batch—perfect for family servings.
- Serve tip: let a tub sit a couple of minutes at room temperature for cleaner scoops.
- Make‑ahead: you can mix the base and chill up to 24 hours before churning to save time when hosting.
This approach preserves body even for an ice cream without yolks because balanced dairy and smart storage hold texture and flavor. Pin these steps so every batch arrives at the table tasting its best.
Nutrition and Ingredient Notes
Small tweaks to sugar and dairy fat make a big difference in every spoonful. Understanding how each ingredient behaves helps you tune texture and taste with confidence.
Why sugar and fat matter for texture
Sugar lowers the freezing point so the base stays scoopable rather than turning rock solid after a long chill. Fully dissolving sugar in cold milk before adding cream improves consistency and reduces grainy bits.
Fat from heavy cream and whole milk supplies a plush mouthfeel that mimics custard. This structure is why an ice cream without yolks still feels rich.
- The right balance of milk solids and fat supports a stable emulsion and fewer ice crystals.
- High‑quality vanilla adds fragrant complexity so simple ingredients shine.
- Expect roughly 170–240 kcal per serving depending on ratios and mix‑ins.
- Avoid drastic cuts to sugar or fat; both act as structural allies for consistent creaminess.
- Use very cold dairy and a brief pre‑chill to limit crystal size and protect silky texture.
Conclusion
Finish strong: this simple method gives reliably smooth, vanilla ice cream with minimal fuss.
You now have a four‑ingredient formula that churns in about 20–25 minutes and firms after a short 2‑hour set. Expect roughly 1.5 quarts per batch and consistent texture from a cold bowl and full‑fat dairy.
Use the base to branch into chocolate ice cream, ribbons and mix‑ins, or keep it pure to show off quality vanilla extract and simple ingredients. Store jars toward the back of the freezer and enjoy within 2–3 weeks for best flavor and texture.
Pin this recipe and note your maker’s ideal churn time. With a little practice, your homemade ice will be the go‑to treat for gatherings and quiet nights alike.
FAQ
How is this homemade vanilla dessert different from custard-style versions?
What core ingredients do I need and how long does it take?
Can I use vanilla bean or paste instead of extract?
Do I need an ice cream maker and which brands work best?
How do I prevent icy texture and maintain creaminess?
When should I add mix-ins like chocolate chips or cookie pieces?
How long can I store homemade pints in the freezer?
Can I make a lower-sugar or lighter version without losing texture?
Is it possible to make chocolate or other flavored variations with this base?
Any tips for serving and pairing at gatherings?
How do nutrition and fat content affect final texture?


