


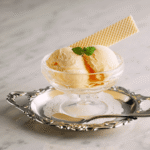
Banana Berry Ice Cream
4
servings30
minutes40
minutes300
kcal1
hour10
minutesA creamy, fruity ice cream made with bananas and berries.
Keep the screen of your device on
Ingredients
2 cups 2 heavy cream
0.5 cup 0.5 whole milk
0.75 cup 0.75 sugar
1 tablespoon 1 vanilla extract
2 2 ripe bananas
1 cup 1 mixed berries
Directions
- In a blender, combine bananas and mixed berries until smooth, ensuring there are no chunks for a creamy texture.
- In a medium bowl, whisk together heavy cream, whole milk, sugar, and vanilla extract until sugar is fully dissolved.
- Combine the fruit puree with the cream mixture, stirring well to ensure a consistent blend for even flavor.
- Cover the mixture and chill in the refrigerator for at least 2 hours to allow flavors to develop.
- Pour the chilled mixture into an ice cream maker and churn according to the manufacturer's instructions, approximately 20-25 minutes.
- For a firmer consistency, transfer the churned ice cream into a lidded container and freeze for 2-4 hours before serving.
Recipe Video
Nutrition Facts
- Total number of serves: 6
- Calories: 180kcal
- Cholesterol: -mg
- Sodium: -mg
- Potassium: -mg
- Sugar: -g
- Protein: -g
- Calcium: -mg
- Iron: -mg
- Thiamin: -mg
- Riboflavin: -mg
- Niacin: -mg
- Folate: -mg
- Biotin: -mg
- Phosphorus: -mg
- Iodine: -mg
- Magnesium: -mg
- Zinc: -mg
- Selenium: -mg
- Copper: -mg
- Manganese: -mg
- Chromium: -mg
- Molybdenum: -mg
- Chloride: -mg
Did you make this recipe?
Tag @https://www.instagram.com/ice_cream_haven/ on Instagram and hashtag it with #IceCreamIceCreamHavens
Like this recipe?
Follow @https://www.pinterest.com/Ice_Cream_Haven/ on Pinterest
Join our Facebook Group!
Follow https://www.facebook.com/icecreamhavens/ on Facebook
Why You’ll Love This Banana Berry Ice Cream
Turn frozen fruit into a silky soft-serve using only a high-powered blender or food processor. In 2–3 minutes, frozen slices of ripe fruit and mixed berries become a smooth, scoopable treat—no machine churning required.
Creamy texture in minutes, no ice cream maker needed
High-powered blenders and processors pulse frozen pieces into a creamy mouthfeel. Pause to scrape the sides, then blend again for even texture.
Dairy-free, vegan, and family-friendly
This version is naturally dairy-free and vegan by default. Add a splash of coconut milk or yogurt if you need a looser blend. Sweetness is flexible—use ripe fruit alone or a touch of honey or maple syrup.
- Prep is minimal: slice and freeze ahead, then blend for instant soft-serve.
- Kids enjoy making and topping bowls with granola, raspberries, or nuts.
- Simple flavor tweaks — vanilla or a pinch of salt — lift the natural notes.
For a full step-by-step guide and tips, check this easy vegan version at vegan banana ice cream guide.
Banana Berry Ice Cream Recipe
This quick guide shows the timing, yield, and simple steps to make a frozen fruit treat at home.
At-a-glance: time, servings, and core method
Plan: 5 minutes active, 2–3 hours to freeze fruit, plus 1–2 hours optional set time for firmer scoops.
- Ingredients: about 2 ripe bananas, 1½ cups mixed berries (raspberries, strawberries, blueberries), optional ½ tsp vanilla, sweetener to taste, and ¼ cup coconut milk or yogurt.
- Yield: ~4 servings, roughly 180 kcal per serving with a fruit-only base.
- Core method: freeze sliced fruit 2–3 hours; blend 2–3 minutes in a sturdy blender or food processor, scraping sides. Add just enough liquid to achieve a smooth, thick texture.
- Finish: serve immediately as soft-serve or transfer to a shallow container and freeze 1–2 hours for scoopable results.
Tip: taste while blending and add a pinch of salt or a splash of vanilla to lift flavors. Pulse when the motor stalls to protect your equipment.
Essential Equipment for the Perfect Blend
Choosing the proper appliances keeps motors safe and yields a creamier final product. Use a high-powered blender or a food processor to handle frozen fruit. Both work well, but each has strengths.
Blender vs. food processor: which to use and when
Blender: best for silky textures when you add a splash of liquid. Stop and scrape the sides often so everything blends evenly.
Food processor: great for thick, drier mixes and larger batches. Pulse to protect the motor and keep blades moving.
Freezer-safe container and scoop tips
Store the set ice cream in an airtight, freezer-safe container. Press parchment or plastic wrap on the surface before sealing to reduce ice crystals.
For serving, let the container sit 5–10 minutes at room temp before you scoop. Warm your scoop by dipping it in hot water and shaking off excess for cleaner, smoother scoop ice cream.
- Blend in portions for large batches to avoid overheating the processor.
- Slice berries and bananas before freezing to ease blade strain.
- Adding 1–2 tbsp coconut milk or yogurt helps a blender form a vortex without thinning the mix too much.
Simple, Wholesome Ingredients
Start with a clean list of items to get consistent, tasty results. Use ripe produce for natural sweetness and a smooth texture.
Main produce: ripe bananas and mixed berries
Fruit base: about 2 large bananas and 1½ cups mixed berries — strawberries, blueberries, raspberries, and blackberries. This ratio gives body from the bananas and bright, tart notes from the berries.
Creaminess boosters: coconut milk or yogurt
For silkiness, add roughly 1/4 cup full-fat coconut milk or a spoonful of yogurt. A small splash helps the blender form a smooth vortex without thinning the mix too much.
Sweetness and flavor: honey, maple, vanilla, pinch of salt
Adjust sweetness with 1–2 tablespoons honey or maple syrup when berries are extra tart. Stir in 1/2 teaspoon vanilla and a tiny pinch of salt to lift the overall flavors.
Optional add-ins: nut butter, cacao nibs, chocolate chips
- Blend 1 tablespoon almond or peanut butter for richness.
- Fold in a handful of dark chocolate chips or cacao nibs for crunch.
- Keep granola as a topping rather than blending to preserve texture.
“Use very ripe bananas to reduce added sweetener and improve texture.”
Tip: Work with frozen fruit for instant soft-serve. If starting fresh, freeze slices on a tray in a single layer first. Small tweaks — an extra splash of coconut milk or a few more berries — let you dial in the balance you prefer.
Step-by-Step Instructions for Creamy Results
With a few simple moves you can get smooth, scoopable results every time. Follow these steps to prep, blend, and set so the final texture stays dense and silky.
Prep and freeze
Slice ripe bananas and spread them with the berries on a baking sheet. Freeze for 2–3 hours until solid.
Blend to soft-serve
Load frozen fruit into a high-powered blender or food processor with a splash of coconut milk or yogurt if needed. Blend in short bursts, stopping to scrape the sides so everything mixes evenly.
Watch for a thick, creamy ribbon in about 2–3 minutes. Add only enough liquid to keep the motor moving while keeping the mix dense.
Set and scoop
For a soft-serve treat, serve immediately while the texture is cold and spoonable.
For firmer scoops, transfer to a shallow, airtight container. Press parchment on the surface and freeze 1–2 hours. Let rest 5–10 minutes at room time before scooping for a smoother bite.
- Tip: Blend in batches if your appliance struggles to preserve consistency and protect the motor.
- Adjust sweetness after blending with a touch of honey or maple if fruit is tart.
- Keep the fruit-to-liquid ratio steady to avoid a slushy texture.
“Freeze fruit fully and scrape the sides while blending for the creamiest results.”
Banana Berry Ice Cream Recipe Pro Tips to Nail the Texture Every Time

Nailing a dense, scoopable finish starts with fruit that is perfectly ripe and frozen correctly. Use very ripe, brown-speckled bananas for natural sweetness and a custard-like creaminess without added sugar.
Freeze and blend the smart way
Slice fruit and freeze pieces in a single layer so they don’t clump. This speeds blending and protects the final texture.
Pulse in short bursts and stop to scrape the sides often. If the motor stalls, wait 2–3 minutes for edges to soften rather than adding more liquid.
Store to avoid ice crystals
Press parchment or plastic directly onto the surface before sealing. Place the block in an airtight container and keep it in the freezer.
“Enjoy your banana berry ice within about a week for best texture; longer storage increases icy shards.”
- Limit added liquid — too much thins the body and weakens the ice cream feel.
- Keep batch sizes manageable for your blender so frozen bananas process evenly.
- Let set portions soften a few minutes at room temp before scooping to avoid icy shards.
Tasty Flavor Variations to Try
A few smart additions let you build versions that range from indulgent to protein-rich. These tweaks keep the core method intact while creating new tastes and mouthfeel.
Chocolate banana berry
Add 2 tablespoons of unsweetened cocoa or a sprinkle of cacao nibs for depth. For ribbons of indulgence, swirl in 2 tablespoons of melted dark chocolate after blending.
Nutty delight
Stir in 1 tablespoon of almond, peanut, or cashew butter to enrich the base and boost healthy fats. Mix-ins keep the final texture dense, so add just a spoonful at a time.
Coconut dream
Use 1/4 cup full-fat coconut milk or cream and fold in toasted coconut flakes for crunch and tropical notes. This version increases silkiness without thinning the mix too much.
Protein-packed
Add a scoop of vanilla or chocolate protein powder, or blend a spoonful of Greek yogurt. These options make a great post-workout treat while keeping the dessert satisfying.
Berry lemon zest
Zest 1/2 teaspoon of lemon or lime and add a few drops of juice to brighten the fruit. Citrus lifts tart notes and balances richer add-ins like chocolate or nut butter.
“Keep add-ins moderate so the base retains its dense, scoopable texture.”
- Create chocolate ribbons by swirling melted chocolate at the end.
- Add chips or nibs last so they stay intact in scoops.
- Taste and adjust sweetness after mixing cocoa or citrus.
- Try extra strawberries for a sweeter profile or raspberries for more tang.
- For more ideas, see the compact banana ice guide.
Banana Berry Ice Cream Recipe Serving Ideas, Toppings, and Pairings

Finish your batch with playful toppings and simple pairings that make every serving feel special. Serve soft-serve right from the blender or chill briefly for firmer scoops to scoop ice cream into classic bowls or cones.
Scoop into bowls or cones for classic vibes
Offer a soft-serve option straight away for a creamy, spoonable treat. For defined scoops, set the mix 30–90 minutes, then scoop into a bowl or cone for easy serving.
Crunch, fruit, and drizzle toppings
Top with crunchy granola or chopped nuts to add texture contrast. Fresh fruit like extra raspberries or banana slices brightens each bite.
- Crunch: granola, chopped nuts, or coconut flakes.
- Drizzle: honey, maple, or melted dark chocolate.
- Finish: a light dusting of cinnamon or a tiny pinch of sea salt to sharpen flavor.
Parfaits, sandwiches, and warm pairings
Layer yogurt, granola, and fruit into parfaits for brunch or tuck a scoop between cookies to make quick ice cream sandwiches. Pair cold scoops with warm brownies, cookies, or waffles for a satisfying hot-cold dessert contrast.
“Portion smaller scoops to keep structure and make toppings easier to enjoy.”
Make-Ahead, Storage, and Freezer Tips
A little planning with portioned fruit packs keeps blending fast and blades happier. Prep single-batch bags by slicing fruit and measuring berries and frozen bananas into labeled packs. Freeze flat so pieces chill quickly and stack neatly in the freezer.
Batch-prepping freezer packs
Assemble single portions for easy dump-and-blend convenience. Flatten bags on a tray before freezing so they freeze faster and separate cleanly when you blend.
How to store, prevent freezer burn, and soften before serving
Blend straight from frozen; if pieces are rock-solid, let them sit 2–3 minutes so your food processor or blender won’t strain. After blending, transfer the ice cream into an airtight container and press parchment or plastic directly on the surface.
This barrier reduces ice crystals and helps preserve a smooth, dense set. Use batches within about a week for best flavor and texture, though stored tubs remain safe longer.
- Freeze packs flat for faster freeze time and easy stacking.
- Smaller, shallow containers freeze and soften more evenly for serving.
- Label packs with date and ratios so you can repeat favorite banana berry blends.
- Let set tubs rest 5–10 minutes at room temp before scooping for smoother scoops.
“This make-ahead method is a smart alternative to store-bought pints when you want control over sweetness and ingredients.”
Banana Berry Ice Cream Recipe Nutrition & Diet Notes for Today’s Kitchen

A short ingredient list and whole fruit make this frozen treat a cleaner alternative to many store-bought pints. Relying on fruit for sweetness adds fiber and nutrients without long labels.
Healthier alternative to store-bought ice cream
This fruit-forward dessert leans on bananas and mixed berries for flavor and body. Per serving, a fruit-only blend runs about 167–180 kcal, with potassium, vitamin C, and fiber from blueberries, strawberries, blackberries, and raspberries.
Keep portions mindful — sugar content varies by banana ripeness and the berry mix.
Low-dairy to dairy-free swaps and lower-carb alternatives
By default this is dairy-free. Add 1/4 cup coconut milk for richness or a spoonful of Greek yogurt for protein.
- Lower-carb swap: replace part of the banana with avocado or coconut cream to cut sugars but keep a creamy texture.
- Texture tip: use minimal liquid and proper storage to preserve a dense, scoopable bite without stabilizers.
- Rotate berries: switch blueberries, strawberries, blackberries, and raspberries to vary micronutrients and flavor.
“This simple fruit mix is a satisfying, cleaner dessert that fits many lifestyles.”
Conclusion
With minimal prep and common kitchen tools, you can enjoy a dense, fruity frozen treat fast.
Banana Berry Ice Cream Recipe, Blend frozen fruit to soft-serve in minutes, then set briefly for scoopable texture. Use a reliable blender or a steady food processor, pulse and scrape the sides, and you’ll get smooth results every time.
The base is flexible — make banana berry and add chocolate swirls, citrus zest, or nut butter to vary flavors. Prep freezer packs for quick weeknight desserts and store the set in an airtight container with a surface cover to limit ice crystals.
Follow simple habits — ripe fruit, minimal liquid, and short time at room temp before scooping — and you’ll have a wholesome ice cream that rivals store pints. Blend a batch today and customize it to your perfect taste.
FAQ
How long does it take to make this banana berry frozen treat?
Do I need an ice cream maker to get creamy results?
Can I make this dairy-free or vegan?
What’s the best way to freeze fruit for this dessert?
How do I prevent ice crystals and freezer burn?
Can I add mix-ins like chocolate or nuts without ruining the texture?
What if my blender struggles with frozen fruit?
How do I get a firmer scoop for cones or sandwiches?
Are there protein-friendly or lower-sugar variations?
How can I scale the recipe for a party or batch prepping?
What toppings and pairings work best?
Can I use frozen mixed fruit blends instead of separate berries and sliced bananas?


