


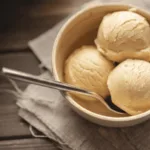
Dairy and Sugar Free Ice Cream
4
servings30
minutes40
minutes300
kcal1
hour10
minutesA simple and delicious dairy-free, sugar-free ice cream recipe.
Keep the screen of your device on
Ingredients
2 cups 2 coconut milk
0.5 cup 0.5 maple syrup
1 tablespoon 1 vanilla extract
0.25 teaspoon 0.25 salt
Directions
- In a blender, combine the coconut milk, maple syrup, vanilla extract, and salt until smooth and well mixed.
- Pour the blended mixture into an airtight container and refrigerate for at least 2 hours or until completely chilled.
- Once the mixture is chilled, pour it into an ice cream maker and churn according to the manufacturer's instructions.
- Typically, churning should take about 15-20 minutes until the mixture reaches a soft-serve consistency.
- Transfer the ice cream to a lidded container, cover tightly, and freeze for at least 1 hour for a firmer texture.
- For best results, serve the ice cream slightly softened by allowing it to sit at room temperature for a few minutes.
Recipe Video
Nutrition Facts
- Total number of serves: 6
- Calories: 150kcal
- Cholesterol: 0mg
- Sodium: -mg
- Potassium: -mg
- Sugar: -g
- Protein: -g
- Calcium: -mg
- Iron: -mg
- Thiamin: -mg
- Riboflavin: -mg
- Niacin: -mg
- Folate: -mg
- Biotin: -mg
- Phosphorus: -mg
- Iodine: -mg
- Magnesium: -mg
- Zinc: -mg
- Selenium: -mg
- Copper: -mg
- Manganese: -mg
- Chromium: -mg
- Molybdenum: -mg
- Chloride: -mg
Did you make this recipe?
Tag @https://www.instagram.com/ice_cream_haven/ on Instagram and hashtag it with #IceCreamIceCreamHavens
Like this recipe?
Follow @https://www.pinterest.com/Ice_Cream_Haven/ on Pinterest
Join our Facebook Group!
Follow https://www.facebook.com/icecreamhavens/ on Facebook
Introduction and Inspiration
Transform your dessert game with a treat that’s as nutritious as it is delicious. The inspiration behind this creation stems from a desire to enjoy classic flavors without compromising on health. By using innovative substitutions, this dessert elevates taste while keeping calories in check.
At the heart of this creation is coconut, a versatile ingredient that adds richness and creaminess. Paired with natural vanilla extract, it delivers a flavor profile that’s both familiar and indulgent. These ingredients work together to recreate beloved traditions with a healthier twist.
What makes this approach so special is its simplicity. You don’t need complex techniques or equipment to achieve gourmet results. With just a few steps, you can create a dessert that’s smooth, velvety, and utterly satisfying. It’s proof that healthy eating doesn’t mean sacrificing flavor.
For those exploring dietary-friendly options, this coconut-based treat is a game-changer. Whether you’re a fan of classic vanilla or crave the richness of chocolate, this recipe offers endless possibilities. It’s a celebration of flavor, health, and creativity—all in one delightful bite.
Ingredients Breakdown The Key to Success

Discover the magic of wholesome ingredients that make this dessert a standout. Each component plays a vital role in creating a creamy, flavorful treat. By choosing the right elements, you can enjoy a healthier indulgence without sacrificing taste.
Coconut Milk & Cream Alternatives
Full-fat coconut milk is the star of this recipe. It provides a rich, velvety texture that mimics traditional creaminess. For an even thicker consistency, opt for coconut cream. These alternatives are perfect for those avoiding dairy while still delivering a luxurious mouthfeel.
Natural Sweetener Choices
Instead of refined sugar, this recipe uses natural options like monk fruit or maple syrup. These sweeteners add just the right amount of sweetness without spiking your blood sugar. They also enhance the flavor profile, making each bite a delight.
Here’s a quick guide to the essential ingredients and their roles:
- Coconut milk/cream: Adds richness and creaminess.
- Natural sweeteners: Provide balanced sweetness.
- Vanilla extract: Enhances flavor depth.
Balancing these ingredients ensures a dessert that’s both delicious and nutritious. With precise measurements and quality choices, you’ll achieve a treat that’s as satisfying as it is healthy.
Equipment Essentials and Preparation Tips Dairy and Sugar Free Ice Cream Recipe

Achieving the perfect texture starts with the right tools and techniques. Whether you’re a beginner or a seasoned pro, understanding your equipment options is key to success. From high-powered blenders to dedicated ice cream makers, each tool offers unique benefits.
Ice Cream Maker vs No-Churn Options
Using an ice cream maker ensures a creamy, consistent mixture with minimal effort. These machines churn the base while freezing it, locking in flavor and smoothness. For best results, pre-freeze the bowl for at least an hour before use.
If you don’t have an ice cream maker, the no-churn method works just as well. Simply blend your ingredients until smooth, then freeze in a shallow container. Stirring the mixture every 30 minutes for the first two hours prevents ice crystals, ensuring a velvety texture.
Blender Techniques for Smooth Texture
A high-powered blender, like a Vitamix, is ideal for creating a silky base. Blend your ingredients on high speed for about a minute, ensuring the mixture is well-combined. Adding a splash of vanilla extract enhances the flavor profile without overpowering it.
For optimal results, pre-freeze your blending container and ingredients. This reduces the freezing time and helps maintain the dessert’s creamy consistency. Patience is key—allow the mixture to chill for at least an hour before serving.
Step-by-Step Preparation Process Dairy and Sugar Free Ice Cream Recipe

Creating a smooth, creamy dessert is easier than you think with these simple steps. By following each instruction carefully, you’ll achieve a velvety texture that’s both indulgent and satisfying. Let’s dive into the process!
Mixing and Blending Techniques
Start by combining your base ingredients in a blender. Ensure the sweetener fully dissolves to avoid graininess. Blend on high speed for about a minute until the mixture is smooth and homogenous. This step is crucial for achieving a rich, fat-based consistency.
For best results, chill your blending container beforehand. This helps maintain the dessert’s creamy texture. Add a splash of vanilla extract to enhance the flavor profile without overpowering it.
Freezing and Churning Methods
If using an ice cream maker, pre-freeze the bowl for at least an hour. Pour the blended mixture into the machine and churn for about 20 minutes. This locks in the flavor and ensures a smooth finish.
For a no-churn option, transfer the mixture to a shallow container. Freeze it, stirring every 30 minutes for the first two hours. This prevents ice crystals and maintains a creamy texture. Patience is key—allow it to set fully before serving.
By following these instructions, you’ll create a dessert that’s as delightful as it is easy to make. Enjoy the process and the delicious results!
Expert Tips for a Perfect dairy and sugar free ice cream recipe

Unlock the secrets to a perfectly smooth dessert with these expert tips. Whether you’re a beginner or a seasoned pro, these insights will help you achieve a luxurious texture every time. From precise churning times to subtle flavor tweaks, these techniques ensure your creation is both indulgent and healthy.
Pro Tips for Achieving Creamy Consistency
Start with full-fat coconut milk for a rich, velvety base. This ingredient is key to mimicking traditional creaminess without dairy. For an even smoother texture, let the mixture thaw slightly before blending. This step ensures a homogenous consistency with no icy chunks.
If you’re using an ice cream maker, pre-freeze the bowl for at least an hour. Churn the mixture for 20-25 minutes to lock in flavor and smoothness. For no-churn methods, stir the dessert every 30 minutes during the first two hours of freezing. This prevents ice crystals and maintains a creamy finish.
Here are some advanced tips to elevate your dessert:
- Add a splash of vanilla extract to enhance flavor depth.
- Experiment with natural sweeteners like monk fruit for balanced sweetness.
- Use a high-powered blender for a silky, lump-free texture.
For a creamier result, try this easy dessert recipe. It’s simple, customizable, and perfect for all skill levels. With these pro tips, you’ll create a treat that’s as delightful as it is easy to make.
Flavor Variations and Creative Twists
Elevate your dessert experience with endless flavor possibilities. A simple base can transform into a personalized treat with just a few creative additions. Whether you prefer classic flavors or bold combinations, there’s no limit to how you can customize your creation.
Customizing with Vanilla & Chocolate
Start with a classic vanilla base for a timeless favorite. Add a splash of vanilla extract to enhance its richness. For a chocolate twist, mix in cocoa powder or melted dark chocolate. These options are perfect for those who love indulgent yet simple flavors.
For a richer texture, consider using a cream maker. This tool ensures a smooth consistency, especially when working with chocolate. Pair it with a drizzle of maple syrup for a hint of natural sweetness.
Incorporating Fruits and Nuts
Add a burst of freshness with fruit purees or chunks. Berries, mangoes, or bananas blend seamlessly into the base. For a crunchy contrast, toss in chopped nuts like almonds or walnuts. These mix-ins not only enhance flavor but also add a delightful texture.
Experiment with combinations like strawberry and chocolate chip or mango and coconut. These pairings create a unique dessert that’s both refreshing and satisfying. For more inspiration, check out this easy no-churn recipe.
With these ideas, you can turn a basic cream recipe into a masterpiece. Let your creativity guide you and enjoy the process of crafting a dessert that’s uniquely yours.
Adapting the Recipe for Dietary Needs

Tailor your dessert to fit your dietary goals without compromising on taste. Whether you’re following a keto or low-carb plan, this recipe is easy to adapt. With a few simple swaps, you can enjoy a treat that aligns with your health needs.
Keto and Low Carb Modifications
For keto-friendly options, replace traditional sweeteners with monk fruit or stevia. These alternatives keep carbs low while adding just the right sweetness. Incorporate healthy fats like peanut butter or butter to enhance richness and flavor.
Precision is key when freezing. Stir the mixture every 30 minutes during the first two hours. This prevents ice crystals and ensures a creamy texture. Keep it in the freezer until it’s firm but still scoopable.
Here are some tips to make this dessert work for you:
- Use full-fat coconut milk for a creamy base.
- Add cocoa powder for a chocolatey twist.
- Experiment with nuts or seeds for added crunch.
With these adjustments, you can enjoy a delicious treat that fits your lifestyle. Customize it to your preferences and savor every bite!
Time Management and Freezing Techniques
Mastering the art of time management can elevate your dessert-making experience. Proper planning ensures a smooth, velvety finish every time. Whether you’re using a maker or opting for a no-churn method, understanding the freezing process is key to success.
Pre-Freeze Preparations
Start by pre-freezing your container for at least an hour. This step helps maintain the dessert’s creamy consistency. If you’re using a maker, ensure the bowl is fully chilled before pouring in the mixture. For manual methods, a shallow, freezer-friendly container works best.
Let the mixture cool for at least 30 minutes before freezing. This prevents ice crystals and ensures a uniform texture. Adding a splash of maple syrup can enhance flavor while keeping the dessert smooth.
Best Thawing Practices for Creaminess
Thawing is just as important as freezing. Remove the dessert from the freezer 10-15 minutes before serving. This allows it to soften slightly, making it easier to scoop. For a controlled thaw, place it in the fridge for a short period.
Avoid over-freezing by setting a timer. Stirring the mixture every 30 minutes during the first two hours prevents it from hardening too quickly. This technique ensures a creamy, scoopable texture every time.
For more tips on achieving the perfect consistency, check out this easy no-churn recipe. It’s a simple way to make ice cream without compromising on quality.
Troubleshooting Common Issues
Encountering issues with your dessert? Let’s solve them together. Whether it’s an icy texture or an overly sweet flavor, small adjustments can make a big difference. Here’s how to tackle the most common challenges and achieve the perfect treat.
Solving Texture Problems
One of the most frequent issues is an icy or grainy texture. This often happens when the mixture freezes too slowly or contains too much water. To fix this, ensure your base is well-balanced with enough solids, like peanut butter or coconut cream, to minimize free water.
Pre-freezing your container and ingredients can also help. Keep the mixture at the right temperature before churning. If you’re using a machine, make sure the bowl is fully chilled. For no-churn methods, stir the mixture every 30 minutes during the first two hours of freezing to prevent large ice crystals.
Balancing Sweetness and Flavor
If your dessert is too sweet, try reducing the amount of natural sweeteners like monk fruit or maple syrup. You can also add a pinch of salt to balance the flavors. For a richer taste, incorporate ingredients like cocoa powder or roasted nuts.
Letting the mixture sit at room temperature for a few minutes before serving can enhance its flavor profile. This slight thawing allows the ingredients to meld together, creating a smoother, more enjoyable experience.
For more tips on perfecting your dairy-free ice, explore our detailed guide. With these solutions, you’ll be able to troubleshoot confidently and enjoy a flawless dessert every time.
Serving Suggestions and Pairing Ideas
Take your dessert presentation to the next level with these creative ideas. Whether you’re hosting a dinner party or enjoying a quiet night in, the right pairings and garnishes can elevate your treat into a gourmet experience. Let’s explore how to serve your dessert in style.
Dessert Pairings for a Gourmet Experience
Pair your dessert with warm brownies or gluten-free cookies for a delightful contrast. The combination of creamy and crunchy textures creates a memorable bite. Fresh fruit compotes, like berry or mango, add a burst of flavor and color to your plate.
For a quick and elegant option, drizzle a spoonful of maple syrup or sprinkle crushed nuts on top. These simple additions enhance both taste and presentation. If you’re using a blender, whip up a smooth fruit sauce to serve alongside your treat.
Garnishing Techniques for Visual Appeal
Garnishes are the finishing touch that makes your dessert stand out. Try these ideas to add flair:
- Fresh mint leaves for a pop of green.
- Edible flowers for a touch of elegance.
- Chocolate shavings for a decadent finish.
Let your creativity shine by experimenting with different styles. For special occasions, layer your dessert with crumbled cookies or toasted coconut flakes. These techniques not only look stunning but also add layers of flavor.
Quick Serving Methods
To ensure your dessert is at the perfect texture, thaw it at room temperature for 10-15 minutes before serving. This allows it to soften slightly, making it easier to scoop. For a quicker option, use a blender to create a smooth, soft-serve consistency in just a few minutes.
For more inspiration on how to make ice cream-style desserts, check out this easy 3-ingredient recipe. It’s a simple way to create a treat that’s both delicious and visually appealing.
With these serving and pairing ideas, you can turn a basic dessert into a masterpiece. Experiment with flavors, textures, and presentations to make every bite special.
Conclusion
Creating Dairy and Sugar Free Ice Cream Recipe treat doesn’t have to be complicated. This innovative dessert showcases how simple ingredients like honey and coconut can transform into something extraordinary. With just a bowl and a few steps, you can enjoy a creamy, indulgent experience that’s both healthy and satisfying.
Using natural ingredients ensures a guilt-free indulgence. Whether you’re adding a pinch of salt for balance or drizzling honey for sweetness, the results are always delightful. This method is perfect for anyone looking to experiment in the kitchen while keeping things wholesome.
Feel confident in your ability to recreate this dessert flawlessly. Share it with friends, pair it with a cookie, or try new flavor combinations. The possibilities are endless, and your creativity is the only limit.
For more inspiration, explore the passionate team behind these ideas. Let their expertise guide you as you craft your next masterpiece. Embrace the joy of creating something uniquely yours!
FAQ
Can I make this without an ice cream maker?
What’s the best natural sweetener to use?
How do I achieve a creamy consistency?
Can I add mix-ins like chocolate or nuts?
How long does it take to freeze?
Can I customize the flavors?
Is this recipe keto-friendly?
What’s the best way to store leftovers?
Can I use almond milk instead of coconut milk?
How do I prevent ice crystals from forming?


