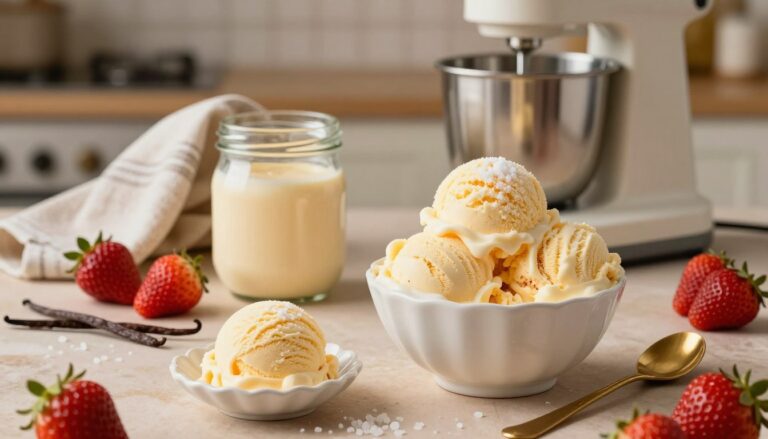
Creating the perfect frozen treat is both an art and a science. With the right techniques, you can achieve a texture that’s smooth, rich, and utterly satisfying. Drawing from expert advice by Stef Ferrari of Hay Rosie Craft Ice Cream Co., this guide will help you master the craft of Creamiest Icy Ice Cream Recipes.
One of the secrets to achieving that dreamy consistency lies in managing ice crystals. By balancing fast freezing with precise temperature control, you can create a dessert that’s creamy rather than icy. Using an ice cream maker simplifies this process, ensuring even churning and optimal results.
Experimenting with flavors is where the fun begins. Whether you’re a fan of classic vanilla or adventurous combinations, the possibilities are endless. With a little creativity and the right tools, you can transform simple ingredients into a masterpiece that delights your taste buds.
Key Takeaways
- Master the balance of temperature to avoid large ice crystals.
- Use an ice cream maker for consistent, creamy results.
- Experiment with unique flavors to make your dessert stand out.
- Chill your mixture thoroughly for the best texture.
- Small ice crystals are key to achieving a smooth, creamy finish.
Creamiest Vanilla Ice Cream
4
servings30
minutes40
minutes300
kcal1
hour10
minutesSimple homemade vanilla ice cream with everyday ingredients.
Keep the screen of your device on
Ingredients
2 cups 2 heavy cream
1 cup 1 whole milk
0.75 cup 0.75 granulated sugar
1 tablespoon 1 vanilla extract
0.25 teaspoon 0.25 salt
Directions
- In a mixing bowl, whisk together the heavy cream, whole milk, granulated sugar, vanilla extract, and salt until the sugar is completely dissolved.
- Cover the mixture with plastic wrap and refrigerate for at least 1 hour or until it is thoroughly chilled.
- Pour the chilled mixture into an ice cream maker and churn according to the manufacturer's instructions, usually around 20 to 25 minutes.
- The ice cream will have a soft, creamy texture when done. For a firmer consistency, transfer the ice cream to an airtight container and freeze for at least 2 hours.
- To serve, remove the ice cream from the freezer and let it sit at room temperature for a few minutes to soften slightly.
Nutrition Facts
- Total number of serves: 8
- Calories: 250kcal
- Cholesterol: 65mg
- Sodium: 95mg
- Potassium: 115mg
- Sugar: 22g
- Protein: 3g
- Calcium: 100mg
- Iron: 0mg
- Thiamin: 0mg
- Riboflavin: 0mg
- Niacin: 0mg
- Folate: 0mg
- Biotin: 0mg
- Phosphorus: 100mg
- Iodine: 0mg
- Magnesium: 10mg
- Zinc: 0mg
- Selenium: 0mg
- Copper: 0mg
- Manganese: 0mg
- Chromium: 0mg
- Molybdenum: 0mg
- Chloride: 0mg
Did you make this recipe?
Tag @https://www.instagram.com/ice_cream_haven/ on Instagram and hashtag it with #IceCreamIceCreamHavens
Like this recipe?
Follow @https://www.pinterest.com/Ice_Cream_Haven/ on Pinterest
Join our Facebook Group!
Follow https://www.facebook.com/icecreamhavens/ on Facebook
Introduction to the Ultimate Homemade Ice Cream Journey
There’s something magical about crafting your own creamy treats at home. It’s a journey that combines creativity, precision, and a love for delicious desserts. Whether you’re a beginner or a seasoned enthusiast, making your own frozen delights is an experience worth savoring.
Setting the Stage for Creamy Success
To achieve the perfect texture, understanding the science behind your dessert is key. The formation of ice crystals plays a crucial role in determining whether your treat is smooth or grainy. By using a cream maker, you can ensure even churning and consistent results every time.
Proper ingredient handling is equally important. Chilling your mixture thoroughly before churning helps maintain a creamy consistency. Experimenting with ratios of milk, cream, and sugar can also enhance the richness of your dessert.
Why Homemade Ice Cream Inspires Creativity
One of the greatest joys of making your own frozen treats is the freedom to experiment. From classic vanilla to bold, unique flavors, the possibilities are endless. You can even add mix-ins like nuts, fruits, or chocolate to create a dessert that’s truly your own.
Don’t be afraid to try new recipes, even if they seem challenging. With a little patience and the right tools, you’ll soon master the art of homemade ice desserts. Remember, every batch is an opportunity to learn and improve.
- Use a cream maker for consistent, smooth results.
- Chill your mixture thoroughly to avoid large ice crystals.
- Experiment with flavors and mix-ins to make your dessert unique.
- Enjoy the creative freedom that comes with making treats at home.
Understanding Icy Ice Cream: The Science Behind the Texture
The texture of your dessert is shaped by the science of freezing and crystallization. Achieving that smooth, creamy consistency depends on how well you manage water content and freezing rates. By understanding these principles, you can create a dessert that’s both delicious and satisfying.
The Role of Ice Crystallization and Water Management
Ice crystals are the key to your dessert’s texture. Smaller crystals, around 10 to 20 μm, create a smooth mouthfeel, while larger ones result in a grainy texture. The size of these crystals depends on how quickly your mixture freezes. Faster freezing leads to smaller crystals and a creamier result.
Your recipe plays a crucial role in this process. Ingredients like milk, cream, and sugar bind water molecules, reducing the chance of large crystal formation. Using a maker with a properly frozen bowl ensures even churning and consistent freezing.
Temperature control is equally important. Your freezer should be set to around -18°C (-0.4°F) for static freezing. This prevents large crystals from forming during storage. Pre-chilling your mixture before churning also helps maintain a smooth texture.
Here are some practical tips to manage water content and freezing rates:
- Use a maker with a well-frozen bowl for even churning.
- Chill your mixture thoroughly before churning to reduce crystal size.
- Maintain your freezer at the right temperature for consistent results.
- Experiment with ingredient ratios to enhance water binding in your recipe.
By mastering these techniques, you can create a dessert with the perfect texture every time. The science behind it may seem complex, but the results are worth the effort.
Mastering the Ice Cream Maker Essentials
Mastering the art of homemade frozen desserts starts with the right tools and techniques. Your ice cream maker is the heart of the process, and understanding how to use it effectively can make all the difference. From pre-freezing the bowl to managing churning time, every step plays a crucial role in achieving the perfect texture.
Pre-Freezing Techniques for a Super Cold Bowl
One of the most critical steps is pre-freezing your maker’s bowl. For optimal results, freeze it for at least 12 to 24 hours. This ensures the bowl is cold enough to freeze your mixture quickly, preventing large ice crystals from forming. “A properly frozen bowl is the foundation of a smooth, creamy dessert,” says Stef Ferrari of Hay Rosie Craft Ice Cream Co.
If you’re short on time, consider using a compressor machine, which doesn’t require pre-freezing. However, for canister-style machines, patience is key. A well-frozen bowl ensures even churning and a consistent texture.
Temperature and Mixing Tips for Optimal Churning
Temperature control is just as important as pre-freezing. Keep your mixture chilled before adding it to the maker. This helps maintain a cold environment during churning, reducing the risk of large ice crystals. Monitor the temperature every minute to catch any deviations.
Churning time also impacts the final texture. Over-churning can lead to a grainy consistency, while under-churning may leave your dessert too soft. Aim for a balance, typically around 20 to 30 minutes, depending on your machine. “The key is to churn until the mixture reaches a soft-serve consistency,” advises Food52.
Finally, pay attention to water management in your recipe. Ingredients like milk and cream bind water molecules, enhancing creaminess. Experiment with ratios to find the perfect balance for your homemade treat.
Perfecting Your Homemade Ice Cream Recipe
The secret to a creamy texture lies in the perfect blend of ingredients. Balancing dairy, fat, and sugar is essential for achieving that smooth, rich consistency. With the right techniques, you can create a dessert that’s both indulgent and satisfying.
Balancing Dairy, Fat, and Sugar for Creaminess
Start by selecting the right milk and cream. Heavy whipping cream, with its high fat content, adds richness and helps prevent a grainy texture. Pair it with whole milk for a balanced base. Sugar plays a crucial role too—it binds water molecules, reducing the chance of large ice crystals.
Even a bit of extra fat can make a big difference. Experiment with ratios to find what works best for your recipe. A well-calibrated machine and a pre-chilled freezer bowl ensure even churning and consistent results.
Creating Custom Mix-Ins That Enhance Texture
Mix-ins like nuts, fruits, or chocolate can elevate your dessert. Add them during the final minutes of churning to maintain a smooth texture. Avoid overloading the mixture, as too many add-ins can disrupt the balance.
Get creative with flavors and textures. From caramel swirls to cookie crumbles, the possibilities are endless. With a little experimentation, you can craft a dessert that’s uniquely yours.
Troubleshooting Common Ice Cream Issues
Even the best recipes can hit a snag when making frozen desserts at home. Recognizing and fixing these problems is key to achieving the perfect texture. Here’s how to tackle the most common issues and ensure your treats turn out smooth and creamy every time.
Fixing Crunchy, Icy Texture and Large Ice Crystals
One of the most frequent problems is a crunchy texture caused by large ice crystals. This often happens when the mixture freezes too slowly or has too much water. To avoid this, make sure your freezer bowl is fully pre-frozen for at least 12 hours.
Another thing to consider is the temperature of your mixture. Keep it chilled before churning to prevent crystal growth. “Small ice crystals are the secret to a smooth texture,” says Stef Ferrari of Hay Rosie Craft Ice Cream Co.
- Pre-freeze your bowl thoroughly.
- Chill your mixture to 39°F (4°C) before churning.
- Use a recipe with balanced water and fat content.
Addressing Fat Globule Clumping and Over-Churning
Fat clumping is another common issue, often caused by over-churning. When fat globules stick together, it can create a grainy texture. To fix this, monitor your churning time closely and stop once the mixture reaches a soft-serve consistency.
Another thing to watch is the fat content in your recipe. Too much fat can lead to clumping, while too little can make your dessert icy. Make sure to balance your ingredients for the best results.
- Aim for 20-30 minutes of churning time.
- Balance fat content with milk and sugar.
- Avoid overloading the mixture with add-ins.
By addressing these problems, you can master the art of making ice cream at home. Remember, every mistake is a chance to learn and improve your skills.
Advanced Tips for Consistently Creamy Icy Ice Cream
Taking your frozen dessert game to the next level requires mastering advanced techniques. By incorporating stabilizers, emulsifiers, and innovative flavor enhancers, you can achieve a texture that’s smooth, rich, and long-lasting. Let’s explore how these methods can elevate your homemade creations.
Utilizing Stabilizers and Emulsifiers Effectively
Stabilizers and emulsifiers play a crucial role in reducing ice crystal growth and maintaining a creamy texture. Ingredients like gelatin, pectin, or guar gum bind water molecules, preventing them from forming large crystals. “A small amount of stabilizer can make a big difference in texture,” says Stef Ferrari of Hay Rosie Craft Ice Cream Co.
When using these additives, precision is key. Measure carefully to avoid overuse, which can lead to a gummy consistency. Pair them with balanced ingredient ratios for the best results.
Integrating Alcohol or Flavor Enhancers for Better Texture
Alcohol is a secret weapon for achieving a smoother texture. It lowers the freezing point, preventing your dessert from becoming too hard. Add a tablespoon or two of vodka, rum, or liqueur to your base for a creamy finish.
Flavor enhancers like vanilla extract or fruit purees can also improve texture while adding depth to your dessert. Experiment with small amounts to find the perfect balance.
Here are some advanced tips to keep in mind:
- Use a pre-chilled container to store your dessert and maintain its texture.
- Ensure your mixture is as cold possible before churning for optimal results.
- Monitor churning time closely to avoid overworking the mixture.
- Allow your base to rest in the fridge for at least an hour before freezing.
By experimenting with these techniques, you can create desserts that rival professional quality. Embrace the process and enjoy the delicious rewards of your efforts.
Creative Variations: Enhancing Flavors and Experiences
Unlocking the potential of your frozen creations starts with bold experimentation. By exploring seasonal ingredients and unique combinations, you can transform a simple recipe into a signature dessert. The key is to balance creativity with technique, ensuring your treat remains smooth and delightful.
Experimenting with Seasonal and Inspired Flavors
Seasonal ingredients are a fantastic way to add freshness and variety to your recipes. For example, using ripe strawberries in the summer can bring a burst of natural sweetness. Adjust the amount of fruit to avoid overwhelming the mixture while still keeping it flavorful.
Inspiration can come from anywhere. Think of desserts like “Blackberry Pinot Gelato,” which combines locally grown blackberries with wine-inspired notes. Or try a nostalgic twist with “PB&J Gelato,” blending peanut butter and jelly into a creamy treat. These creative ideas show how small changes can lead to memorable results.
Here are some tips to guide your experimentation:
- Use seasonal fruits like berries or stone fruits to add natural sweetness and texture.
- Balance the amount of mix-ins to avoid altering the dessert’s smooth consistency.
- Try unique combinations, such as pairing spices with sweet flavors for a surprising twist.
- Keep your mixture chilled to keep ice crystals small and ensure a creamy finish.
Don’t be afraid to push boundaries. Whether it’s adding a hint of alcohol to lower the freezing point or incorporating unexpected ingredients like herbs or spices, the possibilities are endless. Every batch is an opportunity to create something uniquely delicious.
Remember, the joy of making ice desserts lies in the process. Embrace the challenge, learn from each attempt, and enjoy the delicious rewards of your creativity.
Optimal Freezing and Storage Techniques for Homemade Ice Cream
Proper freezing and storage are the unsung heroes of creamy, long-lasting homemade treats. Mastering these techniques ensures your dessert stays smooth and delicious, avoiding common pitfalls like freezer burn or unwanted texture changes.
Strategies to Prevent Freezer Burn and Ice Crystal Growth
Freezer burn and large ice crystals can ruin the consistency of your dessert. To prevent this, freeze your mixture as quickly as possible. Rapid freezing minimizes crystal growth, keeping the texture smooth.
Use airtight containers to protect your treat from exposure to air. This helps maintain the dairy base’s integrity and prevents unwanted changes in flavor or texture. Keep your freezer at a stable temperature, ideally below -18°C (-0.4°F), to avoid repeated thawing and refreezing.
- Freeze your mixture quickly to maintain consistency.
- Use airtight containers to prevent freezer burn.
- Keep your freezer at a stable, cold point.
Choosing the Right Containers for Consistent Texture
The container you use plays a big role in preserving your dessert’s quality. Opt for shallow, wide containers with a high surface-area-to-volume ratio. These freeze faster and more evenly, ensuring a consistent texture.
Plastic containers are ideal because they conduct heat better than glass or ceramic. Make sure the lid fits tightly to prevent air from entering. This simple step can make a lot of difference in maintaining the dairy mixture’s creaminess.
- Choose shallow, wide containers for faster freezing.
- Use plastic containers for better heat conductivity.
- Ensure lids fit tightly to avoid air exposure.
By following these techniques, you can preserve the consistency and flavor of your homemade treats. Proper freezing and storage not only enhance the taste but also extend the shelf life of your creations. Commit to these practices, and every scoop will be as delightful as the first.
Conclusion
Crafting the perfect homemade dessert is a rewarding journey that blends creativity and precision. Throughout this guide, we’ve explored essential techniques to ensure every batch turns out smooth and delicious. Balancing ingredients, controlling temperatures, and using the right equipment are key to achieving the desired effect.
Whether you’re using a ice cream mixture for the first time or experimenting with advanced methods, the process is as enjoyable as the results. Troubleshooting common issues and applying expert tips will empower you to create treats that impress at home.
Remember, every batch is an opportunity to refine your skills and explore new flavors. Embrace the journey, and let your creativity shine. With the right techniques, you’ll consistently produce high-quality desserts that delight everyone who tastes them.


