


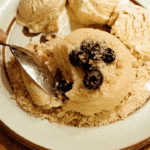
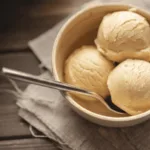
DIY Ice Cream Machine
4
servings30
minutes40
minutes300
kcal1
hour10
minutesEasy vanilla ice cream with everyday ingredients.
Keep the screen of your device on
Ingredients
1 cup 1 heavy cream
1 cup 1 whole milk
0.75 cup 0.75 granulated sugar
1 teaspoon 1 vanilla extract
1 pinch 1 salt
Directions
- In a mixing bowl, combine heavy cream, whole milk, granulated sugar, vanilla extract, and a pinch of salt until well combined.
- Chill the mixture in the refrigerator for at least 2 hours to ensure it’s very cold before churning.
- Set up the ice cream maker according to the manufacturer’s instructions.
- Pour the chilled mixture into the ice cream maker and churn for 20-25 minutes until it reaches a soft-serve consistency.
- Transfer the ice cream to an airtight container and freeze for an additional 2-4 hours to fully harden before serving.
- Store the ice cream in the freezer and always use a clean scoop for best results.
Nutrition Facts
- Total number of serves: 4
- Calories: 240kcal
- Cholesterol: 70mg
- Sodium: 50mg
- Potassium: 100mg
- Sugar: 19g
- Protein: 3g
- Calcium: 100mg
- Iron: 0.1mg
- Thiamin: 0mg
- Riboflavin: 0mg
- Niacin: 0mg
- Folate: 0mg
- Biotin: 0mg
- Phosphorus: 100mg
- Iodine: 0mg
- Magnesium: 10mg
- Zinc: 0.5mg
- Selenium: 4mg
- Copper: 0mg
- Manganese: 0mg
- Chromium: 0mg
- Molybdenum: 0mg
- Chloride: 0mg
Did you make this recipe?
Tag @https://www.instagram.com/ice_cream_haven/ on Instagram and hashtag it with #IceCreamIceCreamHavens
Like this recipe?
Follow @https://www.pinterest.com/Ice_Cream_Haven/ on Pinterest
Join our Facebook Group!
Follow https://www.facebook.com/icecreamhavens/ on Facebook
Essentials for Your DIY Ice Cream Journey
Embarking on your homemade dessert adventure starts with a clear vision. Before diving into the process, take a moment to imagine the perfect flavor and texture. Whether you crave a rich, creamy treat or a light, refreshing option, your vision will guide every step.
Gathering inspiration is the next step. Explore classic recipes for timeless favorites or experiment with innovative mix-ins like fresh fruit or chocolate chunks. Researching different techniques and designs can spark creativity and help you refine your approach.
Quality ingredients are the foundation of great desserts. Fresh milk and the right sugar ratios ensure a smooth, balanced taste. Don’t forget to consider the role of cream in achieving that perfect consistency.
Finally, understanding your tools is crucial. A reliable ice cream maker or cream maker can make the process seamless. By combining your creative vision with the right equipment, you’ll be well on your way to crafting unforgettable desserts.
Essential Tools and Materials for Homemade diy Ice Cream Machine

Crafting homemade desserts requires the right tools and ingredients for success. The quality of your components directly impacts the final product, making it essential to choose wisely. From containers to mix-ins, every detail matters.
Selecting the Right Containers and Hardware
Containers play a crucial role in achieving the perfect texture. An 18 cm plastic container is ideal for small batches, while aluminum options offer durability and efficient heat transfer. Both materials have their advantages, so choose based on your needs.
Hardware like bolts and fittings should be precise. For example, a 6 mm bolt ensures stability during the churning process. Precision in materials leads to smoother results and a more enjoyable experience.
Choosing Quality Ingredients and Mix-Ins
High-quality ingredients are the backbone of great desserts. Fresh milk and the right sugar ratios create a balanced flavor. Adding mix-ins like fresh fruit or chocolate chunks can elevate your creation.
Investing in the right tools and ingredients ensures long-lasting results. Whether you’re a beginner or a seasoned enthusiast, these essentials will help you craft unforgettable treats.
Step-by-Step Construction of Your DIY Ice Cream Machine

Building your own dessert maker is an exciting project that combines creativity and practicality. With a few simple tools and materials, you can create a functional machine that churns out delicious treats. Follow these steps to assemble your homemade churner with ease.
Preparing the Containers and Fittings
Start by selecting the right containers. An 18 cm plastic or aluminum container works well for small batches. Measure and mark the lid for precise drilling. Use a 6 mm bolt to ensure stability during the churning process.
Fit the bolt with washers to prevent corrosion. This step ensures your machine remains durable and efficient. Proper preparation of containers and fittings is key to smooth operation.
Constructing the Shaft and Wings
Cut an aluminum pipe to the required length for the shaft. Bend aluminum sheets to create wings that will churn the mixture effectively. Glue the wings securely to the shaft for optimal performance.
Accurate measurements are crucial here. A well-constructed shaft ensures even churning, resulting in a creamy texture for your ice cream.
Assembling and Securing the Components
Drill holes in the lid for the shaft and fittings. Attach the lid securely to the container. Ensure the paddle turns freely just above the bottom for efficient churning.
Double-check all connections to avoid leaks or instability. Proper assembly ensures your machine operates smoothly and lasts for many batches.
By following these steps carefully, you’ll create a durable and efficient dessert maker. Enjoy the satisfaction of crafting your own ice cream with a machine you built yourself!
Mastering the Science Behind Freezing and Churning
Understanding the science behind freezing and churning can elevate your dessert-making skills. It’s not just about mixing ingredients; it’s about creating the perfect environment for smooth, creamy results. Let’s dive into the fascinating process that transforms simple components into delightful treats.
How Ice and Salt Create the Perfect Freeze
The combination of ice and salt is a game-changer in freezing. Salt lowers the freezing point of water, creating a colder environment. This allows your mixture to freeze evenly, preventing large ice crystals from forming. The result? A smoother, creamier texture that’s hard to resist.
Maintaining consistent temperatures is key. Fluctuations can lead to uneven freezing, affecting the final product. By using the right ratio of ice and salt, you ensure a stable freezing process every time.
Exploring Different Churning Techniques
Churning is where the magic happens. It incorporates air into the mixture, creating that light, fluffy texture we all love. Manual shaking is a simple option, but using a drill with a mixer attachment can save time and effort.
Timing is crucial. Running your machine for about 20 minutes ensures even churning and a smooth consistency. Experiment with different techniques to find what works best for you. Each method offers unique results, so don’t be afraid to get creative!
By mastering the science behind freezing and churning, you’ll unlock the secrets to perfect homemade desserts. Enjoy the process and savor the delicious results!
diy Ice Cream Machine Innovative Methods to Make Ice Cream Without a Machine

Who says you need fancy equipment to enjoy creamy, homemade desserts? With a little creativity, you can whip up delicious frozen treats using everyday kitchen tools. These methods are perfect for anyone who wants to enjoy ice cream without investing in a dedicated machine.
Plastic Bag and Manual Shaking Technique
One of the simplest ways to make ice cream is with a plastic bag and some elbow grease. Start by sealing your mixture in a small, sturdy bag. Place it inside a larger bag filled with ice and coarse salt. Shake vigorously for about 5 to 8 minutes. The salt lowers the freezing point, creating a colder environment for smooth results.
Safety tip: Wear gloves to protect your hands from the cold. This method is not only fun but also a great activity for kids. In just a few minutes, you’ll have a creamy treat ready to enjoy.
Food Processor and Blender Alternatives
If you prefer a hands-off approach, try using a food processor or blender. Freeze your mixture until solid, then break it into chunks. Pulse the chunks in your appliance until smooth and creamy. This method is quick and efficient, perfect for busy dessert lovers.
Experiment with mix-ins like fresh fruit or chocolate to create unique flavors. Whether you use a plastic bag or a blender, these methods prove that you don’t need a fancy ice cream maker to enjoy homemade delights.
These innovative techniques are not only practical but also a fun way to explore your culinary skills. Give them a try and savor the joy of creating your own frozen treats!
diy Ice Cream Machine Delicious Recipes and Flavor Innovations

Unlock a world of flavor with homemade desserts that are as unique as you are. Whether you’re a fan of timeless classics or eager to try bold new combinations, the possibilities are endless. With a few simple ingredients and a dash of creativity, you can craft frozen treats that delight your taste buds and impress your loved ones.
Classic Flavors and Custom Mix-Ins
Start with the basics. A rich base of milk and cream is the foundation of any great dessert. Add sugar to taste and natural extracts like vanilla or almond for depth of flavor. From there, the sky’s the limit. Mix in mini chocolate chips, chopped pecans, or fresh fruit for added texture and taste.
For a classic vanilla, combine 2 cups of whole milk, 1 cup of heavy cream, and ¾ cup of sugar. Stir in 1 teaspoon of vanilla extract for a smooth, creamy finish. Want a twist? Add a pinch of sea salt for a gourmet touch.
Experimenting with Unique Recipes
Ready to get creative? Try blending fresh blueberries with almond extract for a fruity delight. Or mix mint extract with chocolate chunks for a refreshing treat. The key is to experiment and have fun. Divide your base mixture into smaller batches and test different flavors to find your favorite.
For a bold twist, combine miso paste with candied cherries for a sweet and savory profile. Or infuse your base with locally grown lavender for a floral note. The possibilities are endless, and the results are always delicious.
Remember, making ice cream is as much about the journey as the destination. Enjoy the process, and savor every scoop of your homemade creations!
Maintenance, Tips, and Troubleshooting for Your diy ice cream machine
Keeping your homemade dessert maker in top shape ensures consistent, delicious results every time. Regular care and attention can prevent common issues and extend the life of your machine. Let’s explore practical tips to maintain its performance and troubleshoot any challenges.
Regular Cleaning and Component Care
Clean your maker after each use to prevent build-up and corrosion. For plastic parts, use warm, soapy water and a soft cloth. Metal components can be wiped with a damp cloth and dried thoroughly to avoid rust.
Disassemble the machine carefully for deep cleaning. Check seals and fittings for wear and tear. Reapply food-safe sealants or glues if needed to maintain structural integrity.
Overcoming Common DIY Challenges
Loose fittings can disrupt the churning process. Tighten bolts and check connections regularly to ensure stability. For a uniform freeze, pre-chill your mixture to below 39°F (4°C) before use.
If your ice cream turns icy, balance the sugar and solid ingredients to limit free water. Adding 1-2 tablespoons of alcohol per quart can also help maintain a softer texture.
By following these tips, you’ll keep your machine running smoothly and enjoy flawless homemade treats every time.
Conclusion
Homemade frozen treats are a delightful way to explore creativity and satisfy your sweet tooth. From building your own diy Ice Cream Machine maker to mastering the science of freezing, this journey is both fun and rewarding. With the right tools, like quality milk and the perfect balance of sugar and salt, you can craft smooth, creamy desserts that rival any store-bought treat.
Don’t have a dedicated machine? No problem! Alternative methods, like using a blender or plastic bag, make it easy to enjoy homemade goodness. Experiment with flavors, from classic vanilla to bold combinations like miso and cherry. The possibilities are endless.
Remember, the key to success lies in regular maintenance and a willingness to try new things. Share your creations with loved ones and savor the sweet rewards of your efforts. Start your frozen dessert adventure today and discover the joy of making your own treats!
FAQ
What do I need to start making ice cream at home?
Can I make ice cream without a machine?
How does salt help in freezing ice cream?
What are some tips for maintaining my DIY setup?
How can I experiment with unique flavors?
What’s the best way to store homemade ice cream?


