There’s something magical about making your own homemade treats. Whether you’re a dessert enthusiast or just looking for a fun kitchen project, crafting vanilla ice cream from scratch is a rewarding experience. With just a few simple ingredients and a little creativity, you can create a smooth, creamy dessert that rivals any store-bought brand.
This guide will walk you through the process, from selecting the best ingredients to achieving the perfect flavor and consistency. Whether you’re using a trusted recipe or experimenting with mix-ins, the possibilities are endless. Let’s dive into the art of making homemade ice cream and turn your kitchen into a dessert haven!
Key Takeaways
- Making homemade Ice Cream Machine Mixture and rewarding.
- Use quality ingredients for the best flavor and texture.
- Experiment with mix-ins to customize your dessert.
- Chilling the base ensures a smooth consistency.
- This guide covers everything from preparation to troubleshooting.
Strawberry Ice Cream
4
servings30
minutes40
minutes300
kcal1
hour10
minutesCreamy strawberry ice cream with simple ingredients.
Keep the screen of your device on
Ingredients
2 cups 2 fresh strawberries
3/4 cup 3/4 granulated sugar
2 cups 2 heavy cream
1 cup 1 whole milk
1.5 teaspoons 1.5 vanilla extract
1 pinch 1 salt
Directions
- Rinse and hull the fresh strawberries, then slice them up into small pieces and place in a mixing bowl.
- Add 1/4 cup of granulated sugar to the strawberries and allow them to macerate for about 20 minutes.
- Meanwhile, combine the remaining sugar, heavy cream, milk, vanilla extract, and a pinch of salt in another mixing bowl.
- Using a blender or food processor, puree the macerated strawberries until you achieve a smooth mixture.
- Mix the pureed strawberries into the cream mixture until fully combined and the mixture has a uniform color.
- Cover the mixture with plastic wrap and chill in the refrigerator for at least 2 hours or until very cold.
- Pour the chilled mixture into an ice cream maker and churn according to the manufacturer’s instructions, about 20–25 minutes.
- Transfer the churned ice cream to an airtight container and freeze for 4 hours or until firm before serving.
- For the best consistency, allow the ice cream to sit at room temperature for a few minutes before scooping.
Nutrition Facts
- Total number of serves: 6
- Calories: 215kcal
- Fat: 15g
- Saturated Fat: 9g
- Trans Fat: 0g
- Polyunsaturated Fat: 0g
- Monounsaturated Fat: 4g
- Cholesterol: 55mg
- Sodium: 35mg
- Potassium: 160mg
- Carbohydrates: 19g
- Fiber: 1g
- Sugar: 18g
- Protein: 2g
- Vitamin A: 550IU
- Vitamin C: 28mg
- Calcium: 75mg
- Iron: 0.5mg
- Vitamin D: 2mg
- Vitamin E: 1mg
- Vitamin K: 2mg
- Thiamin: 0.03mg
- Riboflavin: 0.2mg
- Niacin: 0.5mg
- Vitamin B6: 0.06mg
- Vitamin B12: 0.3mg
- Folate: 18mg
- Biotin: 6mg
- Pantothenic Acid: 0.5mg
- Phosphorus: 100mg
- Iodine: 9mg
- Magnesium: 20mg
- Zinc: 0.4mg
- Selenium: 4mg
- Copper: 0.1mg
- Manganese: 0.1mg
- Chromium: 0mg
- Molybdenum: 1mg
- Chloride: 60mg
Did you make this recipe?
Tag @https://www.instagram.com/ice_cream_haven/ on Instagram and hashtag it with #IceCreamIceCreamHavens
Like this recipe?
Follow @https://www.pinterest.com/Ice_Cream_Haven/ on Pinterest
Join our Facebook Group!
Follow https://www.facebook.com/icecreamhavens/ on Facebook
Introduction to Homemade Ice Cream
Crafting your own dessert at home brings a sense of joy and creativity. There’s something special about blending simple ingredients into a treat that’s uniquely yours. Whether you’re a seasoned chef or a beginner, making homemade ice cream is a rewarding experience that combines artistry and flavor.
Embracing the Art of Making Ice Cream at Home
Making ice cream at home is more than just a recipe—it’s an expression of creativity. You can experiment with flavors, textures, and mix-ins to create something truly personal. From classic vanilla to bold chocolate chip, the possibilities are endless. Plus, the process itself is fun and engaging, making it a perfect activity for families or friends.
Benefits of a Homemade Approach
When you make ice cream at home, you’re in control. You choose the ingredients, ensuring freshness and quality. Store-bought options often contain additives, but with a homemade approach, you can avoid these and tailor the dessert to your dietary needs. The result? A richer, creamier texture and a flavor that’s unmatched.
- Customization: Add your favorite mix-ins like nuts, fruits, or syrups.
- Freshness: Use high-quality ingredients for a superior taste.
- Dietary Control: Adjust sugar, fat, or dairy to suit your preferences.
With just a few simple steps, you can create a dessert that’s not only delicious but also a reflection of your creativity. So why not give it a try? Your kitchen could be the birthplace of your next favorite recipe.
Gathering Quality Ingredients for Your ice cream machine mixture
The foundation of any great dessert lies in the quality of its ingredients. When crafting homemade ice cream, every component plays a vital role in achieving the perfect texture and flavor. Using premium elements ensures a rich, creamy result that stands out.
Start with heavy cream and whole milk. These dairy essentials provide the fat content needed for a smooth, luxurious consistency. Avoid low-fat options, as they can lead to an icy texture rather than the desired creaminess.
Natural cane sugar is another key ingredient. It dissolves perfectly, enhancing sweetness without overpowering the flavor. For a deeper, more complex taste, consider using vanilla bean paste or pure vanilla extract. These elevate the dessert, adding a warm, aromatic note.
Don’t overlook the importance of salt. A pinch of high-quality salt balances the sweetness and aids in the freezing process. It’s a small addition that makes a big difference.
- Heavy Cream & Whole Milk: Essential for a rich, creamy texture.
- Natural Cane Sugar: Perfectly sweetens without overpowering.
- Vanilla Extract or Bean Paste: Adds depth and warmth to the flavor.
- Salt: Balances sweetness and improves freezing.
By choosing the best ingredients, you’re setting the stage for a dessert that’s not only delicious but also a reflection of your dedication to quality. Trusted sources agree: premium components are the foundation of a perfect recipe.
Step-by-Step Guide to Making Homemade Ice Cream
Transforming simple ingredients into a creamy delight is easier than you think. This step-by-step guide will walk you through the process, ensuring a smooth, rich dessert every time. Whether you’re a beginner or a seasoned pro, these tips will help you master the art of homemade treats.
Preparing the Ice Cream Maker and Freezing the Bowl
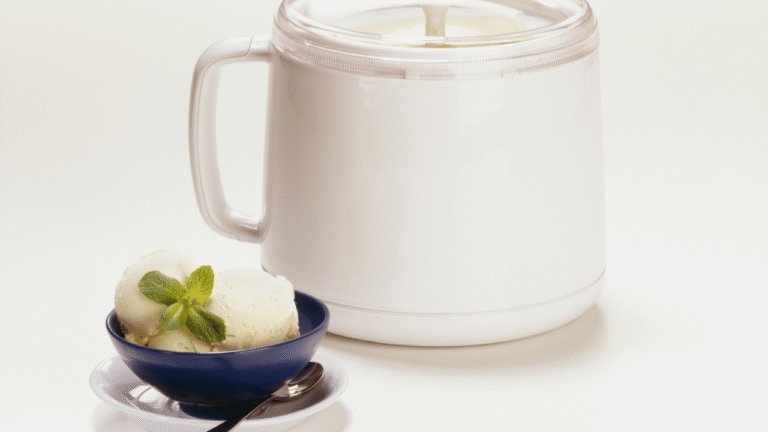
Start by ensuring your equipment is ready. The bowl of your ice cream maker must be frozen for at least 12 hours before use. This step is crucial for achieving the right consistency. Double-check that the bowl is completely solid—any residual warmth can affect the churning process.
Creating and Chilling the Ice Cream Base
Next, prepare the base. Warm your mixture gently for about 5 minutes to dissolve the sugar completely. Transfer it to a heatproof bowl and let it chill in the refrigerator for a few hours or overnight. This step ensures a thick, smooth base that’s perfect for churning.
Mastering the Churning Process
Once your base is chilled, it’s time to churn. Pour the mixture into the ice cream maker and let it run for 20-30 minutes. This process incorporates air, giving your dessert a light, creamy texture. For an even firmer consistency, freeze the churned mixture for an additional 2 hours before serving.
Follow these steps, and you’ll have a delectable, well-textured treat that’s sure to impress. Happy churning!
Creative Variations and Mix-In Ideas
Unlock endless possibilities by personalizing your dessert with creative mix-ins and toppings. Whether you’re a fan of classic vanilla or adventurous flavors, there’s no limit to how you can make your treat uniquely yours. From crunchy nuts to gooey sauces, every addition enhances the experience.
Add Flavorful Toppings and Mix-Ins
Elevate your dessert with fresh fruits like strawberries or blueberries. These add natural sweetness and a burst of color. For a richer texture, try toasted nuts, crumbled cookies, or brownie chunks. Each bite becomes a delightful surprise.
Sauces like salted caramel or hot fudge can take your creation to the next level. Add them right after churning to maintain the perfect consistency. The result? A dessert that’s as beautiful as it is delicious.
Customizing Your Recipe for Dietary Needs
Your dessert can fit any lifestyle. For a sugar-free option, use natural sweeteners like stevia. Dairy-free? Swap in coconut or almond milk. Gluten-free cookies or brownies make excellent mix-ins for those with dietary restrictions.
Experiment with flavor pairings to create something truly unique. Think peanut butter and jelly or chocolate and mint. The possibilities are endless, and every combination is a chance to refine your recipe.
Don’t forget to document your creations. Share your innovative swirls and sauces on social media. Inspire others to join the culinary adventure and make their own signature desserts.
Troubleshooting and Expert Tips
Even the most experienced dessert makers can face challenges when crafting their creations. Whether it’s uneven texture or unwanted ice crystals, these issues can be frustrating. But don’t worry—every problem has a solution. With a few expert tips, you can turn these hurdles into opportunities for improvement.
Common Pitfalls and How to Avoid Them
One of the most frequent issues is the formation of ice crystals. This often happens when the base isn’t chilled long enough before churning. To prevent this, ensure your mixture is refrigerated for at least 24 hours. Another common problem is under-churning, which can lead to a soft, slushy texture. Aim for 20-30 minutes of churning for the best results.
If your dessert is too hard, let it sit at room temperature for 5-10 minutes before serving. This softens it just enough for a smooth scoop. Always verify your freezer temperature is set to 0°F (-18°C) to maintain the right firmness.
Expert Secrets for Achieving Perfect Consistency
Professionals swear by the importance of patience. After churning, let your creation freeze for an additional 2-3 hours. This extra time ensures a firm, creamy texture. “The key is to balance timing and temperature,” says a renowned chef. Avoid overmixing, as this can introduce too much air, leading to a less dense result.
For a richer consistency, consider increasing the fat content slightly. Using heavy cream instead of milk can make a noticeable difference. Brands like Cuisinart® and KitchenAid recommend following their guidelines for optimal results.
- Chill the base thoroughly: At least 24 hours for a smooth texture.
- Monitor churning time: 20-30 minutes is ideal.
- Check freezer temperature: Keep it at 0°F (-18°C).
- Be patient: Allow extra freezing time post-churning.
Remember, every misstep is a chance to learn. With these tips, you’ll master the art of creating the perfect dessert at home. Happy experimenting!
Conclusion
Creating your own frozen treats at home is a journey filled with creativity and satisfaction. From selecting the finest ingredients to mastering the churning process, every step brings you closer to a dessert that’s uniquely yours. Whether you’re crafting classic vanilla or experimenting with bold flavors, the possibilities are endless.
This guide has walked you through the essentials, from preparation to troubleshooting. With quality components and a little patience, your homemade creations can rival any store-bought option. Don’t hesitate to try the recipe and add your own twist—your kitchen is the perfect place for innovation.
Share your creations with friends and family, and inspire others to embark on their own culinary adventures. Embrace the process, and savor every delicious scoop. Happy experimenting!


