Short, practical steps let home cooks turn simple pantry items into rich, scoopable desserts. This guide explains what the phrase ice cream mix milk often implies a recipe means and how to get reliable results.
Ice cream mix milk often implies a recipe, Start with a balanced base: heavy cream, milk, sugar, and vanilla. Whisk until sugar dissolves, chill the mixture 1–2 hours, then churn about 20–25 minutes for soft-serve and freeze around 2 hours for firm scoops.
Why this works: steady chilling and dynamic freezing with agitation keep ice crystals small and produce a smooth texture and clean dairy flavor. Pre-made mixes save time yet still let you add flavor and mix-ins.
Follow the steps that focus on cold, timing, and ingredient balance. With simple tools and clear timing targets, you can achieve consistent results in your own kitchen.
Key Takeaways
- Use a simple base of cream, milk, sugar, and vanilla for reliable texture.
- Chill the base 1–2 hours before churning to improve body.
- Churn 20–25 minutes to reach soft-serve stage; freeze ~2 hours to set.
- Dynamic freezing (agitation) reduces crystal size for a smoother mouthfeel.
- Pre-made mixes speed the process while allowing customization.
Homemade Vitamix Vanilla Ice Cream
4
servings20
minutes4
hours10
minutesA simple, creamy ice cream recipe using everyday ingredients.
Keep the screen of your device on
Ingredients
1 cup 1 heavy cream
1 cup 1 whole milk
0.5 cup 0.5 granulated sugar
1 tablespoon 1 pure vanilla extract
0.25 teaspoon 0.25 salt
Directions
- In a Vitamix blender, combine one cup of heavy cream, one cup of whole milk, half a cup of granulated sugar, one tablespoon of pure vanilla extract, and a quarter teaspoon of salt.
- Blend on low speed for about 30 seconds until the sugar is fully dissolved and all ingredients are well combined.
- Transfer the mixture to a bowl and chill in the refrigerator for at least two hours or until very cold.
- Once chilled, pour the mixture into an ice cream maker and churn according to the manufacturer’s instructions, approximately 20-25 minutes.
- For firmer ice cream, transfer to an airtight container and freeze for at least two hours before serving.
Recipe Video
Nutrition Facts
- Total number of serves: 4
- Calories: 250kcal
- Cholesterol: 65mg
- Sodium: 100mg
- Potassium: 150mg
- Sugar: 20g
- Protein: 3g
- Calcium: 10mg
- Iron: 0mg
- Thiamin: 0mg
- Riboflavin: 2mg
- Niacin: 0mg
- Folate: 0mg
- Biotin: 0mg
- Phosphorus: 8mg
- Iodine: 0mg
- Magnesium: 2mg
- Zinc: 2mg
- Selenium: 1mg
- Copper: 0mg
- Manganese: 0mg
- Chromium: 0mg
- Molybdenum: 0mg
- Chloride: 0mg
Did you make this recipe?
Tag @https://www.instagram.com/ice_cream_haven/ on Instagram and hashtag it with #IceCreamIceCreamHavens
Like this recipe?
Follow @https://www.pinterest.com/Ice_Cream_Haven/ on Pinterest
Join our Facebook Group!
Follow https://www.facebook.com/icecreamhavens/ on Facebook
What “ice cream mix milk often implies a recipe” means for home cooks today
Today’s home kitchens demand methods that balance speed, control, and flavor. Home cooks want clear steps to build a dependable base, manage cold, and get a smooth texture without extra fuss.
User intent centers on practical goals: buy simple ingredients, use minimal equipment, and hit predictable time windows that scale for small or larger batches.
Modern approaches pair convenience with creativity. Pre-made mixes give consistency, while scratch methods let you dial richness and aromatic intensity to taste.
- Success metrics: smooth texture with low iciness, even flavor, stable scoops after freezing.
- Cold control: chill the base well and keep tools cold to cut crystal size and boost body.
- Track times: note chill and churn periods so you can repeat wins and fix issues fast.
- Technique beats gadgets: mastering base composition and cold management matters more than buying top equipment.
Common intents include fast weeknight treats, special flavors for events, and dairy or egg swaps for household needs. Keep steps simple and you’ll get repeatable results every time.
Ice cream mix milk often implies a recipe: the essential concept
Deciding between a boxed formula and a from-scratch base comes down to time, control, and taste goals. Pre-made packets deliver consistent ratios and stabilizers so churning is predictable. A homemade base gives you control over fat, sweetener, and add-ins for tailored texture and flavor.
When to use a pre-made formula
Who benefits: busy cooks, new machine users, or anyone who wants reliable results with minimal measuring.
Commercial mixes often include stabilizers that slow crystal growth. That yields smoother results with less fuss during churn time.
When to build a base from scratch
Who benefits: flavor tinkerers and cooks managing dietary needs. Scratch bases—dairy, sugar, salt, and vanilla—let you add yolks or starch for body and control melt.
Chill the base well before it hits the machine. Proper cooling cuts residence time in the bowl and encourages smaller crystals during the 20–25 minute churn cycle.
- Essential base: balanced dairy, sweetener, salt, and flavor that freezes smoothly when chilled and churned.
- Stability options: use liquid sweeteners, cornstarch, or cream cheese to mimic commercial stabilizers.
- Decision rule: choose speed and repeatability for mixes; choose customization and learning for scratch.
Choose your base style: Philadelphia, French custard, Sicilian starch, no-churn, non-dairy
Select a starting formula that balances speed, richness, and texture goals. Below are five common base styles, each with quick ratios and best flavor matches.
Philadelphia-style
No-cook, whisk-and-chill. Ratio: 2 cups heavy cream, 1 cup whole milk, 3/4 cup sugar, 1/4 tsp salt. This preserves bright dairy notes and works great with fresh fruit.
French custard
Rich and emulsified. Use the same dairy and sugar plus 6 egg yolks. Temper the yolks and cook until the custard coats a spoon for deep chocolate or caramel flavors.
Sicilian starch
Silky, lighter mouthfeel. Try 1.5 cups heavy cream, 1.5 cups whole milk, 3/4 cup sugar, and 3 tbsp cornstarch. Heat to thicken for tea or delicate floral notes.
No‑churn
Machine-free convenience. Whip 2 cups heavy cream and fold in one 14‑oz can sweetened condensed milk plus salt. Great for cookie-studded or quick party treats.
Non-dairy
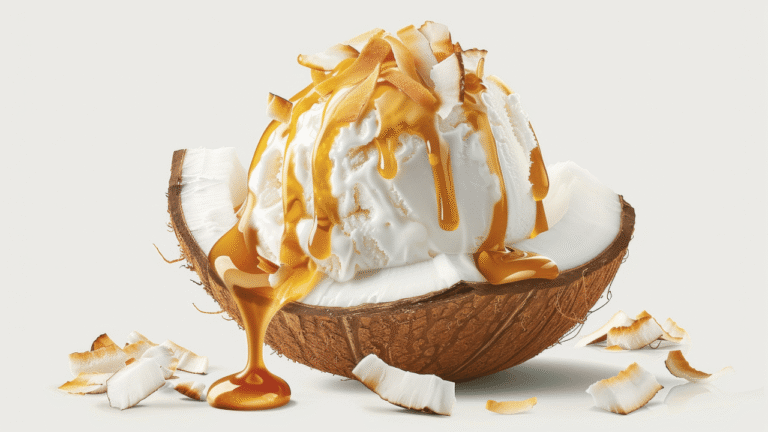
Plant-based structure. Use full-fat coconut milk with almond milk or oat, and add starch or oil for body. Coconut milk pairs well with tropical flavors.
“Try two styles side-by-side to feel real differences in body and melt.”
- Match Philadelphia to bright fruit.
- Choose French for deep chocolate.
- Use Sicilian for subtle tea or floral notes.
- No‑churn for easy, cookie-filled versions.
Core ingredients and ratios for a reliable base
Begin with clear, measured ratios so each ingredient does its job. Use the foundational vanilla base below as a practical starting point before you tweak fat, sugar, or flavor.
How each component affects final texture
Foundational formula: 2 cups heavy cream, 1 cup whole milk, 3/4 cup sugar, pinch of salt, and vanilla. Chill 1–2 hours, churn 20–25 minutes, then freeze about 2 hours to set.
- Dairy balance: heavy cream supplies fat for body and smooth melt; whole milk lightens richness for better scoopability.
- Sweetness: sugar lowers the freezing point and keeps the frozen product pliable; too little causes a brittle, icy texture.
- Salt and vanilla: a pinch of salt sharpens overall flavor while vanilla adds aromatic depth.
Practical tips: dissolve sugar fully before chilling to avoid graininess. Measure by weight when possible for repeatable results. Increase sugar or vanilla slightly for bold add-ins so the balance remains pleasing.
Stabilizers and emulsifiers that boost texture without fuss
Simple stabilizers let home cooks control freeze patterns and mouthfeel with little effort. These small additions slow water mobility and reduce large crystals during churn and storage. Start modestly so you can see each ingredient’s effect on body and flavor.
Liquid sweeteners, cornstarch, and cream cheese as home-friendly options
Liquid sweeteners — swap 25–33% of granulated sugar for light corn syrup or honey to cut iciness. Corn syrup lowers crystallization while honey adds character you must balance.
Cornstarch — use 1–3 tbsp per quart. Mix with cold liquid, then bring to a brief boil for one minute to activate thickening. Strain for smooth results before chilling.
Cream cheese — about 2 oz per quart blends in to add proteins and body. Use softened blocks and beat them into the warm base for even distribution.
Gums and modern additives: when and why to consider them
Tiny doses of guar, xanthan, or carrageenan provide stable texture and reduce wheying-off. Measure precisely; start with the manufacturer’s suggested micrograms per quart.
“Start with a single stabilizer so you can judge its impact before combining methods.”
- Why use one at a time: isolates effects on texture and flavor.
- Don’t overdo it: too much gives gummy or pasty results.
- Freezing dynamics: stabilizers slow water movement and limit crystal growth during churn and storage.
The science of freezing: overrun, ice crystals, and smooth texture
Freezing dynamics determine whether your final scoop feels velvety or granular. Control of motion, cold surface contact, and minutes in the bowl drives crystal size and body.
Dynamic vs. static freezing
Dynamic freezing uses agitation to create many small nuclei and fold in air. That air—known as overrun—lightens the base and changes scoopability and melt.
By contrast, static freezing forms fewer, larger crystals. The result is firmer but more granular texture.
Managing crystals with temperature and residence time
Colder contact surfaces (around -20°C to -25°C) and a chilled starting base speed freezing and limit crystal growth. For many home machines, target a residence time near 20–25 minutes.
Watch the dasher: when it slows and ridges hold, you’re at soft-serve and ready to move to the freezer for hardening.
- Water that remains unbound forms crystals; sugar and stabilizers keep water immobilized.
- Smaller crystals feel creamier because they have fewer sharp edges and a tighter distribution on the tongue.
- Log start temperature and churn duration to repeat your best batches.
For more advanced tips and tested flavor ideas, see creamiest icy recipes.
Step-by-step: make the base, chill for at least hours, then churn and freeze
Proper handling from bowl to freezer is the real shortcut to smooth results. Follow simple stages so the base freezes evenly and your final scoop has clean texture.
Whisk or cook, strain, and chill thoroughly before churning
Whisk cream, milk, sugar, vanilla, and a pinch of salt until the sugar dissolves. If you use eggs or starch, cook gently, then strain to remove any bits.
Chill for at least hours—ideally 1–2 or overnight—so the mixture enters the machine cold and freezes faster.
From soft-serve stage to firming in the freezer
Churn about 20–25 minutes in many home units until the mixture forms thick ribbons and soft-serve texture. Stop when the dasher slows and ridges hold.
Transfer the batch quickly to a pre-chilled container and move to the freezer for about 2 hours to firm. This minimizes melt and keeps texture tight.
“Taste and adjust before churn; freezing mutes flavors.”
- Mix well: dissolve sugar fully so the base chills uniformly.
- Use heat only as needed: cook custards gently and always strain.
- Set workflow: have tools and storage ready to keep temperatures steady.
Temperature control and freezer bowl prep for consistent results
A well-prepared coolant bowl and a truly cold base let home machines perform at their best. Prep matters more than tricks: get the surface cold, the mixture chilled, and the timing right.
Freezer-bowl readiness and ideal machine run time
Freeze the coolant bowl at least 24 hours ahead. Aim for a bowl wall near -20°C to -25°C so heat transfer is rapid and uniform.
Target run time: when the bowl is fully frozen and the base is very cold, most countertop machines hit thick, soft texture in about 20–25 minutes.
- Pre-freeze the bowl thoroughly to avoid a soupy churn and faster set times.
- Verify temperature: colder walls reduce residence time and yield finer crystals.
- Chill the base deeply so the bowl’s cooling capacity is not overwhelmed.
- Watch performance cues: early dasher stall often means an under-frozen bowl; no thickening signals a warm base.
- Avoid back-to-back batches without refreezing the bowl; the second run will underperform.
- Pre-chill lids and paddles and, if possible, store the bowl in the freezer between uses for ready-to-go churns.
“Cold surfaces and tight timing turn good mixtures into smooth, scoopable results.”
Which ice cream maker fits your kitchen and cadence
Pick a machine that suits your batch frequency and countertop space to get consistent results.
Match needs to style: budget, run frequency, and cleanup drive the best choice. Below are three common paths for home cooks.
Frozen-bowl machines: affordable and effective
These units are budget-friendly and common under $50. They need a pre-frozen bowl, so plan ahead.
Good for: casual users who make one or two batches per week.
Self-refrigerating compressors: back-to-back batches
Compressor models plug in and chill on demand. They handle multiple runs without refreezing a bowl.
Good for: frequent churners or those who host desserts often. Brands like Cuisinart and Breville offer reliable models.
Ice-and-rock-salt machines: old-school charm and control
Salt-and-brine rigs, including hand-crank styles, deliver strong chilling and nostalgic control. They can be messier and need more hands-on work.
- Match capacity to weekly volume and available freezer space.
- Consider noise, footprint, and cleanup when choosing a unit.
- Frozen-bowl devices offer value; compressors are an investment for heavy use.
- Keep maintenance in mind: clean parts and store the bowl properly.
- Try a friend’s unit or read reviews to gauge real-world performance.
How to make ice cream without a machine
No-equipment approaches focus on controlling crystal size and folding air into the base. These methods give good texture from simple steps and household tools.
No‑churn whipped base
Classic formula: whip 2 cups heavy cream and fold into one 14‑ounce can sweetened condensed milk with a pinch of salt. Fold gently, add strong flavors or swirls, then freeze until firm.
Slushy‑stir method
Pour the chilled mixture into a shallow pan and freeze. Stir every 30–45 minutes to break crystals and fold in air. Repeat until the texture thickens, then move to the freezer to set.
Food‑processor aeration
Freeze the batch solid, break into chunks, and pulse in a processor until smooth and airy. Refreeze briefly to firm. This yields scoopable body without a machine.
- Use shallow pans for faster, finer freezing.
- Add a tablespoon of corn syrup or soft cream cheese for better body.
- Serve sooner; these ways can become firmer or icier over time.
Flavoring the base: extracts, powders, infusions, and purees
Think of flavoring as tuning: start with low doses, taste after chilling, then amplify if needed. This keeps balance and prevents harsh notes in the frozen final product.
Balancing vanilla, chocolate, coffee, tea, herbs, and spices
Extracts: begin with about 1/4 tsp per quart and adjust. Freezing mutes aromas, so add cautiously and increase after a cold test if needed.
Powders: dissolve instant espresso (2–3 tbsp) or bloom cocoa for smooth integration. Matcha works at 1–1.5 tbsp per quart for clean green notes.
Fruit purees: macerated vs. cooked, and sugar adjustments
Maceration gives bright, fresh fruit character; cook purees to concentrate and reduce extra water. Use roughly 3/4 to 1.5 cups per quart as a guideline.
Adjust sugar to preserve mouthfeel and freezing point. Sweeter purees need less added sugar; tart fruit may need a bit more to keep scoopable body.
- Pairing ideas: coffee with chocolate shards; basil with strawberry; Earl Grey with lemon curd ripples.
- Style note: delicate infusions suit lighter bases, while rich custards carry bold chocolate and coffee well.
“Start gentle, taste cold, then refine—this is the fastest path to balanced frozen flavors.”
Mix-ins, ripples, and stracciatella without melting your base
Finish your churn with cold, solid add-ins so the base stays dense and smooth. Chilling components in the freezer prevents warming and keeps the final texture consistent.
Freeze mix-ins first and add at the right moment
Prep matters. Freeze cookies, nuts, and fruit pieces ahead of time and portion them into 1–2 cups per quart based on how chunky you like your batch.
Add solids near the end of churning or fold them in gently as you transfer to the container so they distribute without breaking down the base.
Creating clean swirls and chocolate shards
For neat ripples, layer sauce and base while spooning into the container. Repeat layers to keep distinct ribbons of flavor instead of one blended mass.
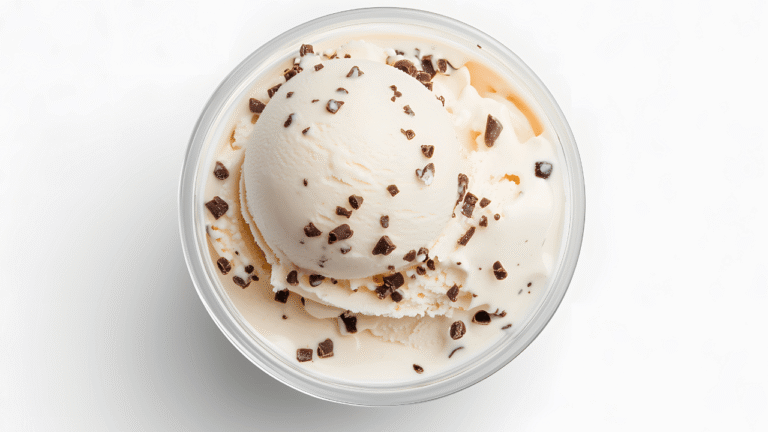
To make stracciatella, stream warm, thin melted chocolate into the spinning mixture in the last seconds. The hot chocolate snaps into thin shards that remain crisp in the frozen cream.
- Chill tools and bowl to limit melt during assembly.
- Manage fruit by roasting or candying to reduce free water and avoid iciness.
- Size pieces for scoopability so they don’t clog a spoon or disrupt texture.
“Cold add-ins and careful timing are the quickest route to clean swirls and crisp shards.”
Avoiding icy results and common texture issues
A few targeted swaps and simple steps will rescue a rough batch and prevent problems later. Focus on controlling free water and adding gentle body so scoops stay smooth in the freezer.
Kitchen fixes that work:
- Replace 25–33% of granulated sugar with light corn syrup or honey to lower crystal formation and keep sweetness balanced.
- Add 1–3 tbsp cornstarch per quart; whisk into cold liquid then boil for one minute to activate thickening and stabilize water.
- Blend in about 2 oz cream cheese per quart for extra body and resilience during storage.
- Stir in 1–3 tbsp alcohol (vodka or a flavored spirit) to gently lower the freezing point and improve scoopability.
Troubleshooting quick tips: Graininess usually means sugar didn’t dissolve or custard was overcooked. Separation comes from a warm base or over-churning—chill, strain, and stop early.
Prevent freezer burn by storing in airtight containers with a protective film. Temper pints 5–15 minutes before serving so spoons glide without shattering.
“Small process changes yield big improvements in texture and flavor.”
Dairy alternatives, allergies, and egg yolk safety considerations
Balancing richer and lighter plant liquids keeps body while preventing one flavor from dominating. Non-dairy bases rely on fat, starch, and careful sweetness to reach pleasing mouthfeel without heavy dairy.
Fat balance in plant milks and managing dominant flavors
Combine full‑fat coconut milk with neutral options such as oat or cashew to add body while taming coconut notes. Use refined coconut oil if you want fat without strong aroma.
Boost structure with small amounts of arrowroot or cornstarch and 1–2 teaspoons of neutral oil per quart. Watch salt and sweetness in flavored or sweetened alternatives; adjust to taste.
Raw versus cooked yolks: tempering for safety and texture
Cooked custards give safety and luxe mouthfeel. Temper yolks slowly by adding hot liquid bit by bit, then cook gently until the mixture coats the back of a spoon.
Raw yolk methods are faster but carry pathogen risk unless you use pasteurized yolks. For guidance on safe egg swaps and handling, see safe egg substitutions.
“Start with small test batches to dial in balance and avoid allergen cross‑contact.”
- Blend richer and leaner plant milks to hit body without overpowering flavor.
- Use starches and oils to mimic dairy cream and improve scoopability.
- Label and avoid cross‑contamination for allergy safety.
From history to craft: what the pros and ice cream schools can teach you
From simple hand cranks to classroom labs, the craft evolved through practical invention and formal study.
Nancy Johnson’s 1846 hand-cranked freezer made steady churning available at home and in small parlors. Her patent put reliable agitation into the hands of cooks, teaching the value of motion for small crystal formation.
Jacob Fussel’s 1851 factory converted surplus cream into a wholesale product and shaped distribution. That industrial scale highlighted hygiene, consistency, and the need for refrigeration as the market grew.
Penn State and modern technique
Penn State’s Ice Cream Short Course and programs at Guelph translate lab science into practical skills. Professionals learn to measure overrun, control temperature, and tune stabilizers for repeatable texture.
Lesson for home makers: precise measurement, cold management, and balanced ingredients deliver consistent flavor and structure. Try small experiments with time, temperature, or stabilizer levels to improve your own base and way of working.
“Craft blends art and science; learn both to raise every batch.”
- Key innovation: hand churns taught controlled agitation.
- Industrial lesson: scale required safety and consistency.
- Education offers tools to measure and repeat what pros do.
Storage, serving, and timing for peak flavor and texture
Finish strong: a short cold chain from the bowl to deep storage makes the biggest difference in final mouthfeel and flavor. Move the batch swiftly to chilled containers to limit early melt and preserve smooth texture.
Pre-chill containers, cover well, and temper before scooping
Pre-chill containers at least 1 hour before you transfer the churned base. Cold tubs reduce melt during handoff and keep crystals small.
- Press plastic film against the surface or snap on an airtight lid to deter freezer odors and avoid surface ice.
- Store pints deep in the freezer where temperature fluctuates less and texture stays steady.
- Portion into smaller containers to limit repeated warm-ups from frequent opening.
For service, temper pints 5–15 minutes at room temperature so spoons glide without losing structure. If you need speed, use 10‑second microwave bursts and check between each burst to avoid softening too much.
“Label dates and flavors to track freshness and rotation for best flavor and mouthfeel.”
Conclusion
ice cream mix milk often implies a recipe
Finish with one clear plan: use a balanced base, chill fully, churn near 20–25 minutes, then harden for about two hours. This path makes reliable ice cream and gives you a repeatable starting point.
Trust the science: colder starts and a well‑prepared bowl shorten residence time and yield finer crystals. Try Philadelphia, French, Sicilian, no‑churn, or non‑dairy styles to explore texture and body.
Build flavor with extracts, purees, or powders and tweak sweetness or salt to keep balance. Small stabilizer tweaks—liquid sweetener, starch, or a little cream—help storage and scoopability.
Pick a machine that fits your cadence. Start with the simple vanilla recipe, then iterate with your favorite flavors and mix‑ins to make the method your own.

