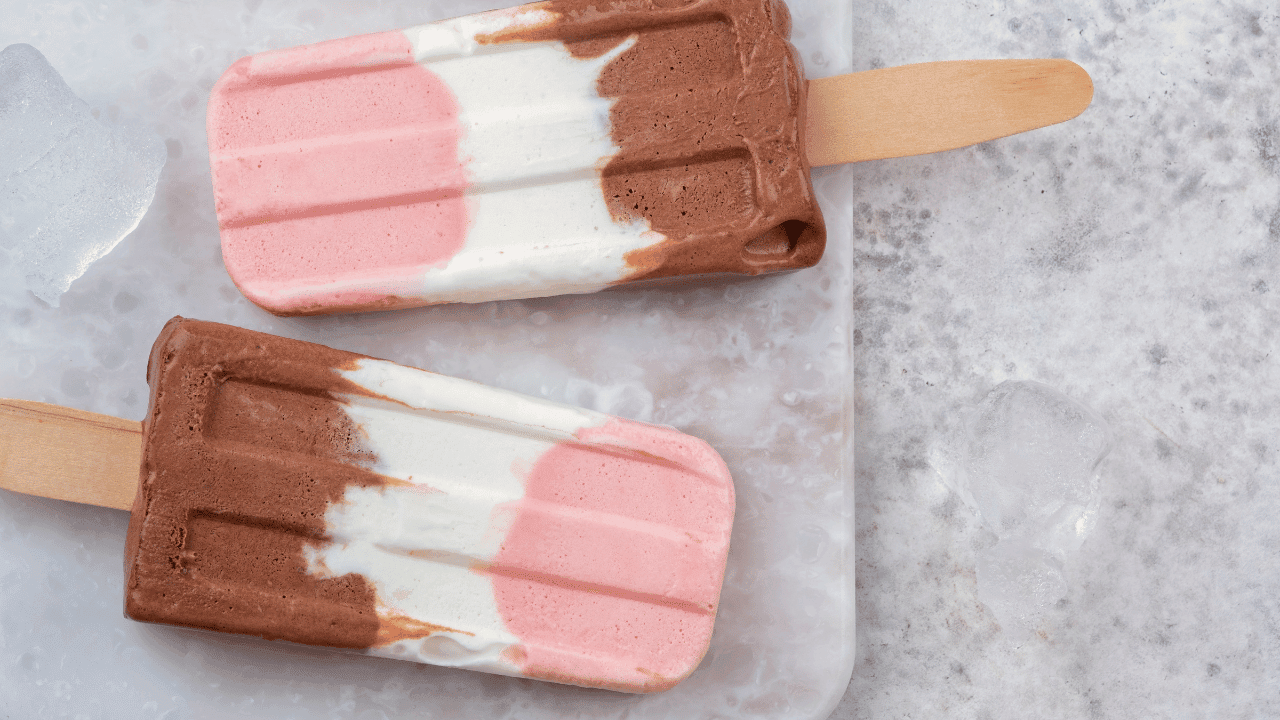
Greek Yogurt Ice Cream Bars Recipe, looking for a refreshing and healthy treat to beat the heat? These homemade frozen delights are the perfect solution. Packed with protein and customizable to your taste, they’re a guilt-free alternative to traditional desserts.
This recipe is simple and versatile, making it ideal for busy families. With just a few ingredients, you can create a creamy, thick treat that’s both satisfying and nutritious. Plus, the creative possibilities are endless—add your favorite toppings or mix-ins for a personalized touch.
Using full-fat plain yogurt ensures a rich and creamy texture, while the addition of crisp chocolate adds a delightful crunch. Perfect for any time of day, these bars are a crowd-pleaser that’s as fun to make as they are to eat.
Key Takeaways
- Healthy and protein-rich alternative to traditional desserts.
- Simple and quick to prepare, ideal for busy schedules.
- Customizable with various toppings and mix-ins.
- Full-fat yogurt ensures a creamy and thick texture.
- Perfect for a refreshing treat any time of day.
Greek Yogurt Ice Cream Bars
4
servings30
minutes40
minutes300
kcal1
hour10
minutesDelicious frozen treats using simple Greek yogurt and everyday ingredients.
Keep the screen of your device on
Ingredients
2.5 cups 2.5 Greek yogurt
0.5 cup 0.5 honey
1 tablespoon 1 vanilla extract
1.5 cups 1.5 fresh berries
Directions
- In a mixing bowl, combine Greek yogurt, honey, and vanilla extract, stirring until the mixture is smooth and well combined.
- Gently fold in the fresh berries, ensuring they are evenly distributed throughout the yogurt mixture.
- Evenly pour the yogurt mixture into ice cream bar molds, shaking the molds gently to remove any air bubbles.
- Insert sticks into each mold and freeze for at least 4 hours, or until the yogurt has completely frozen.
- To release the bars, run warm water over the outside of the molds for a few seconds and gently pull the bars out.
- Serve immediately or wrap each bar in wax paper and store in an airtight container in the freezer for up to two weeks.
Recipe Video
Nutrition Facts
- Total number of serves: 8
- Calories: 160kcal
- Fat: 3g
- Saturated Fat: 2g
- Trans Fat: 0g
- Polyunsaturated Fat: 0g
- Monounsaturated Fat: 1g
- Cholesterol: 10mg
- Sodium: 50mg
- Potassium: 250mg
- Carbohydrates: 25g
- Fiber: 1g
- Sugar: 20g
- Protein: 9g
- Vitamin A: 50IU
- Vitamin C: 10mg
- Calcium: 100mg
- Iron: 0.5mg
- Vitamin D: 0mg
- Vitamin E: 0mg
- Vitamin K: 3mg
- Thiamin: 0mg
- Riboflavin: 0.3mg
- Niacin: 0.2mg
- Vitamin B6: 0.1mg
- Vitamin B12: 0.4mg
- Folate: 15mg
- Biotin: 0mg
- Pantothenic Acid: 0.5mg
- Phosphorus: 100mg
- Iodine: 0mg
- Magnesium: 15mg
- Zinc: 1mg
- Selenium: 0mg
- Copper: 0.1mg
- Manganese: 0.1mg
- Chromium: 0mg
- Molybdenum: 0mg
- Chloride: 0mg
Did you make this recipe?
Tag @https://www.instagram.com/ice_cream_haven/ on Instagram and hashtag it with #IceCreamIceCreamHavens
Like this recipe?
Follow @https://www.pinterest.com/Ice_Cream_Haven/ on Pinterest
Join our Facebook Group!
Follow https://www.facebook.com/icecreamhavens/ on Facebook
Introduction to a Healthier Frozen Treat
Craving a cool, nutritious snack that’s easy to make at home? These homemade frozen yogurt bars are the answer. They’re not just a dessert—they’re a versatile treat that can be enjoyed for breakfast, a midday snack, or even a post-workout refuel. Packed with protein and customizable to your taste, they’re a guilt-free alternative to traditional frozen desserts.
The Inspiration Behind Homemade Frozen Yogurt Bars
The idea for these bars came from a desire to create something both delicious and nutritious. Frozen yogurt bars are a perfect way to enjoy a sweet treat without the added sugars and artificial ingredients found in store-bought options. Plus, they’re incredibly fun to make—whether you’re crafting them with kids or experimenting with flavors on your own.
Why Choose Greek Yogurt for Creaminess and Protein
Greek yogurt is the star of this recipe for good reason. Its thick, creamy texture makes it ideal for freezing, while its high protein content keeps you feeling satisfied.
“Greek yogurt adds a rich, nutty flavor that pairs perfectly with sweet or tangy toppings.”
It’s also a great source of probiotics, supporting gut health with every bite.
Using a popsicle stick in each bar makes them easy to handle and fun to eat. Whether you’re adding fresh fruit, nuts, or a drizzle of chocolate, the possibilities are endless. Jump into the kitchen and start creating your own variations today!
Greek Yogurt Ice Cream Bars Recipe Key Ingredients and Their Benefits

Transform simple ingredients into a refreshing, guilt-free dessert. The right choices can make all the difference in creating a treat that’s both delicious and nutritious. Let’s dive into the essentials that will elevate your homemade frozen bars.
Choosing the Right Yogurt: Greek vs. Coconut
The base of your frozen treat is crucial. Greek yogurt is a popular choice for its thick, creamy texture and high protein content. It’s perfect for creating a rich, satisfying bar that keeps you full longer. For a dairy-free option, coconut yogurt offers a smooth, tropical flavor. Both are excellent choices, so pick the one that fits your dietary needs.
Essential Flavor Enhancers: Maple Syrup, Peanut Butter, and More
Natural sweeteners like maple syrup or honey add just the right amount of sweetness without processed sugars. Peanut butter brings a nutty richness, while a splash of vanilla enhances the overall flavor. For a fun twist, toss in some chocolate chips for a delightful crunch. These additions not only boost taste but also contribute to the nutritional value of your bars.
Mixing and matching ingredients is part of the fun. In just a minute, you can create a unique flavor profile that suits your preferences. Whether you prefer tangy, sweet, or a mix of both, thoughtful ingredient choices are the foundation of a successful recipe. Jump into the kitchen and start experimenting today!
For more inspiration on creating delicious frozen treats, check out this cookie dough frozen yogurt bars recipe or explore the turtle ice cream guide for creative ideas.
Greek yogurt ice cream bars recipe

Ready to whip up a delightful frozen treat that’s both healthy and satisfying? This step-by-step guide will walk you through creating creamy, protein-packed bars that are perfect for any occasion. With just a few ingredients, you’ll have a dessert that’s as fun to make as it is to eat.
Start by preparing the yogurt mixture. In a bowl, combine 2 cups of full-fat yogurt with 2 tablespoons of maple syrup for natural sweetness. Add a splash of vanilla extract and a pinch of salt to enhance the flavor. For a nutty twist, mix in ½ cup of peanut butter or your favorite nut butter.
Next, pour the mixture into a popsicle mold. Insert a stick into each section to hold the bar shape during freezing. This step ensures your bars are easy to handle and fun to enjoy. Place the mold in the freezer for at least 3 hours, or until fully set.
While the bars freeze, prepare the chocolate coating. Melt 1 cup of chocolate in a microwave-safe bowl, stirring every 30 seconds until smooth. Once the bars are frozen, dip each one into the melted chocolate for a rich, crunchy shell. Let the coating set for a few minutes before serving.
Here’s a quick summary of the steps:
- Mix yogurt, maple syrup, and optional add-ins like peanut butter.
- Pour the mixture into a mold and insert sticks.
- Freeze for 3 hours or until firm.
- Dip the bars in melted chocolate and let the coating set.
For more inspiration on creating delicious frozen treats, check out this 3-ingredient ice cream recipe. It’s a great way to explore new flavors and techniques.
Follow these steps, and you’ll have a batch of creamy, satisfying bars ready to enjoy. Perfect for a quick snack or a refreshing dessert, these bars are sure to impress!
Greek Yogurt Ice Cream Bars Recipe Essential Equipment and Tools

Want to make your frozen treats at home? Start with the right tools. Having the proper equipment ensures your bars turn out perfectly every time. From molds to measuring cups, each tool plays a vital role in the process.
Must-Have Popsicle Molds and Alternatives
Popsicle molds are a game-changer for creating uniform bars. They come in various shapes and sizes, making it easy to customize your treats. If you don’t have molds, try silicone muffin pans or even Dixie cups. These alternatives work just as well and are budget-friendly.
For a professional touch, opt for molds with built-in sticks. This ensures your bars hold their shape during freezing. Whether you choose classic molds or creative alternatives, the key is to pick something that fits your kitchen setup.
Kitchen Tools for a Smooth Preparation
Beyond molds, a few additional tools can make the process effortless. A baking sheet is perfect for stabilizing molds in the freezer. Measuring cups ensure accurate ingredient portions, while a whisk helps blend the yogurt mixture smoothly.
Don’t forget the sticks! Wooden or reusable sticks are essential for easy handling. Cleanliness is also crucial—ensure all tools are sanitized before use. With the right equipment, making frozen bars becomes a fun and stress-free activity.
For more creative dessert ideas, check out this Pear and Gorgonzola Ice Cream recipe. It’s a unique treat that combines sweet and tangy flavors for a memorable experience.
Detailed Step-by-Step Preparation
Master the art of making homemade frozen delights with this easy guide. From mixing the base to adding the final chocolate shell, every step is designed to ensure success. Let’s dive into the process and create a treat that’s as fun to make as it is to eat.
Mixing and Layering the Yogurt Base
Start by combining 2 cups of full-fat yogurt with 2 tablespoons of maple syrup in a bowl. Add a splash of vanilla extract and a pinch of salt for enhanced flavor. For a nutty twist, mix in ½ cup of peanut butter or your favorite nut butter. Whisk until the mixture is smooth and creamy.
Next, pour the yogurt mixture into a popsicle mold. Use a spoon to spread it evenly, ensuring each layer is smooth. Insert a stick into each section to hold the shape during freezing. This step is crucial for creating bars that are easy to handle and enjoy.
Freezing, Dipping, and Setting the Chocolate Shell
Place the mold in the freezer for at least 3 hours, or until the bars are fully set. While they freeze, prepare the chocolate coating. Melt 1 cup of chocolate chips with ½ tablespoon of coconut oil in a microwave-safe bowl. Stir every 30 seconds until smooth.
Once the bars are frozen, dip each one into the melted chocolate. Let the excess drip off before placing them on a parchment-lined tray. Allow the chocolate shell to set for a few minutes. For added creaminess, consider mixing in a tablespoon of peanut butter or coconut oil into the chocolate.
Here’s a quick summary of the steps:
- Mix yogurt, maple syrup, and optional add-ins like peanut butter.
- Pour the mixture into a mold and insert sticks.
- Freeze for 3 hours or until firm.
- Dip the bars in melted chocolate and let the coating set.
For more tips on creating delicious frozen treats, check out this healthy frozen yogurt bars recipe. It’s packed with ideas to inspire your next batch!
Greek Yogurt Ice Cream Bars Recipe Tips and Tricks for Perfect Frozen Bars

Discover how to elevate your frozen treats with simple yet effective techniques. Whether you’re a beginner or a seasoned pro, these tips will help you achieve the perfect texture and make serving a breeze.
Consistency Hacks for Creamier Texture
For a smoother, creamier result, use full-fat yogurt as your base. Its richness prevents ice crystals from forming, ensuring a velvety texture. Adding a splash of vanilla extract or a dollop of peanut butter can enhance both flavor and creaminess.
Temperature management is key. Place your bars in the coldest part of the freezer to freeze evenly. Avoid opening the freezer frequently, as temperature fluctuations can affect consistency.
Practical Advice for Easy Removal and Serving
Struggling to remove your bars from the mold? Run the mold under warm water for a few seconds. This loosens the edges, making removal effortless. For storage, use an airtight container to keep them fresh for up to three weeks.
Let your bars sit at room temperature for about an hour before serving. This softens them slightly, making them easier to bite into. For added crunch, sprinkle chocolate chips or nuts on top before freezing.
“A little patience and the right techniques can transform your frozen treats into a masterpiece.”
Experiment with small tweaks to find your perfect balance. For more creative ideas, check out Ice Cream Haven. Their recipes and tips are a great source of inspiration for frozen dessert enthusiasts.
Flavor Variations and Creative Add-Ins

Take your frozen treats to the next level with endless flavor possibilities. Whether you’re craving something fruity, nutty, or protein-packed, there’s a mix-in for every taste. Personalizing your bars is easy and fun, making them a hit with family and friends.
Experimenting with Fresh Fruits and Nuts
Add a burst of natural sweetness with fresh fruits like berries, banana slices, or mango chunks. For a crunchy twist, toss in chopped nuts such as almonds, pistachios, or walnuts. These ingredients not only enhance flavor but also boost the nutritional value of your bars.
Layering fruits and nuts into the base mixture creates a delightful texture. Alternatively, sprinkle them on top before freezing for a visually appealing finish. The possibilities are endless, so don’t be afraid to mix and match.
Enhancing the Recipe with Protein Powder and Other Mix-Ins
For an extra protein boost, blend in a scoop of your favorite protein powder. This addition is perfect for post-workout snacks or a filling breakfast option. Pair it with peanut butter or almond butter for a rich, nutty flavor.
When it comes to the chocolate coating, adding a teaspoon of coconut oil ensures a smooth, glossy finish. It also helps the chocolate set perfectly in the freezer. For a healthier twist, opt for dark chocolate or sugar-free alternatives.
Here are some quick ideas to inspire your next batch:
- Layer fresh strawberries and granola for a breakfast-inspired bar.
- Mix in cocoa powder and chocolate chips for a decadent treat.
- Top with shredded coconut and a drizzle of honey for a tropical vibe.
Using a baking sheet to freeze your bars ensures even freezing and easy removal. With these tips, you can create a personalized treat that’s as unique as you are.
Serving Suggestions and Storage Ideas
Elevate your dessert game with stunning presentation and smart storage solutions. Whether you’re serving these treats at a party or enjoying them solo, a little creativity goes a long way. Here’s how to make your frozen delights both Instagram-worthy and long-lasting.
Presentation Tips for an Instagram-Worthy Treat
First impressions matter, especially when it comes to food. Start by arranging your bars on a stylish platter or a baking sheet lined with parchment paper. Add a drizzle of melted chocolate or a sprinkle of chopped nuts for a gourmet touch. Fresh fruit slices or edible flowers can also enhance the visual appeal.
For the perfect photo, place your bars near natural light and use a simple background. A rustic wooden board or a marble countertop works wonders. Let your bars sit at room temperature for about an hour before serving. This softens them slightly, making them easier to bite into while maintaining their elegant shape.
Best Practices for Long-Term Freezer Storage
Proper storage ensures your bars stay fresh and delicious. After freezing, transfer them to an airtight container. This prevents freezer burn and keeps flavors intact. For added protection, wrap each bar in parchment paper before placing them in the container.
To keep freezer conditions optimal, store your bars in the coldest part of the freezer. Avoid frequent temperature changes by minimizing how often you open the freezer door. When stored correctly, your bars can last up to two months without losing their quality.
For more tips on maintaining the freshness of your frozen treats, check out our privacy policy for additional insights.
With these serving and storage tips, you can enjoy your homemade treats anytime. Whether you’re hosting a gathering or indulging in a personal snack, these bars are sure to impress.
Conclusion
Greek Yogurt Ice Cream Bars Recipe, creating a nutritious and customizable frozen treat has never been easier. This recipe offers a healthy alternative to traditional desserts, packed with protein and endless flavor possibilities. Whether you enjoy it as a snack or dessert, it’s perfect for any time of day.
With just a few simple steps, you can whip up a batch of these creamy delights. Experiment with fresh fruits, nuts, or even a drizzle of chocolate to make it your own. Don’t forget to share your creations online and inspire others to try this versatile recipe.
For long-lasting enjoyment, store your treats in the freezer using an airtight container. Place them on a baking sheet to keep freezer space organized. Let them sit at room temperature for a few minutes before serving for the perfect texture.
Thank you for exploring this recipe with us. We hope it brings joy to your kitchen and inspires you to enjoy a delicious, nutritious frozen treat. Don’t forget to print or share this recipe with friends and family!


