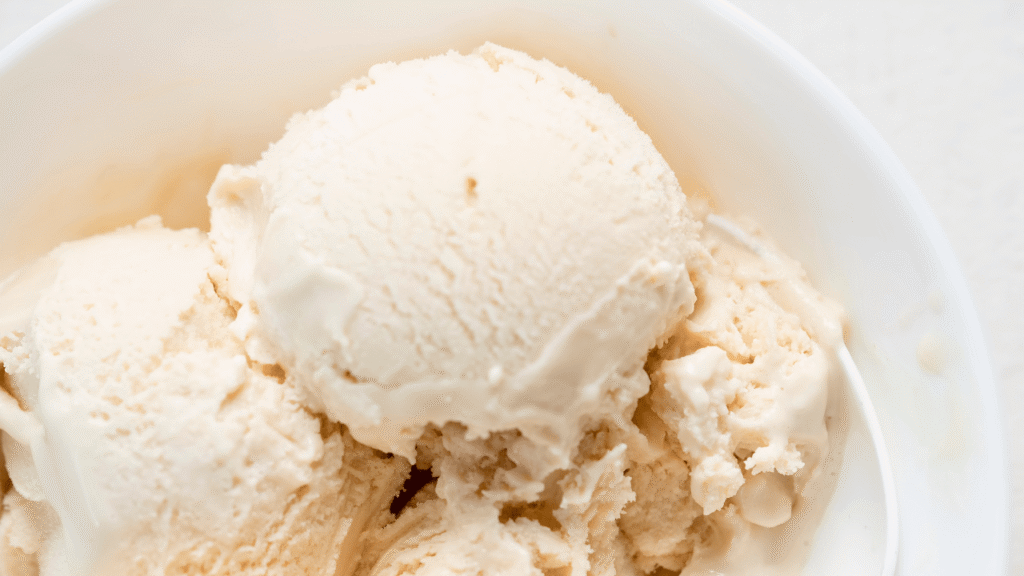
Meet a simple, silky frozen dessert Biscoff Ice Cream Recipe that layers cookie butter ribbons and crunchy cookie bits into a rich dairy base. This easy version gives you two clear paths: a churned method for the silkiest texture and a no‑churn shortcut when time is tight.
The churned path uses a Cuisinart 2‑Quart maker and takes about 25 minutes to churn after the bowl is pre‑frozen 12 hours, plus a 1–2 hour firm-up. The no‑churn approach whips together in under 15 minutes and freezes about 8 hours in a 9×5 loaf pan.
Core ingredients are heavy cream, whole milk, sugar, and vanilla, with cookie butter and crushed cookies for signature flavor and crunch. Find spreads and cookies near the peanut butter aisle or bakery section at Target, Walmart, or Trader Joe’s.
Follow simple technique tips—don’t boil dairy, temper eggs for a custard base, and chill the mix to about 40°F before churning—to get the best texture and a true cookie‑forward taste.
Key Takeaways
- Two methods: churned for silkiness, no‑churn for speed.
- Timing at a glance: 25 min churn + 1–2 hours, or ~15 min prep + 8 hours freeze.
- Core mix: heavy cream, whole milk, sugar, vanilla, cookie butter and cookies.
- Gear options: electric maker (Cuisinart 2‑Quart) or a 9×5 loaf pan and mixer.
- Flavor notes: brown sugar and warm cinnamon boost the cookie profile.
- Where to buy: major U.S. retailers stock spreads and cookies nearby pantry aisles.
- Learn more: see the full instructions and ingredient list at this detailed guide.
Biscoff Ice Cream
6
servings15
minutes4
hours300
kcalCreamy Biscoff-flavored ice cream using everyday ingredients
Keep the screen of your device on
Ingredients
1.5 cups 1.5 heavy cream
1 cup 1 milk
0.75 cup 0.75 granulated sugar
0.5 cup 0.5 Biscoff spread
1 teaspoon 1 vanilla extract
5 5 Biscoff cookies, crushed
Directions
- In a mixing bowl, combine the heavy cream, milk, and granulated sugar. Whisk until the sugar is fully dissolved and the mixture is smooth.
- Add the Biscoff spread and vanilla extract to the cream mixture, and continue whisking until all ingredients are well combined.
- Cover the mixture with plastic wrap and refrigerate for at least 2 hours or until thoroughly chilled. Chilling helps the ice cream firm up during churning.
- Pour the chilled mixture into an ice cream maker and churn according to the manufacturer’s instructions, usually for about 20-25 minutes until it reaches the desired consistency.
- During the last 5 minutes of churning, add the crushed Biscoff cookies to the ice cream and allow them to mix evenly.
- Transfer the churned ice cream to an airtight container, smoothing out the surface. Cover with a lid and freeze for at least 2 hours before serving.
- To serve, let the ice cream sit at room temperature for 5 minutes to soften slightly for easy scooping.
Recipe Video
Nutrition Facts
- Total number of serves: 6
- Calories: 300kcal
- Cholesterol: 60mg
- Sodium: 40mg
- Potassium: 150mg
- Sugar: 22g
- Protein: 3g
- Calcium: 110mg
- Iron: 0.4mg
- Thiamin: 0.01mg
- Riboflavin: 0.1mg
- Niacin: 0.1mg
- Folate: 5mg
- Biotin: 0.5mg
- Phosphorus: 90mg
- Iodine: 5mg
- Magnesium: 10mg
- Zinc: 0.5mg
- Selenium: 2mg
- Copper: 0.04mg
- Manganese: 0.1mg
- Chromium: 1mg
- Molybdenum: 2mg
- Chloride: 10mg
Did you make this recipe?
Tag @https://www.instagram.com/ice_cream_haven/ on Instagram and hashtag it with #IceCreamIceCreamHavens
Like this recipe?
Follow @https://www.pinterest.com/Ice_Cream_Haven/ on Pinterest
Join our Facebook Group!
Follow https://www.facebook.com/icecreamhavens/ on Facebook
Why You’ll Love Homemade Biscoff Ice Cream This Summer
Celebrate a summer-perfect frozen treat that marries caramelized brown sugar and warm cinnamon with crunchy cookie bits. The brown sugar‑cinnamon custard deepens the signature cookie profile while the no‑churn method gives a fast, summer‑friendly option for busy days.
Prep ahead and relax: both churned and no‑churn versions can be made days before a cookout. Store in airtight containers to keep texture for up to about two weeks.
- Texture choices: churned custard for ultra‑creamy body or no‑churn for quick, satisfying frozen dessert.
- Balanced flavor: cookie butter ribbons and crushed biscoff cookies shine without overwhelming the dairy and spice notes.
- Serve options: enjoy straight from the tub or dress a scoop with warm sauce and extra cookie crumble for summer sundaes.
Want a shortcut? Try this cookie butter ice cream guide for a no‑fuss version that still delivers big, nostalgic flavor.
Biscoff Ice Cream Recipe Ingredients & Smart Substitutions for Creamy Biscoff Flavor
Choose bold cookie butter and full‑fat dairy to lock in caramelized spice and a silky mouthfeel.
Biscoff cookie butter vs. Speculoos: grab the branded spread for the most authentic caramel‑cinnamon note. Trader Joe’s Speculoos makes a fine substitute with similar texture.
Cookies and how to handle them
Pick classic biscoff cookies in the cookie aisle or bakery section. Crush 6–8 into fine crumbs for even distribution and reserve 2–4 chunkier pieces to fold in and top for crunch.
Dairy base and sweeteners
Use heavy cream and whole milk for richness and scoopability. Sweeten with granulated sugar, or swap part for dark brown sugar plus a pinch of cinnamon to deepen flavor. Add vanilla extract to round the profile.
- Layer tips: drizzle softened cookie butter between layers for ribbons.
- Prep hack: measure ingredients into a bowl before mixing to keep the base consistent.
Biscoff Ice Cream Recipe
A cooked yolk custard gives a richer mouthfeel—heat, temper, chill, then churn for best results.
Churned custard method: ultra‑creamy texture with egg yolks
Heat 2 cups heavy cream and 2 cups whole milk with 1 cup packed dark brown sugar and a pinch of salt to a simmer. Whisk 7 egg yolks with 1 tbsp vanilla and 1 tsp cinnamon, then temper them with the warm dairy.
Return the mixture to the pot and cook until it coats a spoon. Cool slightly, pour into a bowl, press plastic wrap directly on the surface, and chill to about 40°F—preferably overnight.
Step‑by‑step: tempering, churning, and adding cookie pieces
Churn per your ice cream maker directions. In the final 1–2 minutes, add 1 cup crushed biscoff cookies so the cookie pieces stay crisp and distinct.
Transfer to an airtight container and freeze several hours to firm. Expect soft‑serve straight from the machine; freeze 1–2 hours for cleaner scoops.
No‑churn method: quick bowl‑to‑freezer in minutes
Whisk 14 oz sweetened condensed milk with 1/2 cup cookie butter. Whip 2 cups heavy cream with 1 tsp vanilla to stiff peaks and fold into the condensed milk mixture.
Fold in 1 cup chopped cookies. Pour into a 9×5 loaf pan, warm 1/2 cup cookie butter for 30 seconds to drizzle, swirl with a knife, top with 1/4 cup chopped cookies, cover, and freeze at least 8 hours.
Layering and swirling cookie butter for ribbons of flavor
For dramatic ribbons, layer half the churned mixture into a shallow dish, drizzle softened cookie butter, add remaining ice cream, drizzle again, and scatter more cookie crumbs. Swirl lightly to preserve streaks.
Freezer time and scoopability: soft‑serve vs. firm set
- Churned: about 20–25 minutes in the machine, then 1–2 hours firming.
- No‑churn: prep in minutes, then at least 8 hours in the freezer.
- Use a loaf pan for faster freeze and cover to protect texture.
Biscoff Ice Cream Recipe Equipment, Time & Prep: Ice Cream Maker or No-Machine
Choose gear and plan timing before you mix. Confirm the maker bowl is frozen and clear space in the freezer. This avoids last‑minute delays when the base is ready.
Ice maker tips
If you use an electric ice cream maker, check capacity and chill time. A 2‑quart bowl needs 12–24 hours in the freezer. Keep the bowl stored cold so the machine is ready when you are.
Essential tools
- Churned: ice cream machine with a pre‑frozen bowl and a timer for the 20–25 minute churn window.
- No‑machine: an electric mixer, a large bowl for whipping, and a 9×5 loaf pan or shallow dish for faster freezing.
- Always have plastic wrap, measuring cups heavy, and a spatula on hand to streamline assembly.
Prep timeline
Plan 10–15 minutes active time for no‑machine and 20–30 minutes active for churned batches. Add several hours in the freezer to reach scoopable firmness.
“Keep ingredients cold—chilled milk and a cold bowl speed freezing and improve texture.”
Biscoff Ice Cream Recipe Pro Tips, Storage & Serving Ideas
Small technique choices separate a grainy batch from a silky, scoopable dessert—here’s what to do.
Heat and chill the base
Keep dairy at a gentle simmer when heating. Do not boil; boiling can separate milk and harm texture.
After cooking, cool the custard fully to about 40°F before churning. This helps the mixture freeze quickly and form fine ice crystals.
When to add cookies and how to keep them crisp
Add crushed cookies in the final minutes of churning so pieces stay distinct and crunchy.
For no‑machine batches, fold cookie pieces in gently right before the pan goes into the freezer.
Storing and shelf life
Press plastic wrap directly on the custard surface while chilling to stop a skin from forming in the bowl.
Store finished tubs in an airtight container at the back of the freezer. Use within about two weeks for best flavor and texture.
Serving suggestions and pairings
Scoop into cones, build sundaes, or top servings with extra cookie crumbs and a drizzle of cookie butter for contrast.
Balance sweetness with a pinch of salt or a drop of vanilla at service. For grown‑up pairings, try barley wine, tawny port, or a chai old fashioned to echo caramel and spice notes.
“If the mixture softens while serving, return it to the freezer briefly to avoid excessive ice formation.”
- Maintain a simmer, never boil.
- Chill to ~40°F before churning.
- Add mix-ins late and store extras separately for crunch.
- Keep finished ice in airtight containers and enjoy within two weeks.
Conclusion
Biscoff Ice Cream Recipe, Strong, choose the method that fits your schedule and gear—custard churned, simple churned, or the no‑machine loaf pan—and you will get great results every time.
Keep the fundamentals in mind: do not boil dairy, chill the base well, and add mix‑ins late to protect texture when you make ice cream. Prep frozen bowls and cold ingredients to speed set‑up and make scooping easy.
Bookmark related ice cream recipes and a cream recipe index for future ideas. Enjoy your homemade biscoff ice with a single biscoff cookie garnish for an elegant finish that stores well for about two weeks.

