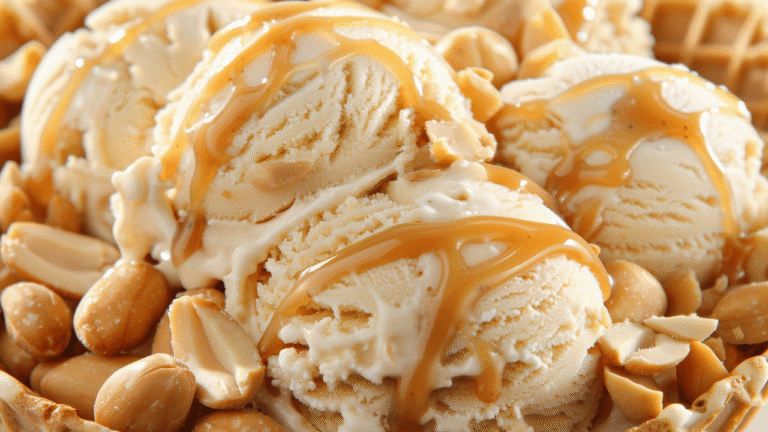
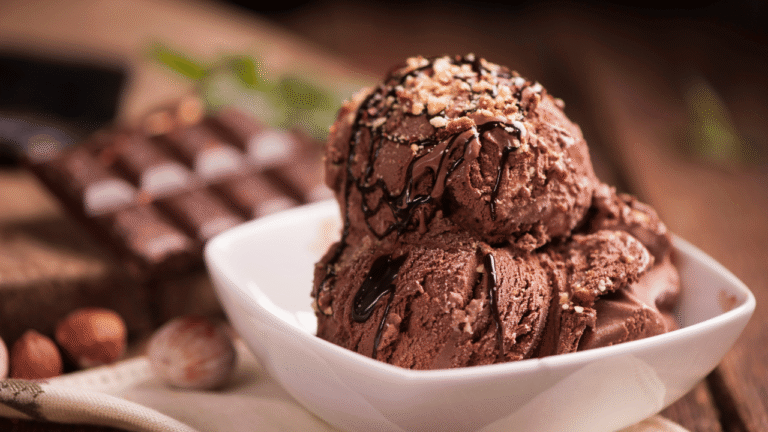
Craving a dessert Chocolate Peanut Butter Ice Cream Recipe that’s rich, creamy, and utterly indulgent? Look no further. This homemade creation combines the perfect balance of flavors and textures to deliver a treat that’s far superior to anything store-bought. With every spoonful, you’ll experience a luxurious blend of smoothness and decadence that’s hard to resist.
What makes this recipe stand out? It’s all about the quality ingredients and expert techniques. Heavy cream, whole milk, and premium cocoa come together to create a base that’s silky and rich. Generous chunks of peanut butter add a delightful contrast, making each bite a flavor explosion. Whether you’re a seasoned cook or a beginner, the step-by-step instructions ensure success every time.
For those looking for a healthier alternative, check out this dairy-free, sugar-free version. It’s perfect for anyone on a vegan, keto, or gluten-free diet, without compromising on taste or texture.
Key Takeaways
- This recipe uses high-quality ingredients for a rich and creamy texture.
- Generous peanut butter chunks enhance the flavor profile.
- Step-by-step instructions make it easy for beginners.
- Expert tips ensure a smooth and luxurious finish.
- A healthier, dairy-free option is available for dietary needs.
Chocolate Peanut Butter Ice Cream
4
servings30
minutes40
minutes300
kcal1
hour10
minutesCreamy and luscious homemade ice cream with chocolate and peanut butter flavors.
Keep the screen of your device on
Ingredients
2 cups 2 heavy cream
1 cup 1 whole milk
0.75 cup 0.75 granulated sugar
0.5 cup 0.5 unsweetened cocoa powder
0.5 cup 0.5 peanut butter
1 tablespoon 1 vanilla extract
0.25 teaspoon 0.25 salt
Directions
- In a medium saucepan, combine the heavy cream, whole milk, granulated sugar, cocoa powder, peanut butter, vanilla extract, and salt.
- Heat the mixture over medium heat, stirring constantly, until the sugar and cocoa powder are completely dissolved.
- Remove the saucepan from heat and let the mixture cool to room temperature.
- Cover the mixture and place it in the refrigerator for at least 2 hours or until thoroughly chilled.
- Pour the chilled mixture into the ice cream maker and churn according to the manufacturer's instructions, usually about 20 to 25 minutes.
- Transfer the churned ice cream into an airtight container and freeze for at least 4 hours for a firmer consistency.
- To serve, let the ice cream sit at room temperature for a few minutes to soften slightly for easier scooping.
Recipe Video
Nutrition Facts
- Total number of serves: 8
- Calories: 350kcal
- Cholesterol: 70mg
- Sodium: 95mg
- Potassium: 190mg
- Sugar: 18g
- Protein: 6g
- Calcium: 90mg
- Iron: 1mg
- Thiamin: 0mg
- Riboflavin: 0.2mg
- Niacin: 1mg
- Folate: 15mg
- Biotin: 2mg
- Phosphorus: 130mg
- Iodine: 8mg
- Magnesium: 30mg
- Zinc: 0.8mg
- Selenium: 5mg
- Copper: 0.1mg
- Manganese: 0.3mg
- Chromium: 0mg
- Molybdenum: 3mg
- Chloride: 100mg
Did you make this recipe?
Tag @https://www.instagram.com/ice_cream_haven/ on Instagram and hashtag it with #IceCreamIceCreamHavens
Like this recipe?
Follow @https://www.pinterest.com/Ice_Cream_Haven/ on Pinterest
Join our Facebook Group!
Follow https://www.facebook.com/icecreamhavens/ on Facebook
Introduction to a Decadent Ice Cream Experience
There’s something magical about a treat that combines rich flavors and velvety textures. This recipe is more than just a dessert—it’s an experience that awakens the senses and leaves a lasting impression. Every spoonful is a celebration of balance, where smoothness meets indulgence in the most delightful way.
An Inspirational Start
This creation was born from a passion for crafting exceptional desserts at home. It’s a testament to the joy of blending simple ingredients into something extraordinary. Whether you’re a seasoned cook or just starting out, this recipe invites you to explore the art of making something truly special.
Why This Recipe Stands Out
What makes this dessert unique is its meticulous balance of ingredients. Using the perfect ratios of cream, milk, and cocoa ensures a luxurious texture that’s hard to resist. The process transforms everyday items into a treat that feels both indulgent and effortless. It’s a reminder that great things often come from simple beginnings.
For those who love experimenting, this recipe also serves as a foundation for creativity. You can explore variations or stick to the classic version—either way, it’s sure to become a favorite. If you’re curious about other decadent creations, check out this homemade chocolate ice cream recipe for more inspiration.
Step-by-Step “chocolate peanut butter ice cream recipe” Guide
Unlock the secrets to crafting a luxurious frozen treat at home. This step-by-step guide ensures you achieve a creamy, indulgent dessert that’s perfect for any occasion. Follow these instructions to create a masterpiece that’s as smooth as it is flavorful.
Creating the Creamy Base
Start by combining heavy cream, whole milk, and sugar in a saucepan. Heat the mixture over medium heat, stirring constantly, until it reaches a gentle simmer. Add cocoa powder and whisk vigorously to eliminate lumps. This forms the foundation of your dessert.
Next, temper egg yolks by slowly adding the warm mixture to them. This step ensures a smooth, thick custard. Return the mixture to the saucepan and cook for a few minutes, stirring continuously. Once thickened, remove from heat and let it cool for at least an hour.
Mixing in the Peanut Butter Magic
Once the base is cool, it’s time to add the star ingredient. Fold in creamy peanut butter, ensuring it’s evenly distributed. For an extra burst of flavor, mix in chopped peanut butter cups. This creates a delightful swirl that enhances every bite.
For a twist, try adding a pinch of salt to balance the sweetness. This small addition can elevate the flavor profile significantly. If you’re looking for more inspiration, check out this rocky road ice cream recipe for creative mix-in ideas.
Churning, Freezing, and Serving
Pour the mixture into your ice cream maker and churn for about 20 minutes. This process transforms the custard into a soft, frozen yogurt-like texture. Transfer the churned mixture into a container and freeze for at least 4 hours to firm up.
When ready to serve, let the dessert sit at room temperature for a few minutes to soften slightly. Scoop into bowls or cones and enjoy the perfect blend of creamy and crunchy textures. For more tips on freezing and serving, explore this homemade ice cream guide.
Essential Ingredients & Equipment
Crafting the perfect frozen treat starts with the right ingredients and tools. Every component plays a crucial role in achieving the smooth, rich texture and balanced flavor that defines a standout dessert. Let’s dive into what you’ll need to create this indulgent masterpiece.
Ingredient Breakdown for Maximum Flavor
Quality ingredients are the backbone of any great dessert. Heavy cream and whole milk form the creamy base, while unsweetened cocoa powder adds depth and richness. Granulated sugar ensures the perfect level of sweetness, and a touch of vanilla enhances the overall flavor profile.
For a nutty twist, creamy peanut butter is folded into the mixture, creating delightful swirls. Chopped peanut butter cups add a satisfying chunk of texture. Each ingredient is carefully measured to achieve the ideal balance of sweetness and richness.
Must-Have Kitchen Tools
Having the right tools on hand makes the process seamless and enjoyable. A 3-quart saucepan is essential for heating the mixture evenly, while a whisk ensures a smooth, lump-free base. A fine mesh strainer helps achieve a silky texture by removing any impurities.
An ice cream maker is the star of the show, transforming the mixture into a soft, frozen delight. For those without one, a hand mixer and freezer-safe container can work in a pinch. Prep your tools ahead of time to streamline the process and make the most of your time in the kitchen.
For more inspiration on creating creamy desserts, check out this turtle ice cream recipe that combines caramel, chocolate, and pecans for a decadent treat.
Tips, Variations, and Troubleshooting
Want to elevate your dessert game? These tips and tricks will help you perfect your frozen creations. Whether you’re adjusting ingredients or mastering the churning process, these insights ensure a smooth and satisfying result every time.
Ingredient Substitutions and Adjustments
Switching up ingredients can add a personal touch to your dessert. For a healthier twist, try natural peanut butter or reduce the sugar content. If you prefer a richer flavor, opt for dark cocoa powder. These small changes can make a big difference.
- Use almond or oat milk as a dairy-free alternative.
- Adjust the sweetness by experimenting with different types of sugar.
- Add mix-ins like crushed cookies or caramel swirls for extra texture.
Mastering the Churning Process
Churning is key to achieving the perfect texture. If you don’t have an ice cream maker, a hand mixer can work wonders. Just ensure the mixture is chilled thoroughly before freezing. Stirring every 30 minutes prevents large ice crystals from forming.
- Keep the mixture at a medium temperature during churning.
- Use a freezer-safe bowl to maintain consistency.
- For a softer texture, reduce the freezing time slightly.
For more inspiration on creating a simple homemade dessert, check out this guide. It’s packed with tips for making a creamy treat with minimal effort.
Remember, experimentation is encouraged, but stick to the basics for the best results. With these tips, you’ll master the art of making a delightful dessert that’s uniquely yours.
Conclusion
Indulge in a dessert that’s as smooth as it is satisfying. This homemade ice creation combines high-quality ingredients like unsweetened cocoa and creamy peanut butter for a rich, balanced flavor. Every step, from churning to freezing, ensures a luxurious texture that’s hard to resist.
Follow the detailed method to achieve the perfect consistency. Store your treat in the freezer to maintain its splendor for several days. Whether served in a bowl or on a cone, this dessert promises long-lasting satisfaction.
Many home cooks and professionals have praised this recipe for its authenticity. Share your experience on social media and inspire others to make ice cream at home. For more tips, explore this easy no-churn guide.
Perfect for any occasion, this dessert is a testament to the joy of creating something truly special. Enjoy every bite and savor the memories it brings.


