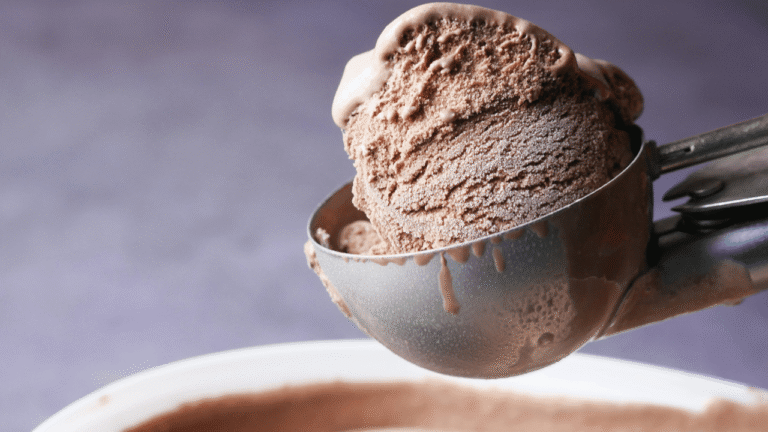
Make creamy, higher-protein frozen treats Ninja Creami Protein Ice Cream Recipes at home with simple bases and a few kitchen tricks. Since 2021, home cooks have turned to this countertop machine to enjoy scoopable dessert with better macros.
The method is straightforward. Start with one of four bases: a ready-to-drink shake plus Greek yogurt, a pure Greek yogurt base, milk with protein powder, or a cottage cheese blend. Freeze the pint on a level surface for 24 hours and never pass the max fill line.
Use the Lite Ice Cream program for the first spin. If the texture is crumbly, add 1–2 ounces of milk and respin. For richer mouthfeel, try instant pudding mix, unflavored collagen, or a pinch of guar or xanthan gum.
Mix-ins go in with the Mix-In setting so nuts, fruit, or chips stay chunky and do not get pulverized. A tested Fairlife vanilla approach pairs 1.5 cups 2% milk, one scoop vanilla powder, 2–3 tbsp agave, and 1 tsp vanilla extract for a reliable flavor and nutrition snapshot.
Key Takeaways
- Pick a base you like: RTD + yogurt, Greek only, milk + powder, or cottage cheese.
- Freeze 24 hours; follow max fill guidelines to protect the blade.
- Use Lite Ice Cream then add 1–2 oz milk and respin if crumbly.
- Add small amounts of pudding mix, collagen, or gums for creaminess.
- Use the Mix-In program for chunky add-ins like nuts or chips.
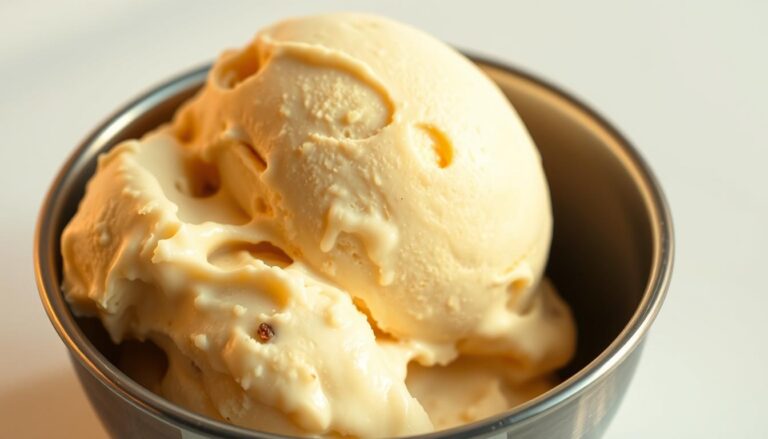
Easy Vanilla Ice Cream
4
servings30
minutes40
minutes300
kcal1
hour10
minutesA simple, creamy vanilla ice cream for beginners.
Keep the screen of your device on
Ingredients
1 cup 1 whole milk
2 cups 2 heavy cream
0.75 cup 0.75 granulated sugar
2 teaspoons 2 vanilla extract
1 pinch 1 salt
Directions
- In a mixing bowl, whisk together the whole milk and granulated sugar until the sugar is completely dissolved.
- Add the heavy cream, vanilla extract, and a pinch of salt, whisking until all ingredients are well combined.
- Cover the mixture and refrigerate for at least 2 hours or until well chilled.
- Pour the chilled mixture into your ice cream maker and churn according to the manufacturer’s instructions, typically 15-20 minutes.
- Once the ice cream has reached a soft-serve consistency, transfer it to an airtight container.
- Freeze for at least 2 hours before serving to achieve a firmer consistency.
Nutrition Facts
- Total number of serves: 4
- Calories: 200kcal
- Cholesterol: 50mg
- Sodium: 50mg
- Potassium: 90mg
- Sugar: 17g
- Protein: 2g
- Calcium: 90mg
- Iron: 0mg
- Thiamin: 0mg
- Riboflavin: 0mg
- Niacin: 0mg
- Folate: 0mg
- Biotin: 0mg
- Phosphorus: 0mg
- Iodine: 0mg
- Magnesium: 0mg
- Zinc: 0mg
- Selenium: 0mg
- Copper: 0mg
- Manganese: 0mg
- Chromium: 0mg
- Molybdenum: 0mg
- Chloride: 0mg
Did you make this recipe?
Tag @https://www.instagram.com/ice_cream_haven/ on Instagram and hashtag it with #IceCreamIceCreamHavens
Like this recipe?
Follow @https://www.pinterest.com/Ice_Cream_Haven/ on Pinterest
Join our Facebook Group!
Follow https://www.facebook.com/icecreamhavens/ on Facebook
Why Ninja Creami Protein Ice Cream Is a Game Changer
This countertop spinner turns frozen pints into scoopable, cafe-style treats in minutes. The device mechanically shaves and aerates a solid block so you get a pleasant texture that rivals store pints.
Build bases around high-protein dairy like Fairlife milk, Greek yogurt, or cottage cheese to boost daily protein without excess fat. Use the Lite Ice Cream setting, then add 1–2 ounces of liquid and re-spin when the mix looks crumbly.
- Custom texture:mechanical aeration creates a smooth microstructure.
- Macro control:choose ingredients to hit protein targets and manage sugar.
- Mix-in timing:process chunks after the base is aerated so pieces suspend evenly.
For athletes or anyone tracking macros, ninja creami protein desserts make nightly treats more sustainable. The flavor and portion control beat many store options, so you can enjoy ice cream while keeping goals on track.
Essential Gear and Ingredients for the Ninja Creami Pint
Start by gathering a few reliable tools and pantry staples to set up a smooth pint-making workflow.
Tools matter. You’ll need the unit itself and the official creami pint container to keep the blade safe and the texture right. A handheld milk frother or immersion blender prevents clumps when you mix powders and thickeners.
- Scale: a cheap digital kitchen scale helps you hit macros every time.
- Frother: quickly disperse protein powder, cocoa, or collagens to avoid grit.
- Container rules: never exceed the MAX FILL line and leave headspace for aeration.
Core ingredients to keep on hand include Fairlife or other RTD milk, Greek yogurt, cottage cheese, and a quality protein powder. Add instant pudding mix, unflavored collagen, or a pinch of guar/gum for creaminess in low-fat blends.
For flavor, stock cocoa powder, vanilla extract, and a few sweeteners. When you’re ready, mix the base in the pint, rest 5–10 minutes to release bubbles, freeze level for 24 hours, then process in your ninja creami pint. For a tested starting point, try this full recipe.
Ninja Creami Protein Ice Cream Recipes
Try four tested pint bases that turn simple pantry items into scoopable, higher-protein frozen treats.
RTD shake + Greek yogurt + powdered peanut butter base: combine a 12-ounce ready-to-drink shake (Fairlife works well) with 3 ounces Greek yogurt and 2 tablespoons powdered peanut butter. For extra body, whisk in 2 tablespoons instant pudding mix, 10 g collagen, or 1/4–1/2 teaspoon guar or xanthan. Rest 5–10 minutes, then freeze level for 24 hours.
Greek yogurt base
Use 1 1/4 cups Greek yogurt, 1/4 cup milk, 1 teaspoon vanilla, and 1.5 scoops protein powder if you want a boost. Sweeten to taste and add a pinch of pudding mix or collagen for silkier texture. Freeze 24 hours.
Milk + powder classic base
Stir 12 ounces milk with 1.5 scoops powder and 2 tablespoons instant pudding mix. Add 10 g cocoa for a chocolate option. This recipe cuts iciness and spins into a custard-like result.
Cottage cheese base
Blend 1.5 cups cottage cheese with 1/2 cup milk, 2 tablespoons instant pudding mix, and 1 tablespoon honey. Blend until smooth if you prefer a silky pint, then freeze 24 hours.
- Flavor tips: match chocolate-leaning powders with cocoa or peanut butter for depth.
- Process note: keep mixture under the MAX FILL line, use Lite Ice Cream first, then add 1–2 ounces milk and re-spin if crumbly.
- Learn more: follow a full step-by-step guide for troubleshooting and mix-in timing.
How to Prep Your Creami Pint for the Best Texture
How you mix and freeze determines whether a pint becomes silky or grainy. Follow a short pre-freeze routine to improve final texture and avoid extra re-spins.
Start by mixing the base in the official creami container. Whisk or froth thoroughly until no dry pockets remain so powders fully hydrate and you don’t get chalky spots after spinning into ice cream.
- Rest 5–10 minutes: let foam dissipate and micro-bubbles rise before freezing.
- Level freeze: make sure the pint sits flat in the freezer for 24 hours so the top freezes even and the blade cuts uniformly.
- Lid and MAX FILL: many users freeze without the lid to avoid a hump; either way, stay below the MAX FILL line in the container.
- Release and label: run warm water briefly to loosen a stuck pint, and label flavors and freeze dates when batching multiple pints.
Pro tip: keep ingredient temps similar and save large add-ins for the Mix-In stage. This small attention to detail helps the machine turn a frozen block into a smooth, scoopable cream and improves every subsequent recipe.
Spin, Re-Spin, and Mix-In: Mastering the Lite Ice Cream Setting
Begin with the Lite Ice Cream program to shave and aerate a frozen pint into a crumbly, semi-smooth base. Run the cycle for about 2–3 minutes and expect a sandy texture after the first pass.
Create a small well in the center, add 1–2 ounces of milk, and select Re-Spin. That tiny amount closes gaps in the microstructure and gives a creamier finish without thinning the whole pint.
If the texture still feels sandy, run another Re-Spin without extra liquid. Too much milk can over-loosen the block, so save further additions only if necessary.
- Add chunky mix-ins after the base is creamy. Use the Mix-In button for chocolate chips, cookies, nuts, or fruit so pieces suspend evenly.
- Break larger cookies or bars into pea-sized bits to avoid overloading the blade path during the short mix cycle.
- Keep the pint seated correctly in its outer container and never overfill, so the blade can travel the full height of the frozen block.
This workflow preserves texture and crunch while letting you control sweetness and mouthfeel. For higher-protein pints, the same steps apply—spin, re-spin, then mix.
Ninja Creami Protein Ice Cream Recipes Creaminess Boosters You Can Also Use
A few smart add-ins will turn a stiff, icy pint into a silky scoopable treat. Use one or two boosters per batch so flavor stays clean and texture stays balanced.
- Instant pudding mix: 2 tablespoons add body, shrink ice crystals, and improve scoopability without extra churn time.
- Unflavored collagen: About 10 grams increases viscosity and gives a smoother mouthfeel, especially in milk + powder bases.
- Guar or xanthan gum: Start with 1/4 teaspoon and scale to 1/2 teaspoon if needed. Small amounts thicken; too much makes a gummy texture.
- Higher-fat swaps: Use whole milk, full-fat Greek yogurt, or blended cottage cheese to add dairy solids and richness for a more custard-like cream.
Practical tips: If your powder already thickens the base, cut back on gums. Blend cottage cheese smooth before freezing to mimic traditional cream. Track each change so you can repeat the exact results in later creami protein pints.
Keep it simple: pick one stabilizer and one fat swap per pint. That small test-and-note approach helps you tune sweetness, mouthfeel, and overall texture for better homemade ice cream.
Sweeteners and Flavor Enhancers That Improve Texture
A few targeted additions help reduce large crystals and deepen taste in every batch. Use them sparingly to keep balance between mouthfeel and sweetness.
Agave nectar doubles as a sweetener and a texture aid. It helps minimize large ice crystals so your ice cream feels smoother after a single respin.
- Agave amounts: start with 2 tablespoons when your protein powder is already sweetened; use 3 tablespoons for unsweetened powders to reach a balanced sweetness.
- Vanilla extract: add 1 teaspoon to amplify classic notes and round out whey or casein edges after freezing.
- Cocoa powder: builds deep chocolate flavor with minimal fat, ideal for milk + powder and Greek yogurt bases.
- Taste first: sample the mix before freezing and adjust agave modestly so you don’t overdo sugar and thin the base.
These small tweaks boost both flavor and texture. When paired with the right base, they create a more consistent, scoopable result across different protein products.
Flavor Combos to Try Right Now
These tested pairings make it easy to pick a bold flavor direction for your next pint. Each combo was validated in trials and yields a scoopable, balanced result when you follow the prep steps.
Banana + chocolate + banana pudding
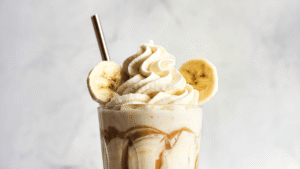
Banana Greek yogurt with chocolate protein and banana instant pudding spins into a creamy treat that evokes a chocolate-dipped frozen banana.
Red velvet + chocolate + chocolate pudding
Red velvet yogurt, chocolate protein, and chocolate pudding concentrate cocoa notes while the yogurt adds tang.
Salted caramel + vanilla + cheesecake pudding
Salted caramel yogurt, vanilla protein, and cheesecake pudding mix yield a sweet-salty base that takes pretzel bits well on the Mix-In cycle.
Pistachio + vanilla + pistachio pudding
Pistachio yogurt paired with vanilla protein and pistachio pudding delivers a nutty, aromatic profile. Add chopped pistachios after the first spin.
Strawberry + banana + white chocolate pudding
Strawberry yogurt with banana protein and white chocolate pudding mix gives a bright, fruity-and-cream result; fold in fresh strawberries post-spin.
- Taste before freezing: adjust sweetness with a touch of agave if your powder is lightly sweetened.
- Match mix-ins: pick add-ins that reinforce the theme for a cohesive bite.
- Mind the fill line: puddings and powders add density that can raise volume during aeration.
Nutrition Snapshot: Calories, Protein, Sugar, and Saturated Fat
Compare typical calorie and macro ranges to choose a base that fits your diet. Below are tested totals per pint and practical notes to help you plan portions and flavors.
Macronutrient ranges by base
Fairlife-based pints usually land around 281–317 calories with roughly 43 g protein before mix-ins.
Greek yogurt bases span about 297–445 calories and can reach 39–76 g protein when powder or extra yogurt is added.
Milk + powder with fat-free milk averages ~323 calories and ~62 g protein; almond milk drops to ~235 calories and ~41 g protein.
Cottage cheese versions vary widely: ~181–449 calories and 14–86 g protein depending on fat level and added powder.
How add-ins affect fiber, sugar, and total calories
Mix-ins change the macro picture quickly. Nuts and chocolate chips add fats and sugars, raising calories and saturated fat.
Cookies boost sugar and calories without fiber. Fresh fruit adds natural sugar and a small fiber bump, which can improve satiety.
Tracking tips for repeatable results
Log each ingredient separately and standardize your powder scoop and sweetener amounts. That makes it easy to hit a target protein goal and manage sugar and saturated fat.
- Tip: weigh add-ins and adjust serving size if you want lower calories.
- Tip: for lower saturated fat, choose low‑fat milk or nonfat yogurt and add a creaminess booster if needed.
- Tip: small changes to mix‑ins can shift total calories more than base swaps.
Vanilla Protein Ice Cream with Fairlife Milk
Start with a clean vanilla foundation to learn how different powders affect mouthfeel. This pint is simple, reliable, and easy to batch for weekly meal prep.
Base recipe: combine 1.5 cups Fairlife 2% milk with 1 scoop vanilla protein powder, 2–3 tablespoons agave, and 1 teaspoon vanilla extract. Whisk directly in the pint until smooth and freeze level for 24 hours.
Process on the Lite Ice Cream setting. Expect a crumbly first pass. Add 1 tablespoon Fairlife milk and select Re-Spin to reach a scoopable texture.
Whey, casein, or plant-based powders — what changes
Whey often yields a lighter, airier body and aerates well. Casein gives a thicker, creamier mouthfeel that can reduce the number of respins. Plant-based blends may spin denser and sometimes need a touch more liquid during the Re-Spin.
Dialing sweetness with agave based on powder
Start with 2 tablespoons agave if your powder is already sweet. Use 3 tablespoons for unsweetened powders to reach balanced vanilla notes without being cloying.
- Taste before freezing: a tiny extra splash of vanilla extract lifts aroma without adding calories.
- Storage: store sealed in the pint up to two weeks; soften a minute and re-process for best texture.
- Mix-ins: fold in chunky add-ins using the Mix-In setting so pieces stay distinct.
- Keep the MAX FILL line: powders and agave can expand volume; overfilling limits blade travel and hurts results.
Chocolate Protein Ice Cream and Peanut Butter Variations
Building a rich chocolate pint starts with properly balancing cocoa, your powder, and a small stabilizer. This approach keeps the frozen block from turning grainy and makes the first spin much smoother.
Using cocoa powder and powdered peanut butter for rich flavor
For a robust chocolate base, whisk 12 ounces of milk with about 1.5 scoops of your powder, 10 g cocoa powder, and 2 tablespoons instant pudding mix. Sweeten lightly if your powder is unsweetened.
If you want a peanut butter swirl vibe, combine a 12-ounce RTD shake with 3 ounces Greek yogurt and 2 tablespoons powdered peanut butter. Freeze level for 24 hours.
- Texture tip: run the Lite program, then add 1–2 ounces milk and re-spin if crumbly.
- Add a pinch of salt to deepen cocoa notes in milk-forward bases.
- Use mini chips or crushed peanut butter cups as mix-ins; keep pieces small for even suspension.
- Casein-forward powders give a thicker spoonfeel; reduce pudding mix slightly if too dense.
Troubleshooting Texture: Icy, Crumbly, or Too Soft
Texture problems are usually fixable with simple adjustments and a quick re-spin. Start by assessing the first spin: a crumbly result is normal. Add 1–2 ounces of milk, then use Re-Spin. If the mix remains sandy, run one more Re-Spin without extra liquid to protect structure.
When to re-spin, how much milk to add, and fixing overfilled pints
If the first pass is crumbly, add 1–2 ounces of milk and hit Re-Spin; repeat a second respin without more liquid if needed. When pints taste icy, try a creaminess booster next batch—instant pudding, unflavored collagen, or a small pinch of guar or xanthan.
Too-soft results often mean too much liquid was added during respin or the container was overfilled. For future batches, make sure you stay below the MAX FILL line. That prevents thinning and keeps the blade path clear.
Level freezing, lid considerations, and avoiding blade issues
Always freeze pints on a level surface so tops set flat. A dome or tilt creates hard pockets where the blade can miss, leaving icy sections. Some creators freeze without the lid to avoid a hump that blocks the blade; you can cover the pint after freezing for storage.
For pints that stick in the outer container, pour warm water briefly around the sides to release the block. Avoid prying or twisting the container; this protects the plastic and the blade housing. If dry pockets appear after spinning, the mix likely needed better whisking—use a frother and rest 5–10 minutes before freezing next time.
- Quick checklist: If crumbly, add 1–2 oz milk and Re-Spin.
- Add boosters for icy pints; track changes so you repeat success.
- Label your notes on liquid used during each respin for consistent results.
These steps help you rescue a disappointing pint and steady your process for the next ice cream batch. Follow the tips and this simple troubleshooting routine to make your next recipe more reliable with the creami and ninja creami workflow.
Storage, Meal Prep, and Ready-to-Eat Tips
A few simple storage rules make batch-prepped pints convenient and ready to enjoy. Follow these steps to protect flavor and texture so a frozen treat performs like it was just made.
Freezer guidance and quick refresh
Store finished pints directly in the official pint container with a tight lid to reduce odors and moisture loss. Label each lid with flavor and freeze date so you can rotate stock.
For best scoopability, let a pint sit at room temp 1–2 minutes, then run the Lite Ice Cream program to refresh texture before serving. This short respin revives soft mouthfeel and reduces large ice crystals.
Batch prep, recipe card notes, and serving tricks
Batch-prepping saves time: freeze multiple pints level on one shelf and keep them below the MAX FILL line. Add chunky mix-ins only at serving time using the Mix-In cycle to preserve crunch and separation.
- Keep a small “top-off” bottle of milk for quick respins.
- Use a recipe card to record powder brand, sweetener, and boosters for repeatable results.
- Rotate pints within two weeks to maintain fresh aroma and flavor.
Conclusion
Ninja Creami Protein Ice Cream Recipes, End with a quick recap of actions that guarantee a scoopable, flavorful pint from any of the four core bases. Choose a base—Fairlife, Greek yogurt, milk + powder, or cottage cheese—and whisk until smooth before freezing level for 24 hours.
Process on the Lite Ice Cream setting, then add 1–2 ounces of milk and respin if needed. Use the Mix-In cycle for nuts, fruit, or chips so chunks stay distinct. Boosters like instant pudding, unflavored collagen, or a light gum improve body.
Flavor tips: a touch of agave and a splash of vanilla extract smooth texture and lift taste. Finally, make sure to respect the MAX FILL line, note your respin liquid, and log adjustments.
With consistent prep and this workflow, you can craft repeatable ice cream recipes and cream recipes that fit both taste and goals.

